Have you ever found yourself in the unenviable position of needing to bulk add attachments to over 200 features in ArcGIS Pro? The options are either tediously attaching each file manually or devising a more efficient method. Fortunately for you, I’ve navigated this so you don’t have to, and have emerged victorious.
Picture this: I needed to attach a ‘Stadium Card’ to each player involved in transfers for a top English football team. My dataset contained 276 transfer points, each representing a player moving in or out of the team. With twenty possible attachments per player, I was staring down the barrel of a monumental task. This was all to enable filtering on the Details component of my ArcGIS Dashboard—but that’s a tale for another time.
Enabling Attachments in ArcGIS Pro
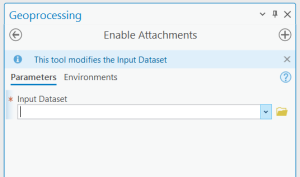
The first step in this grand adventure is enabling attachments for your layer. This can be done in one of two ways: ArcGIS Pro or ArcGIS Online, depending on your layer type. If you’re working with a geodatabase feature class or table, ArcGIS Pro is your go-to. Simply locate the Enable Attachments tool, add your dataset, and hit Run. No need to tinker with settings—it’s as straightforward as it gets.
Enabling Attachments in ArcGIS Online
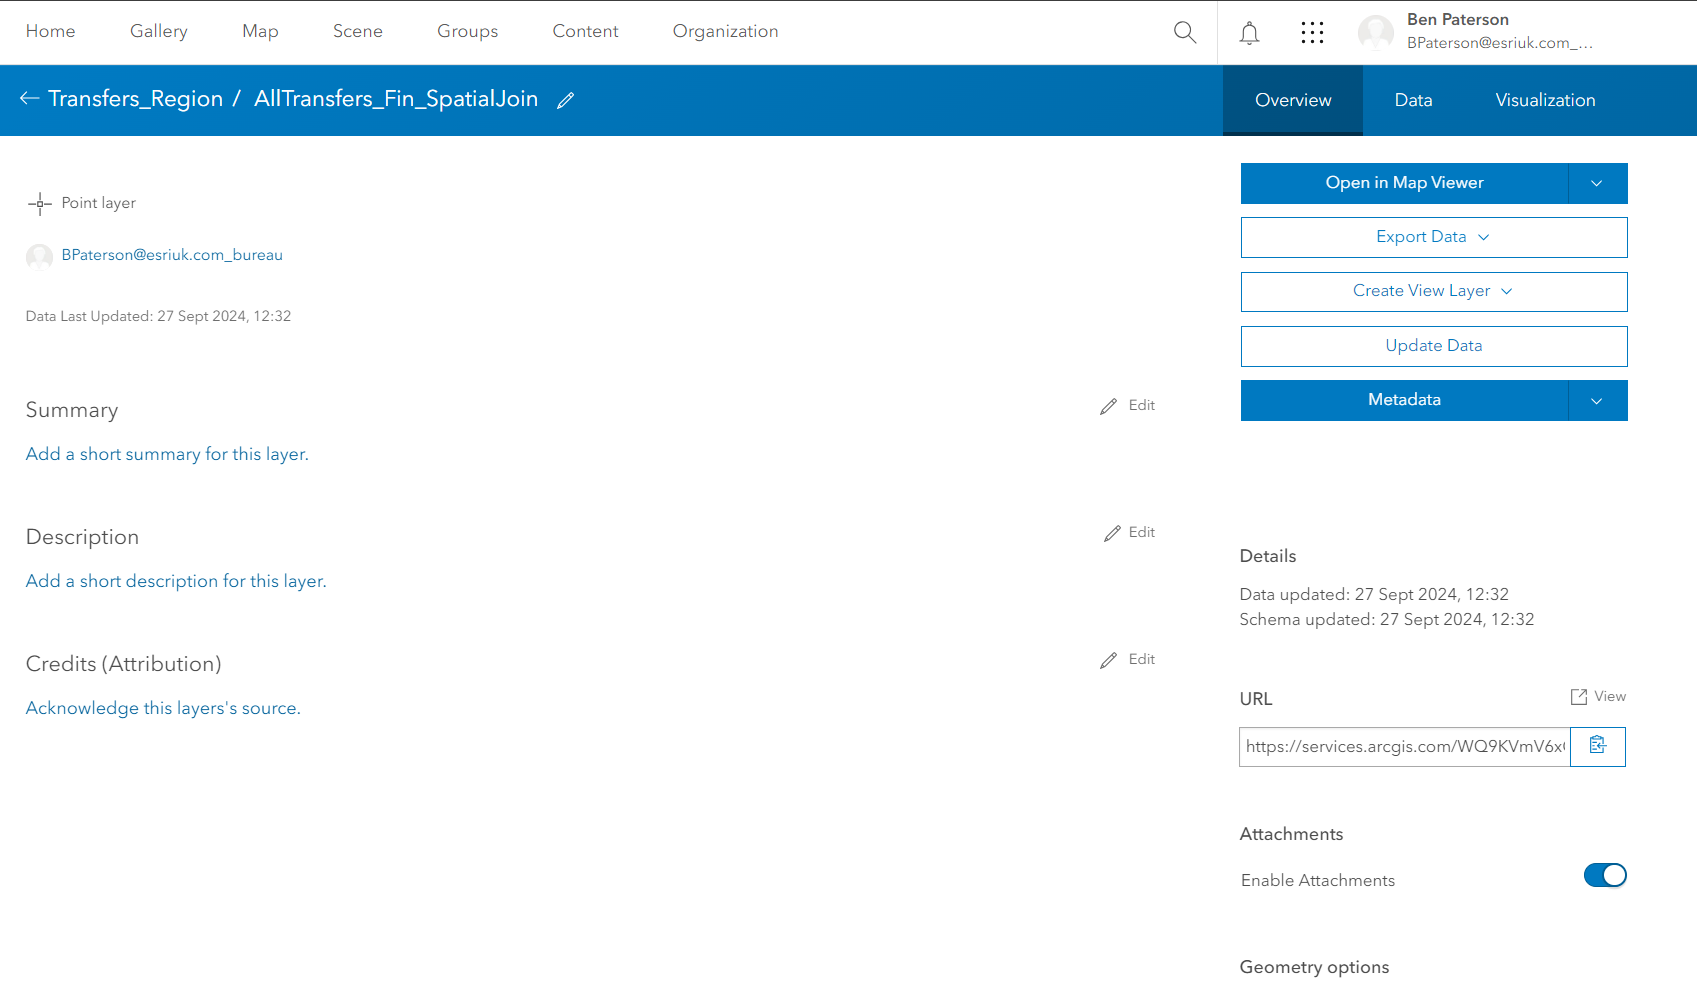
However, if your feature is already shared on ArcGIS Online, re-importing it into ArcGIS Pro to use the Enable Attachments tool won’t work. Instead, navigate to the View Details section of your Hosted Feature Layer in ArcGIS Online. Here, under the Layers subheading, you can enable attachments without lifting a finger to run a tool!
With your layer now primed for attachments, you can manually add them in ArcGIS Online or ArcGIS Pro. But if you’re like me, with more features needing attachments than you can count, read on. This method not only spares your fingers from excessive clicking but also introduces you to two new tools in your ArcGIS Pro arsenal…
Generate Attachment Match Table and Add Attachment
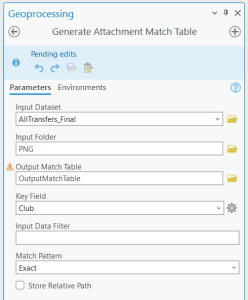
To begin, we’ll use the Generate Attachment Match Table tool, which creates a match table for our next tool, Add Attachments. This might sound a bit complex, but it’s quite manageable. Start by setting your Input Dataset to the layer where you want to add attachments. Then, choose your Input Folder, which is the local folder containing your attachments. For me, this was a folder of 20 PNGs featuring some of England’s finest football stadiums. The Key Field is the common attribute between your layer and the attachment names; in my case, it was the club’s name. A match happens when the Key Field matches an attachment’s file name. Finally, we have the Match Pattern, which determines how your file names align with your Key Field. My advice? Go for Exact and make sure your files are named identically to your Key Fields.
Once the match table is generated, it will appear under your Standalone Tables in the Contents Pane, with a RowID, MatchID, and FileName, and a row for each entry in your initial Input Dataset. For me, this amounted to 276 rows.
In Add Attachments, by matching the Input Join Field to the Match Join Field of the Match Table we can point our attachments in the right direction. The Match Path Field is the column where each of our attachments resides.
And there you have it! By using the Select tool in conjunction with the Attributes Pane, you can verify that all attachments have successfully made their way through.
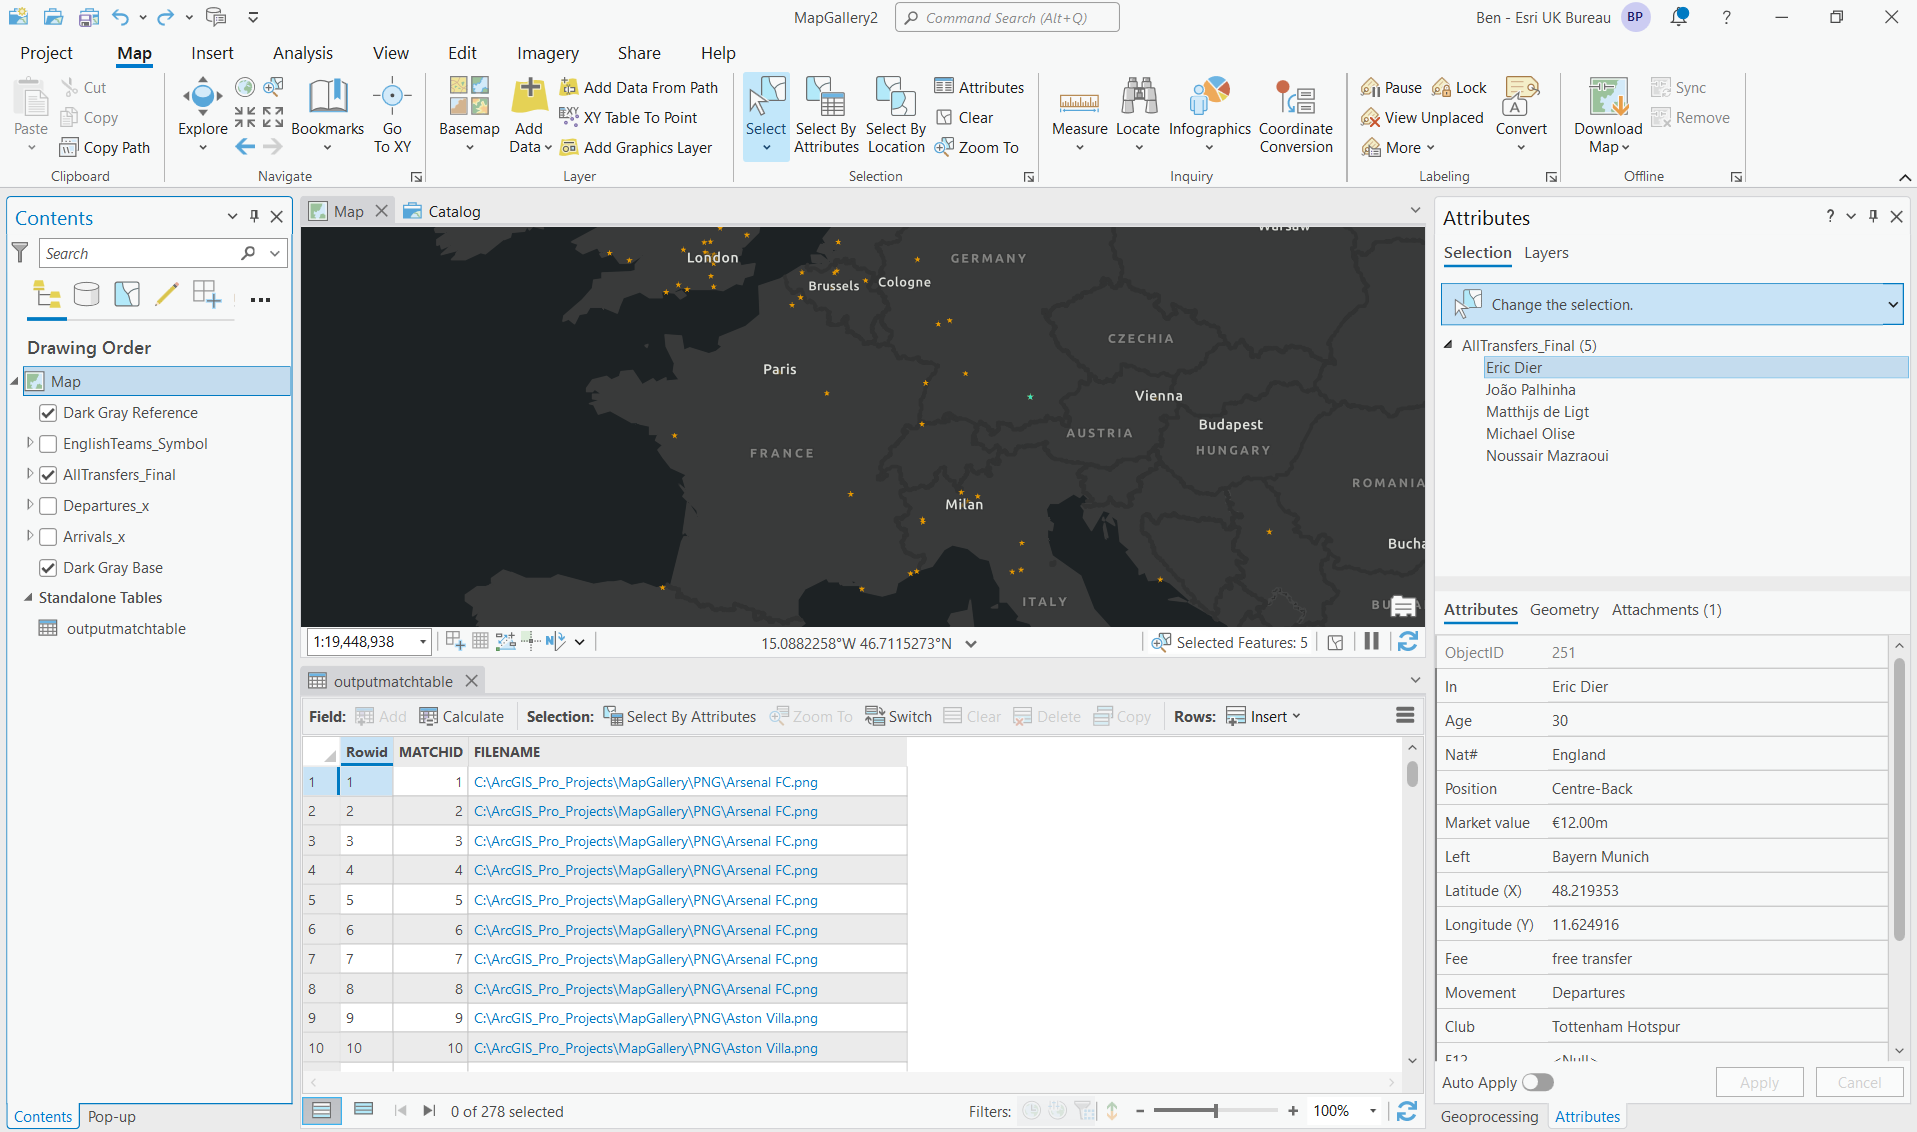
This incredibly useful workflow is just a small part of the process I went through to create my ArcGIS Dashboard. If you want to carry on reading, you can discover how I created my ‘Stadium Cards’ that I worked so hard to attach to each of my features.
Want to know how I made my Stadium Cards?
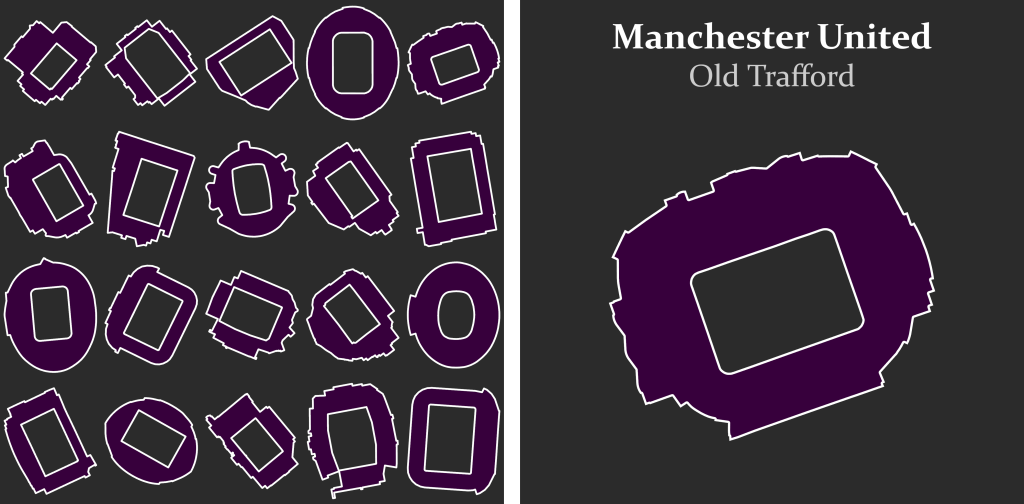
I couldn’t possibly write this blog without sharing the process of creating these stadium cards, which I meticulously attached to each of my features. Fortunately, the process was straightforward, so you can easily replicate it yourself.
It all begins with a suitable Buildings Layer. I used the OSMM Buildings Layer from Maps +, focusing on football stadiums around England. However, you can apply this method to anything you fancy—just steer clear of garden sheds unless you enjoy the thrill of the mundane.
First, we need to locate these stadiums. Luckily, I have a layer with the coordinates of the top 20 English football teams’ stadiums. A simple right-click on the feature in the attribute table and selecting Zoom-to does the trick.
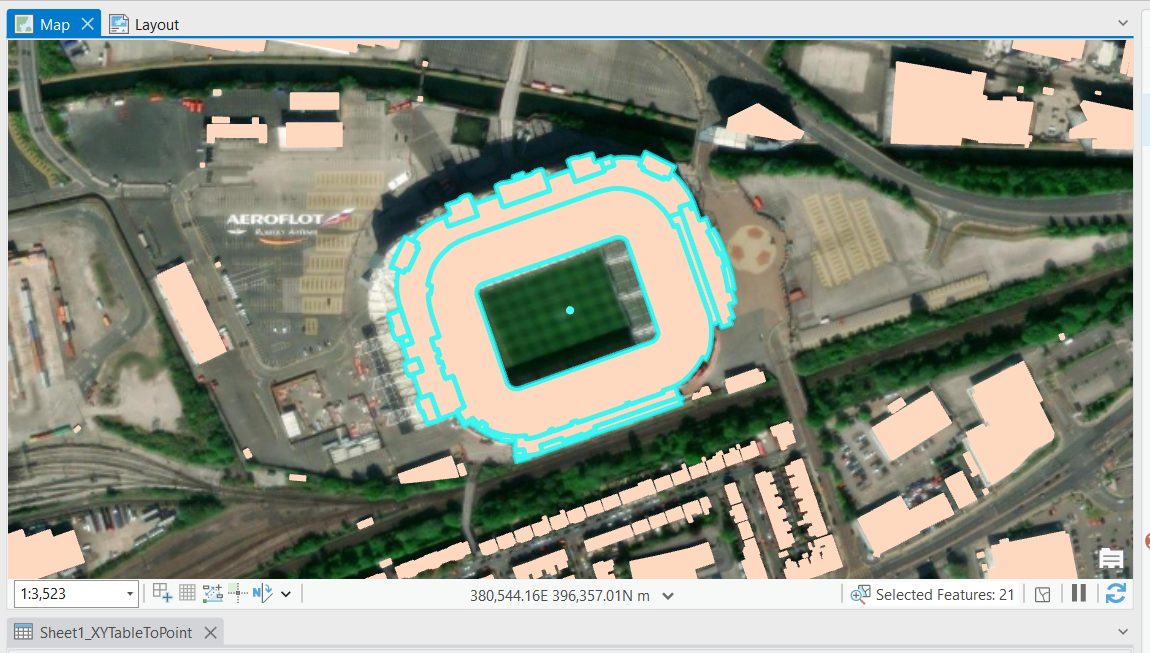
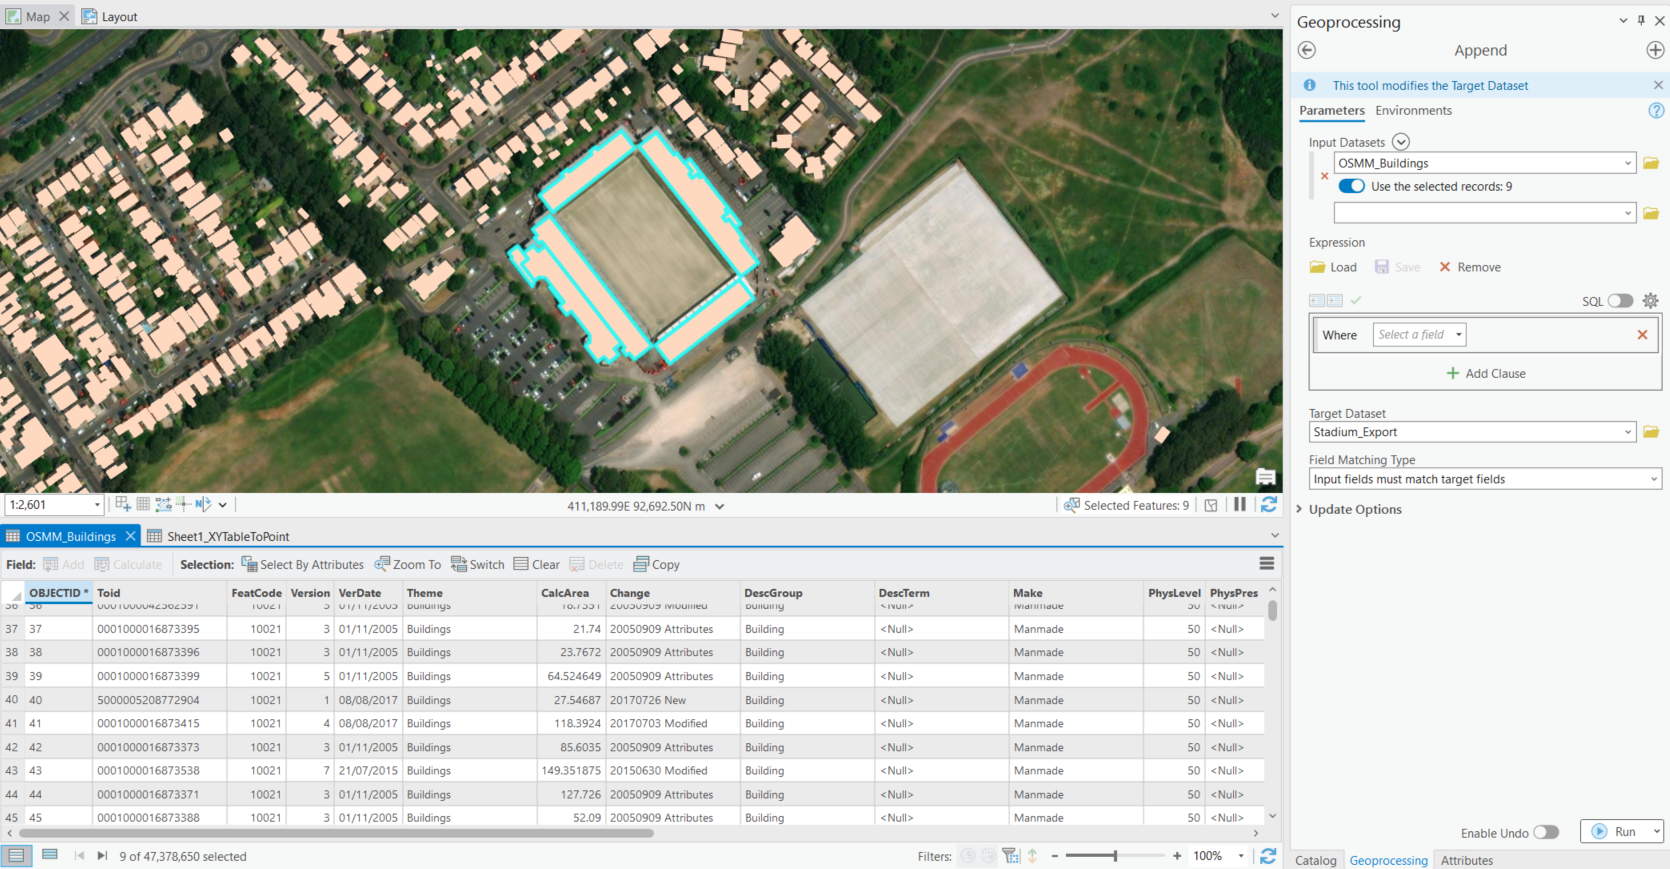
Under the Edit tab at the top of the page, you’ll find a Select button. Expanding this reveals the Lasso tool, perfect for rounding up any features you want to select. This is particularly handy because many OSMM Building outlines consist of multiple features, as shown below:
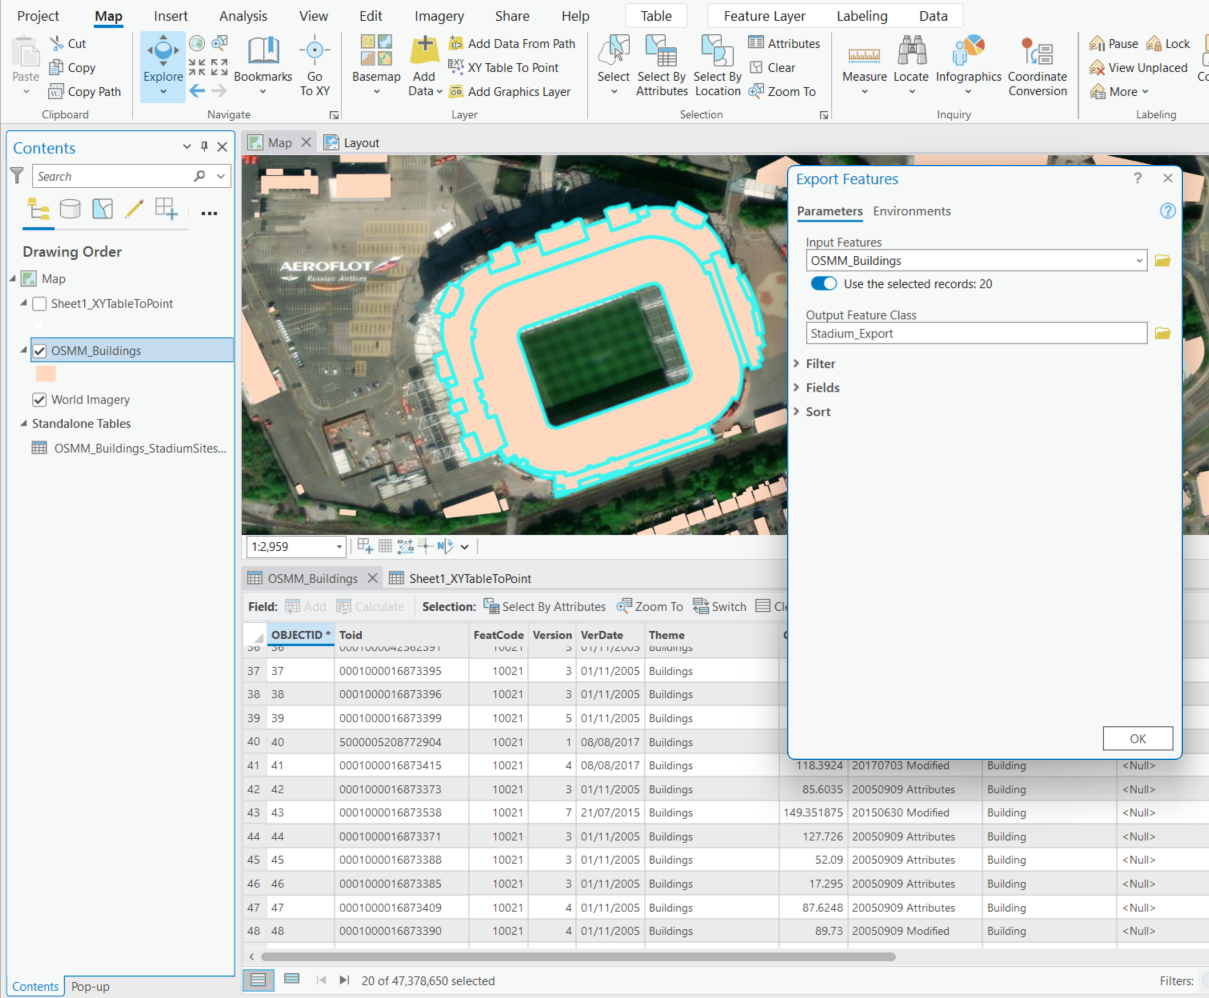
To keep our Append tool content, we need to create a new layer with the same schema as our Buildings Layer. Right-click on our buildings layer, find Data, and click Export Features. This uses only the layers we selected and creates an export with the same schema! I aptly named this layer Stadium_Export, ready to welcome more stadiums.
Append Tool
To move selected polygons into the ‘Stadium_Export’ feature, just use the Append tool. Set your Input Datasets to the building layer and make sure the selected polygons are used. The Target Dataset is ‘Stadium_Export’. Once you run the tool, the polygons will change colour to match the target layer, so you can see the magic happen.
Aggregate polygons
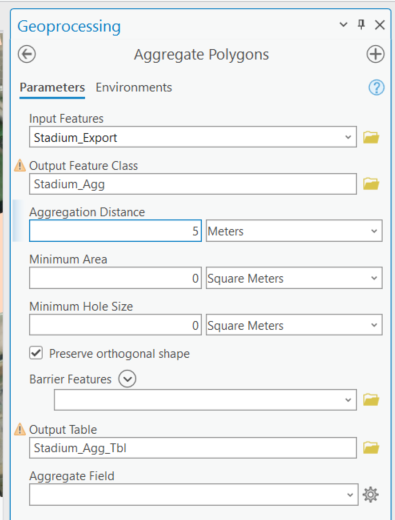
After you’ve added all your polygons, it’s time to use the Aggregate Polygons tool to piece together your Football Stadium Puzzle. Set the Input Features to ‘Stadium_Export’ and give your Output Feature Class a meaningful name. Choose an Aggregation Distance that fits your polygon size—20 meters for larger polygons, less for smaller ones. Don’t forget to tick Preserve orthogonal shape to keep the natural shape of the buildings. Finally, name your Output Table and you’re all set to generate your output.
Getting your feature layer into a new layout
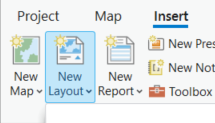
To get this into a new view you can go to the Insert tab and select New Layout.
Still within the Insert Tab, you will find Map Frame. This is where you can add one or multiple map frames. I created two versions: one with each individual stadium on the card, which had one map frame, and one with all 20 stadiums, which had – surprise, surprise – 20 map frames.
You can use Dynamic Text to replicate the information I added to my cards. However, feel free to play around with all the Graphics and Text to truly make your new cards your own.
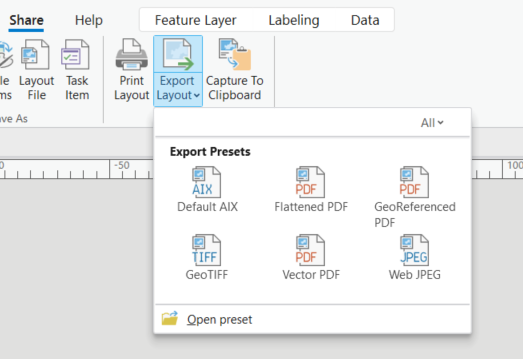
You’ve now created some beautifully put together cards that you can use to your hearts content. To get them out of ArcGIS Pro, you can select the Share tab at the top of the page and Export Layout. I used the flattened PDG version and saved it to somewhere I could easily access.
If you’re still with me, kudos to you for sticking through this whirlwind tour of attachments in ArcGIS Pro and how to create them. I embarked on this journey while crafting my Map Gallery, which delves into the Transfers In and Out of Top English Football Teams. You can check that out here.