Collector for ArcGIS is a great piece of kit to mobilise employees and allow them to collect data while in the field. Being able to use Collector for ArcGIS offline has meant that field work can be done anywhere and it’s quicker than using a pen and paper!
The common workflow is to synchronise data via a feature service, in ArcGIS Online or Portal, but if this isn’t practical for you don’t despair! Today we’re going to look at how we can use Collector for ArcGIS offline in the field and then bring the data collected back into your organisation without syncing it to ArcGIS Online. Instead, we’re going to reconcile data and attachments collected with Collector for ArcGIS directly with the parent file geodatabase (exported from ArcGIS Online).
You still need to setup Collector in the standard way to create the local Runtime Geodatabase on the device that will store the collected data. Then export the ArcGIS Online feature service to create your parent file geodatabase and extract it to your machine. You can now use the following steps to bring data back off your device:
1) The ArcGIS for Desktop 10.3 release included a new tool called Copy Runtime Geodatabase to File Geodatabase. This allows you to convert the runtime geodatabase (where data from Collector for ArcGIS is held on your device) to a file geodatabase. Follow these instructions to get the collected data from your device.
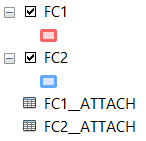
2) Now you will have 2 file geodatabases – the parent file geodatabase exported from ArcGIS Online and the Collector for ArcGIS file geodatabase:

3) We want to append the Collector for ArcGIS file geodatabase to the parent file geodatabase. Right click on FC2, choose Copy. Right click on the Parent Data.gdb and choose Paste. Click OK to the Data Transfer dialog and the FC2 feature class, FC2_ATTACHREL relationship class and FC2_ATTACH table will all copy to the file geodatabase:

4) In ArcMap, add the copied feature classes and tables to the Table of Contents:
5) Open the Attribute Table for FC1, add a new text field and call it ‘GID_Save’.

6) Start an Edit Session, then right-click the GID_Save field and open the Field Calculator. We want to calculate this field to equal the GlobalID of the same layer:

Click OK to run the process. Save your edits and end the Edit Session.
7) Repeat steps 5 & 6 for the FC2 feature class.
FC1 and FC1_ATTACH will be the target in the next steps because it’s these I want to hold the complete data.
8) Select all the features in FC2 that you want to add to FC1:

9) Search for and open the Append (Data Management) tool and fill it out like so:

10) Once the tool has run, the FC1 feature class will have a complete set of features:

11) With your features in FC2 still selected, open the Append (Data Management) tool again. This time we want to append the FC2_ATTACH table to the FC1_ATTACH table and click OK to run the tool:

12) Right click on the FC1_ATTACH table in ArcMap, choose Joins and Relates and then Join. Choose REL_GLOBALID from the FC1_ATTACH table. Choose FC1 – the feature class that has all of the features. Choose GID_SAVE – the field with the complete GlobalIDs. Choose to ‘Keep all records’ and click OK to run the join:
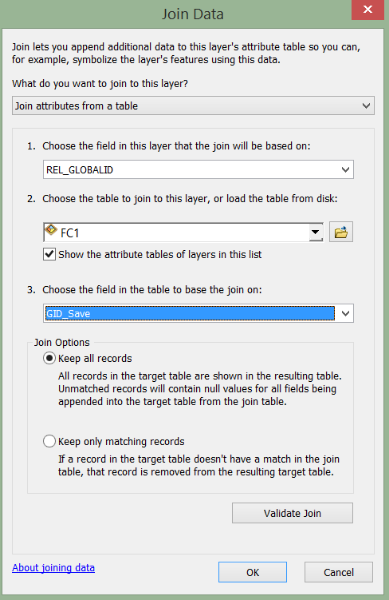
All the copied records are now tied back to their original attachments via the original GLOBALID.
14) Start another Edit Session. Open the FC1_ATTACH table. Right click on the REL_GLOBALID column and open the Field Calculator. Now we want to calculate the REL_GLOBALID field to equal the GlobalID field from the joined feature class table for all records:

Save and end your edit session.
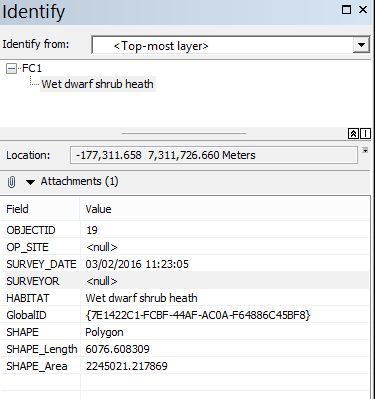
If you like, you can remove the join from the T1_ATTACH table and the GID_SAVE field from the FC1 feature class. Now when you use the Identify tool in ArcMap to click on one of the appended features to FC1, you’ll see all of the attributes and the attachments: