The recent release of version 1.4 for ArcGIS Pro introduced 3D editing tools and I’ve been exploring how to improve the accuracy of existing multipatch features, as well as creating new ones. There are also some additional tools to generate multiple buildings.
Generating a set of 3D Buildings:
Esri’s Local Government 3D Basemaps tools provide a set of Tasks and Tools for ArcGIS Pro which use elevation data and building polygons to create a 3D urban model. A colleague had used OS and EA open data to create a 3D view with Level of Detail (LOD) 1 buildings for part of Leeds. Note, the tools require an Advanced license and the 3D Analyst and Spatial Analyst extensions.

3D Buildings of Leeds
LOD 1 represents buildings as block models by extruding their footprints before converting to multipatch features. Whilst LOD 1 doesn’t possess high levels of detail, it’s an ideal starting point to use the editing tools and manually enhance buildings based on their real-world attributes.
Modifying Existing Multipatch Features:
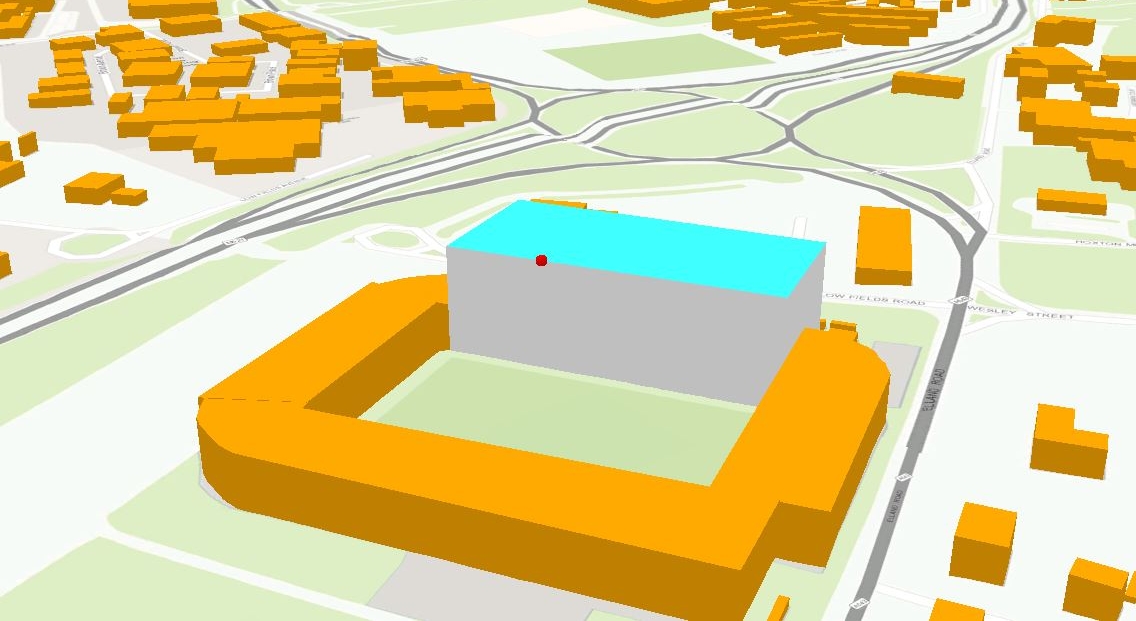
To demonstrate the editing tools, I will use the LOD 1 multipatch for Elland Road football stadium (seen on the near right of the image above). The editing tools can be located on the Edit ribbon. Selecting Modify will bring up a Modify Features panel, which is the central hub to explore 3D editing tools. It’s worth noting, the tools require a 3D Analyst License.
My objective for the following scenario is to improve the basic 3D multipatch feature of Elland Road and create a model that resembles its real-world structure. Currently, the stadium is constructed of 4 rectangular boxes (4 stands). I’ll walk you through how I visually improved the main stand, which I later applied to the other 3 stands. The editing session begins by selecting the Vertices option, found under the Reshape drop down.
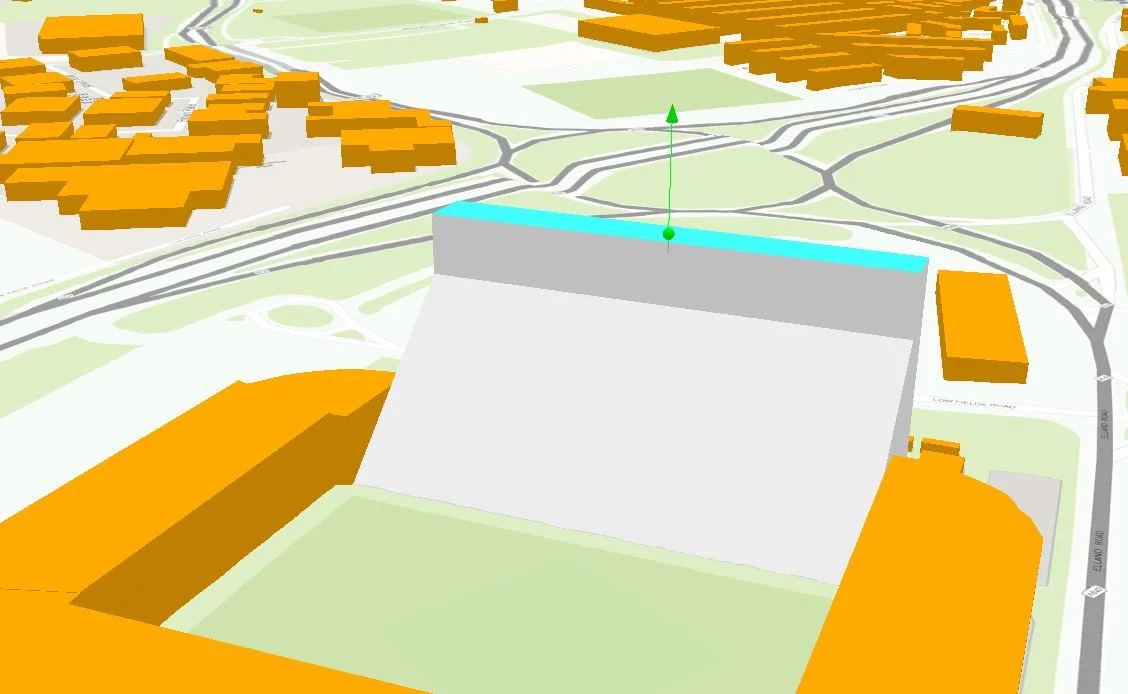
Clicking on the multipatch feature, allows you to manipulate the faces of any selected object.
By hovering over an object’s face, a 3D handle appears on its centre. As you can see in the image below, I have dragged the handle and created a sloping face to replicate the seating area facing towards the pitch:
Now I have created the base structure; the next task is to create the overhanging roof. This was achieved by using the dissect function within the same Vertices tool we had previously selected. It’s possible to draw a line across the middle of the feature and essentially split it into two separate faces:
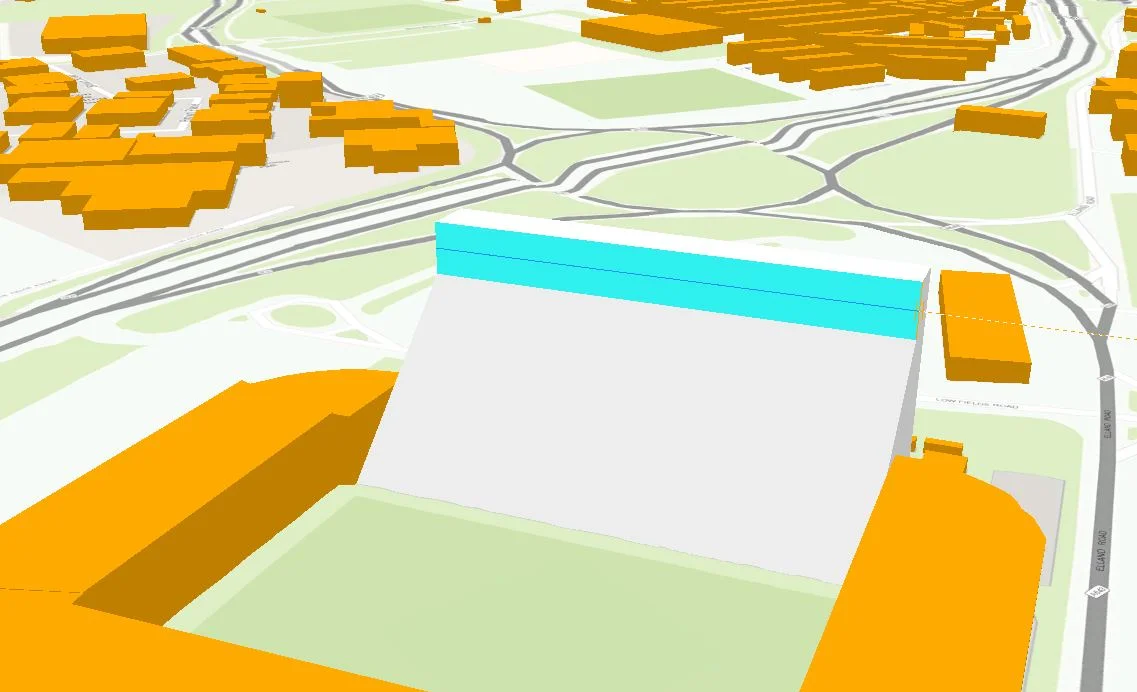
After doing so, I can extrude/intrude each of the faces separately. The tool can also be used to create a new face within an existing face. For this example I have extruded the top half to create an overhang roof:
Moving back to the Modify Features panel, there are tools under the Alignment dropdown to move, reshape and rotate your multipatch feature. This can be particularly useful after editing, if you wish to adjust the position or size of an object.
Creating a new Multipatch Feature:
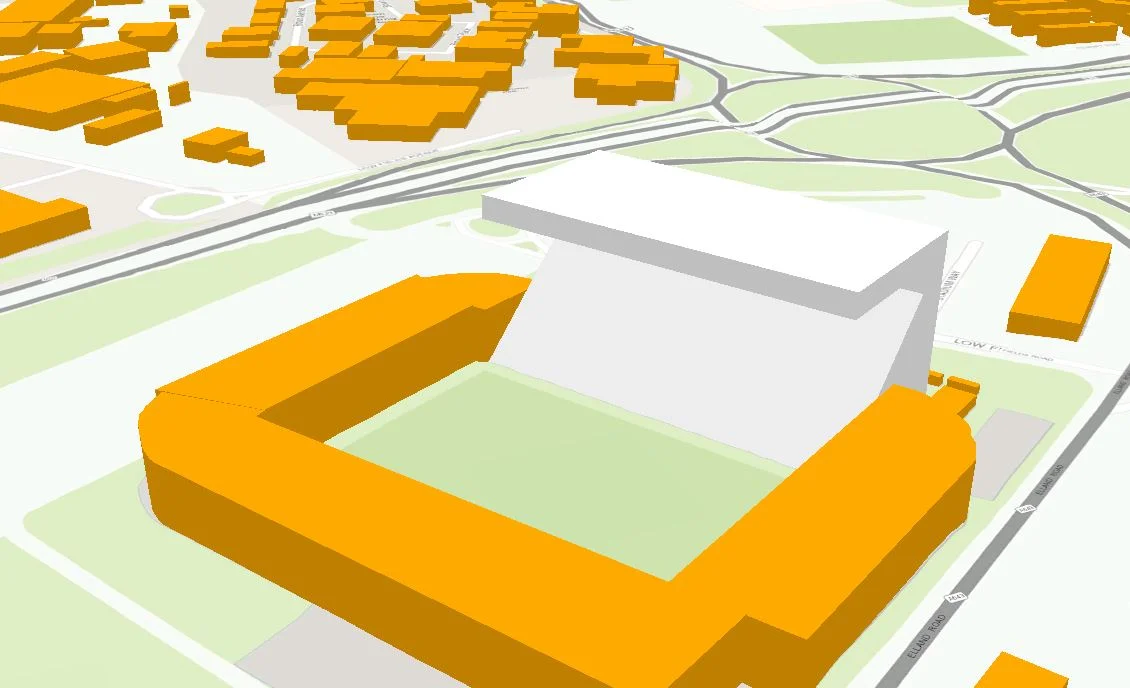
Once I had completed the stand, I began to create a new multipatch feature for a small building with a pitched roof. Using the previously mentioned Alignment tools, I then manipulated the new feature and located it adjacent to the stadium – perhaps it’s the proposed club shop!

After editing all sides of the stadium, I then used the Scale and Rotate tools to apply smaller changes. I found that manipulating the size of objects allowed me to control the overall size of the stadium – even adding in some goalposts!
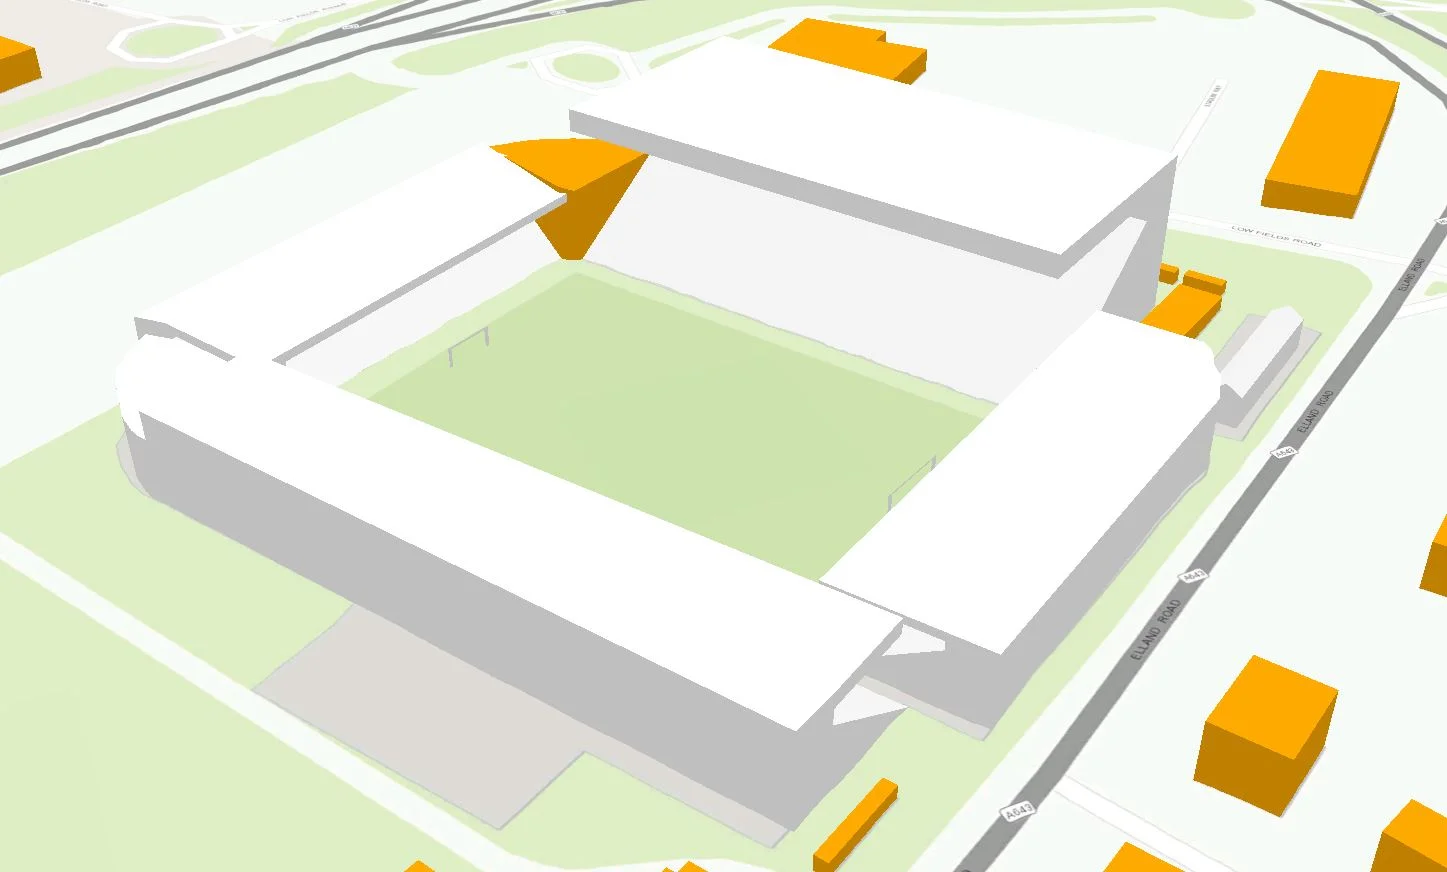
Having the ability to create new features is an exciting opportunity to enhance your 3D visualisation. The editing tools can be an excellent addition for improving the accuracy of 3D objects, like Elland Road. Just minor changes to the simple model transformed it into an instantly recognisable building.