As mentioned in my previous post (Vector Tiles Part 1: Creation), one benefit of using vector tiles over their raster counterparts is the ability to customise the content, colours and fonts on the fly – without having to re-host or re-publish the underlying data.
Options for customisation
- Turn layers on or off and change scale thresholds
- Update the colours and symbols
- Label language options (available in selected areas)
- Change label fonts (currently around 40 fonts to choose from)
In this post, I am going to restyle the vector basemap I previously created in ArcGIS Pro using OS Open data. You don’t necessarily need to create your own basemap, instead you can use one of the nine global basemaps that Esri provide and create your own styles from these.
How to create a custom style?
The easiest way to style vector tiles is using Esri’s Vector Basemap Style Editor application. It should be noted that this is currently in Beta and therefore may be a little buggy!
The first step is to make a copy of your vector tile layer. This creates a reference layer which can be restyled. To make the copy, select the layer in the ArcGIS Online map viewer and select Copy:

Then, save this new layer by selecting the layer and clicking Save:

This creates a new reference layer (it doesn’t copy the original data, but rather points to it) in your account which contains a JSON style file. It is this style file that we can update with Vector Tile Editor.
Open up the Vector Basemap Style Editor and sign in with your ArcGIS Online credentials. You will see your vector tile layer listed in the content window. In the screenshot below, you can see that my ‘os_open_carto_vector_basemap’ layer is selected and this exposes the data layers in the editor.

Simply by clicking on a layers hex code, you can update the colours in the basemap. I edited the colour of the motorway network in my map to red and you can see the result here:
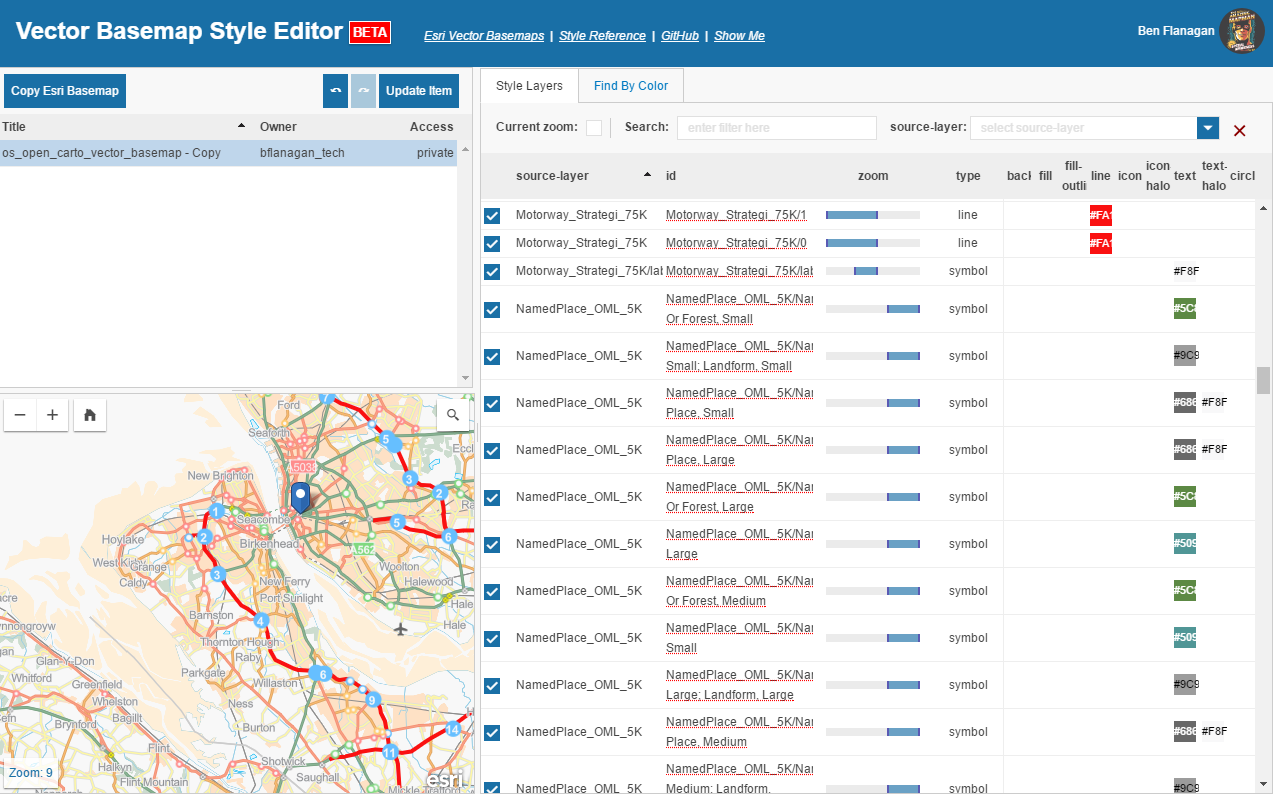
It is also possible to hide layers from the basemap by deselecting them. For more advanced editing (including controlling scale thresholds) you can click on the layer name and edit the raw JSON.
It’s important to note that you must click the ‘Update Item’ button to save any edits you make. These are then written back to your ArcGIS Online item.
Custom Map Style Example
Below are the vector tiles I published from ArcGIS Pro in part one, along with a custom ‘purple’ style I created. In this example the basemap was updated simply by changing the hex colours for a few layers in the map.
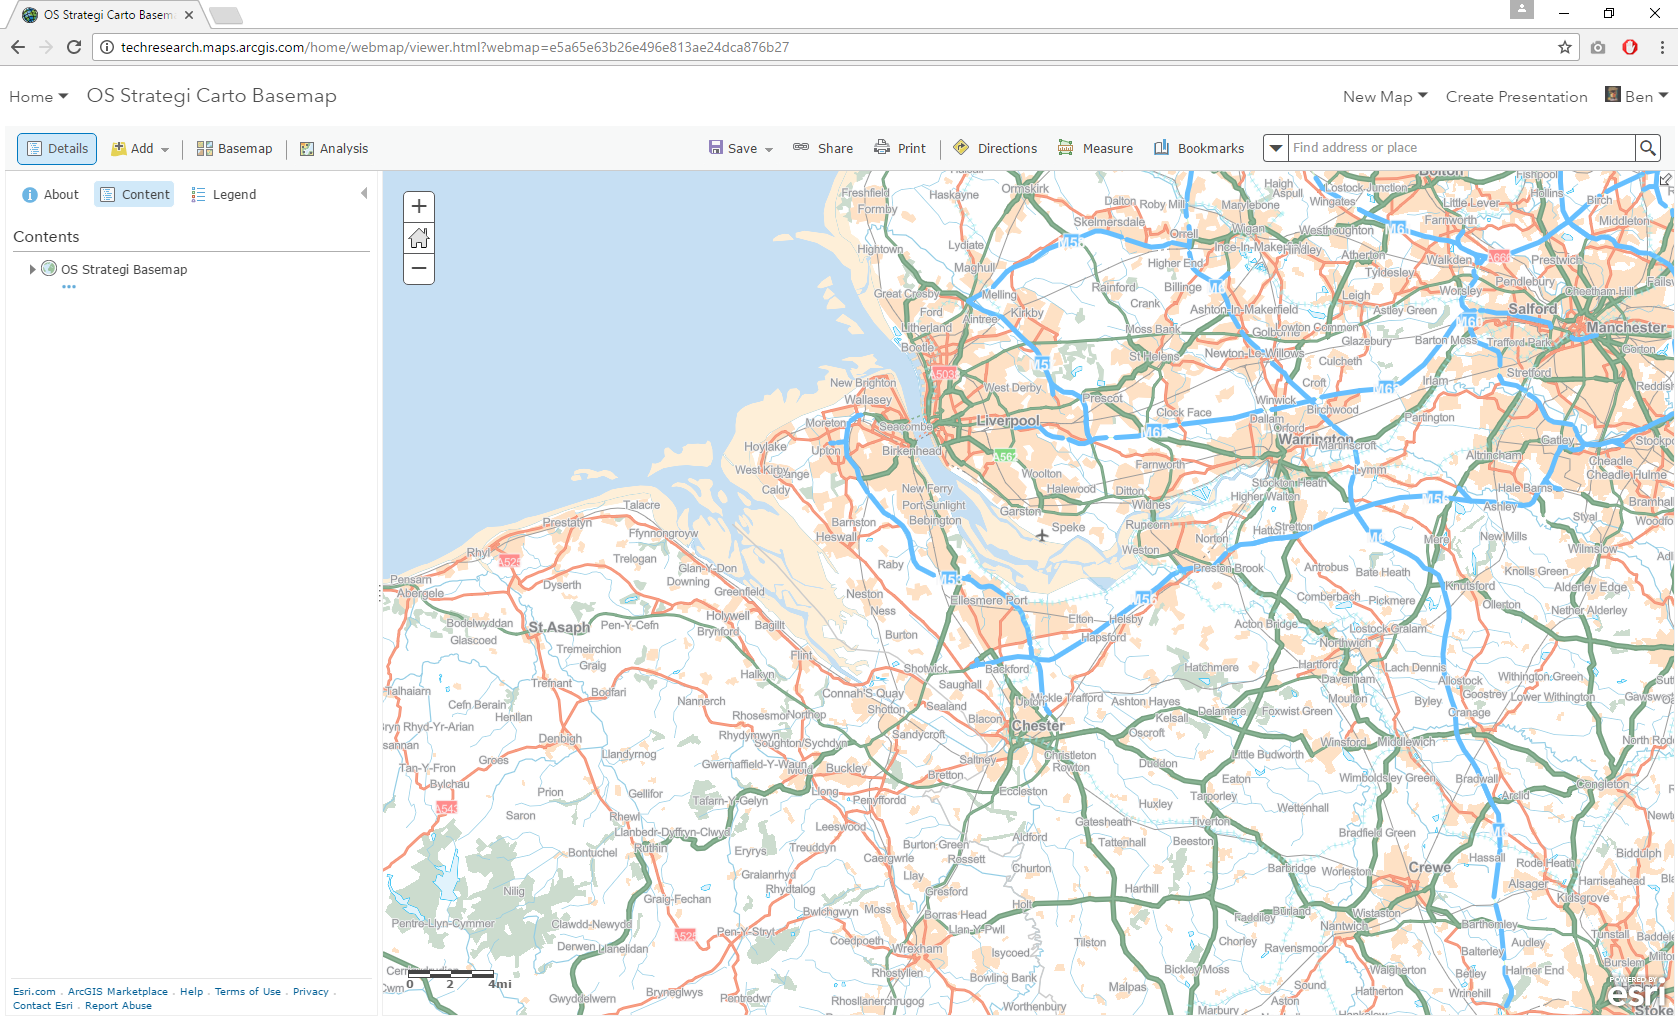
Original vector tiles published in my previous post
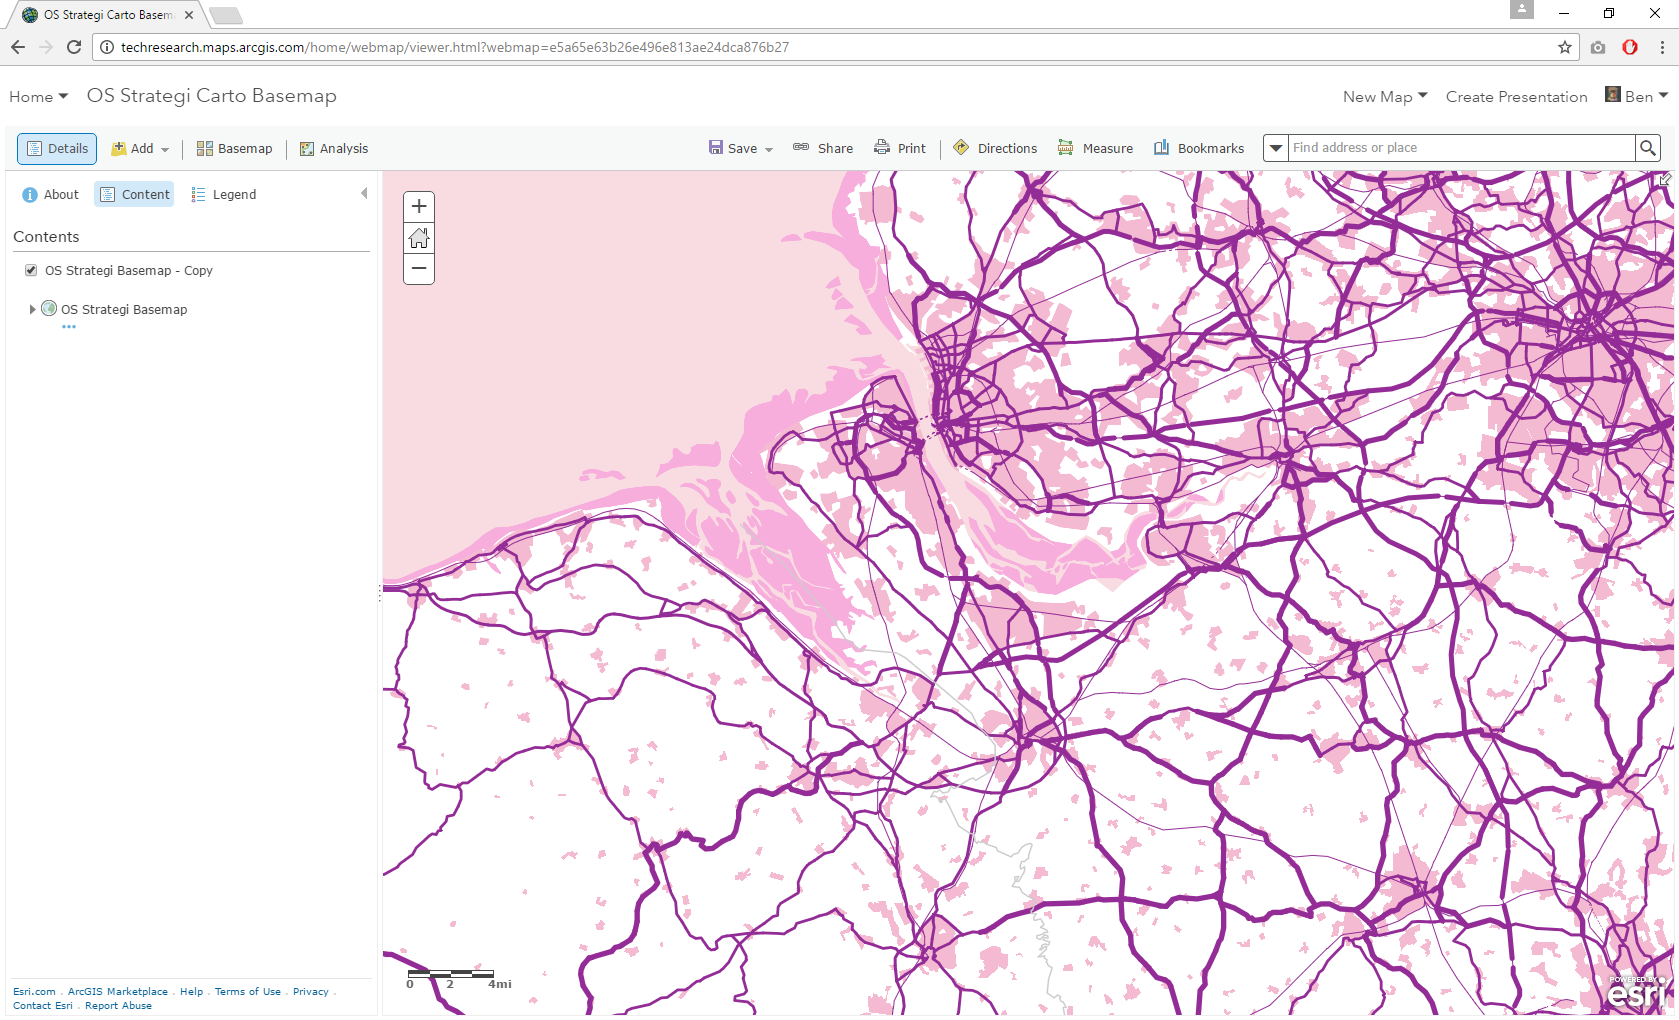
New style applied to same vector tiles – without the need to republish or recreate the vector tile service