The Story Map Journal template allows you to view and edit the HTML source for the narrative side panel, as well as adding custom CSS between style tags. This gives you the ability to completely adjust how content in the side panel looks and feels. Web pro’s can follow the quick start guide. For anybody just starting out with HTML and CSS scroll down to the beginners guide and accompanying learning exercise.
Quick Start
If you know all about HTML and CSS and want to dive straight in then just follow these three easy steps:
- Create or open a Story Map Journal.
- Navigate to the section you wish to apply your custom HTML and CSS and click edit section.
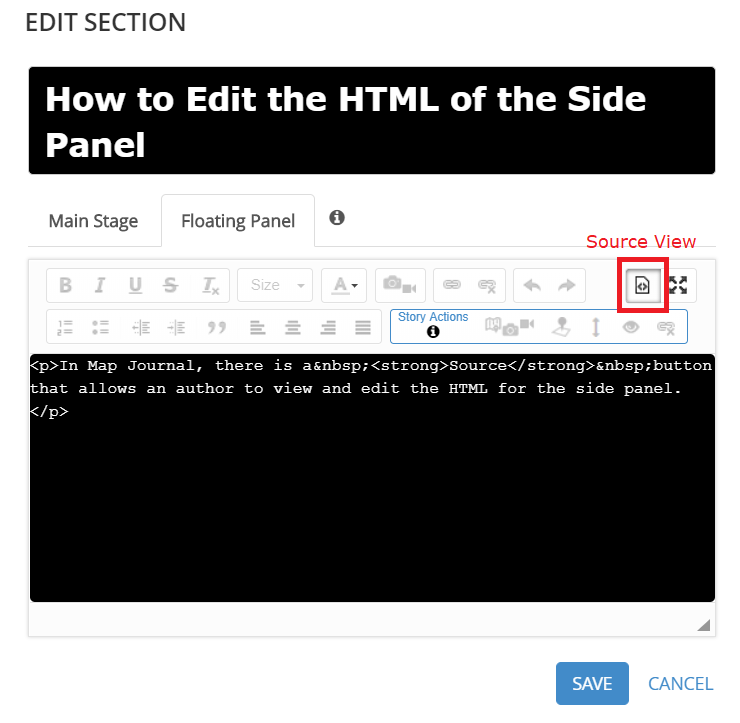
- Click the source button to view and edit the sections HTML, apply your CSS* as an internal stylesheet between <style> tags.
* CSS rules created with <style> tag are global, so it’s not necessary to duplicate them in every section. However, you can limit styles to specific sections. In the following example, a style is specified for the second section of the story:
.section:nth-child(2) .p1 { }
Beginners Guide and Learning Exercise
If you’re new to the world of HTML and CSS, but would like to learn more about it, this Story Map is for you.

The Story Map takes you through the basics of HTML and CSS, and also introduces a learning exercise – walking you through how to create your own navigation panel for Story Actions. If you don’t know what Story Actions are – don’t worry, the Story Map explains these too!
Have fun and happy story mapping!
![]()