ProductivitySuite was created to provide additional functionality where there were gaps in ArcGIS. The platform has evolved over the last 10 years and many of those functions are now available out of the box. With ProductivitySuite set to retire at the end of 2019 we are here to help you make the transition to ArcGIS Pro as smooth as possible. In this blog I am going to show you how you can achieve Red-Lining and T-marking just as easily in ArcGIS Pro.
Red-lining is the process of inserting a red-line to the inside boundary of a land parcel, while T-marking is used to indicate boundary responsibility or ownership.
Red-Lining
The Red Line Tool in ProductivitySuite inserted a red line around the inside boundary of a land parcel. This is now possible in ArcGIS Pro by creating the red-line style once and saving it to be re-used throughout your projects.
Creating your Red Line
My first job was to create a red line with the symbology I wanted. Once created, this style can be reused across all of my projects. I started by creating a new polygon, added it to my map and opened the Symbology pane.
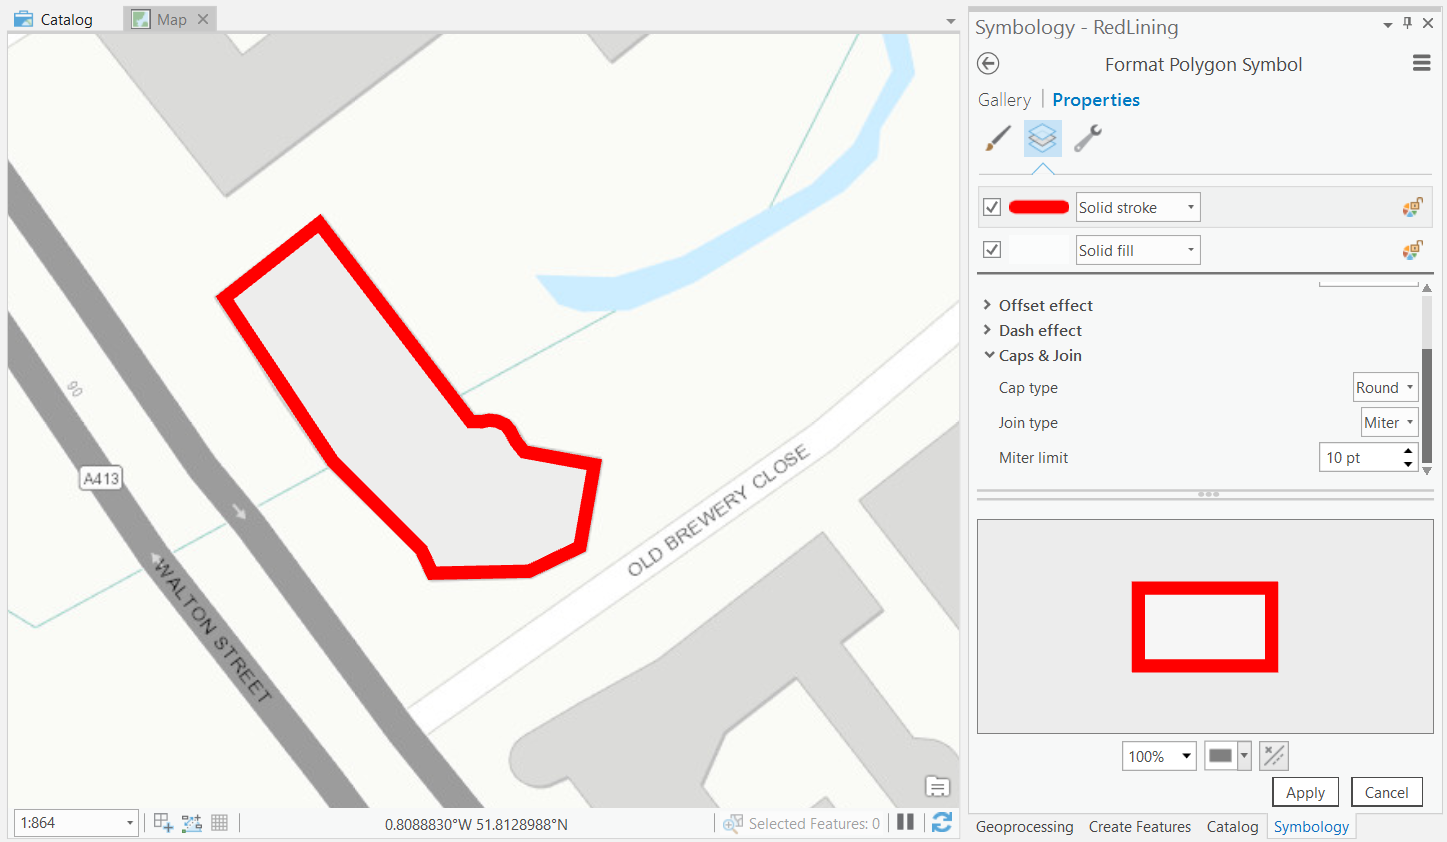
I set the Colour to No colour and the Outline colour to a bright red. I chose an Outline width of 8pt (you can choose a width that suits your projects). By default the corners of the line are rounded, so I sharpened them by selecting the Layers tab in the Symbology pane and under Caps & Join, changed Join type to Miter.
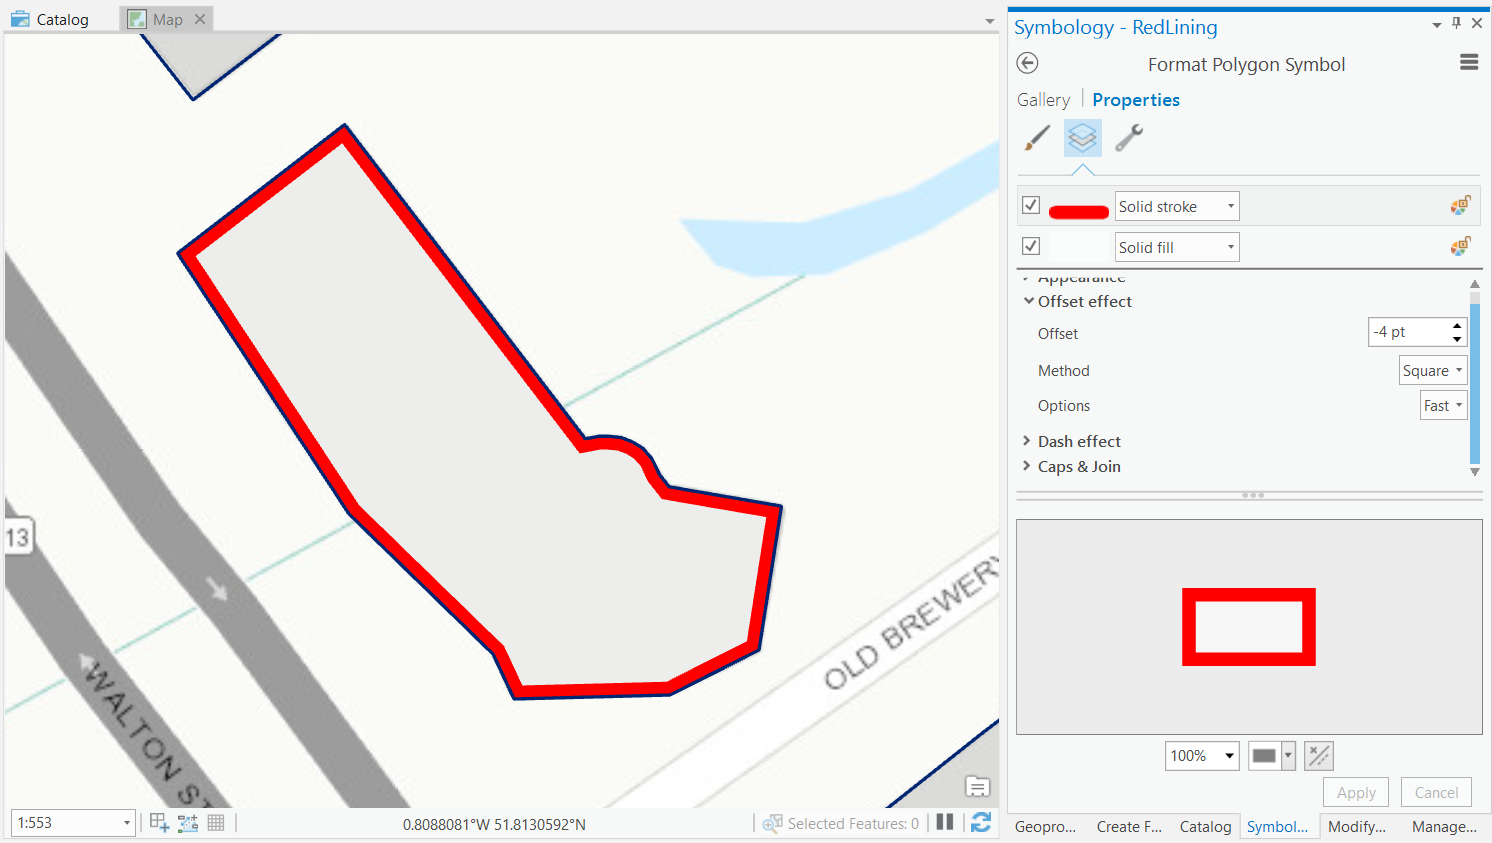
Nearly there! The final thing was to ensure it sits inside the boundary of the building. At the moment the line straddles the true boundary so I applied an offset.
In the Layers tab of the Symbology pane, select Offset effect. Set the offset to a negative value (this is what pulls the boundary inside our building). The size of the offset must be half that of the line thickness to ensure it sits directly up against the true boundary. For example, I set my line thickness to 8pt earlier, so now my offset needs to be -4pt. I now have a red line that sits directly inside the boundary of the building. I’ve added in another polygon of the building boundary in dark blue to demonstrate this.
Saving the Red-Line Style
The hard part is done! Now I’ve set up the symbology for the red-line, I can simply save this as a style to re-use in other projects by following these are the steps:
-
Click a symbol in the Contents pane or in the Symbology pane to open the Format Symbol pane
-
In the Format Symbol pane, click the menu button in the upper right corner and click Save Symbol to Style.
-
On the Save Symbol As dialog box, provide the following:
a) Optionally, for Category; use the pull-down menu to choose a category from the list of all categories present in the current project styles, type a new category, or leave it blank.
b) Optionally, for Tags, type one or more descriptive tags
c) For Style, use the pull-down menu to choose an editable style that is connected in the project.
d) You are limited to your Favourites style only if no editable styles are in the project.
e) Optionally, for Key, enter a string to be used as the style item key.
-
Click OK to save the symbol to the specified style
For more information on saving symbols in a style see this help page.
Using the Red-Line Style
My Red Lining style is now ready. So… how do I use it?
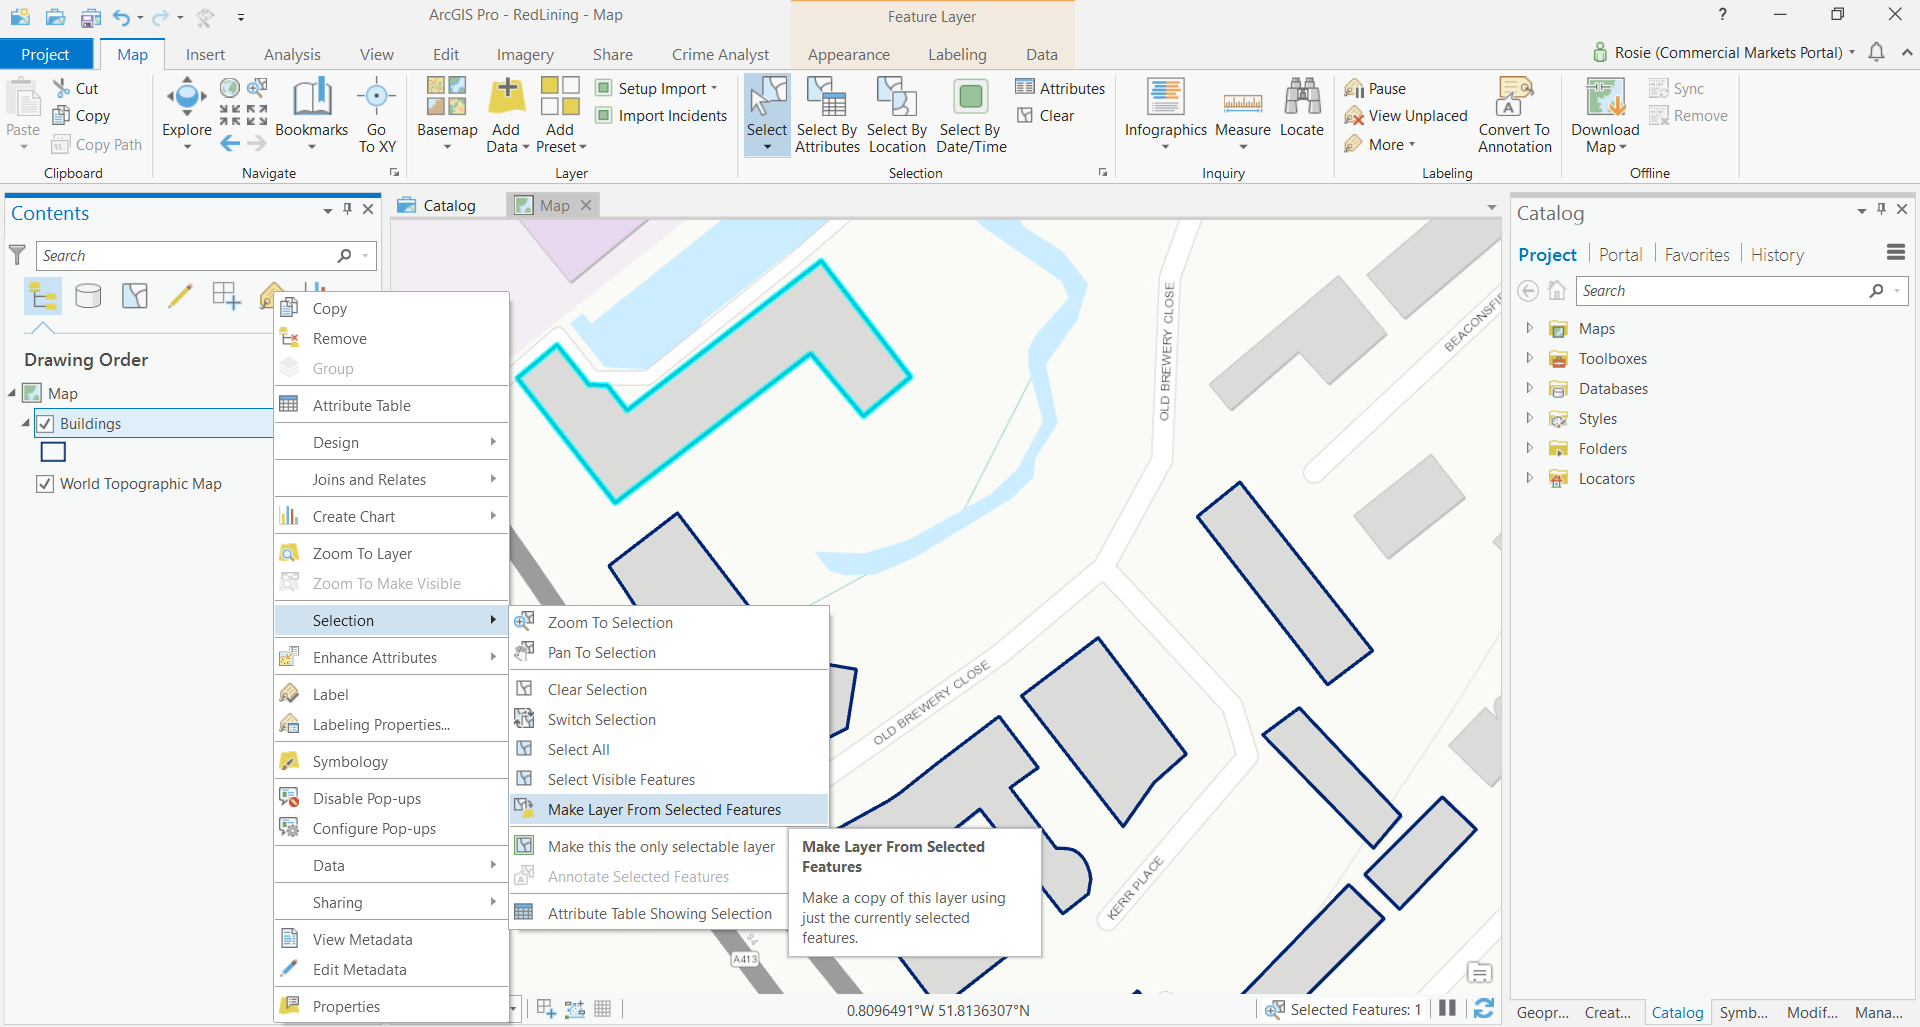
This bit couldn’t be easier! I’ve got my buildings features all outlined in dark blue. I selected the building that I was interested in (shown highlighted in light blue) and wanted to apply my red-line to it. I right clicked on the building layer in the Contents pane and chose Selection and Make Layer From Selected Features.
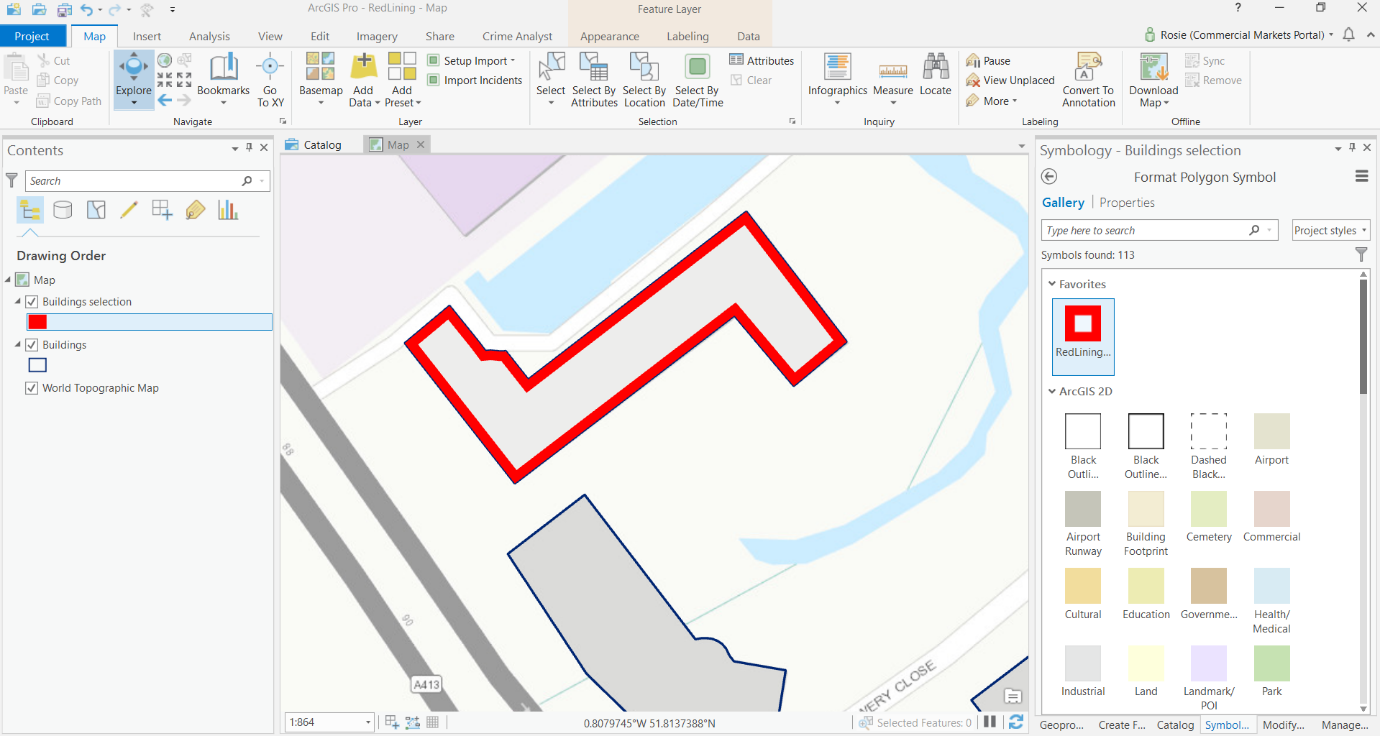
The building then appeared as a new layer in the Contents pane. Double clicking on the symbol opened the Symbology pane. In the Gallery I could see the style I had created. I had saved mine to Favourites. All I needed to do was select this style and it applied my red line to my feature.
T-Markers
Creating the T-Marker
The T Mark Tool in ProductivitySuite marked boundaries to show responsibility or ownership, displayed on a map by using the conventional ‘T’ symbol. Again, this can now be achieved out of the box using ArcGIS Pro. Just as I did with the red-lining, I created a template for our T-marker which then be saved to use repeatedly.
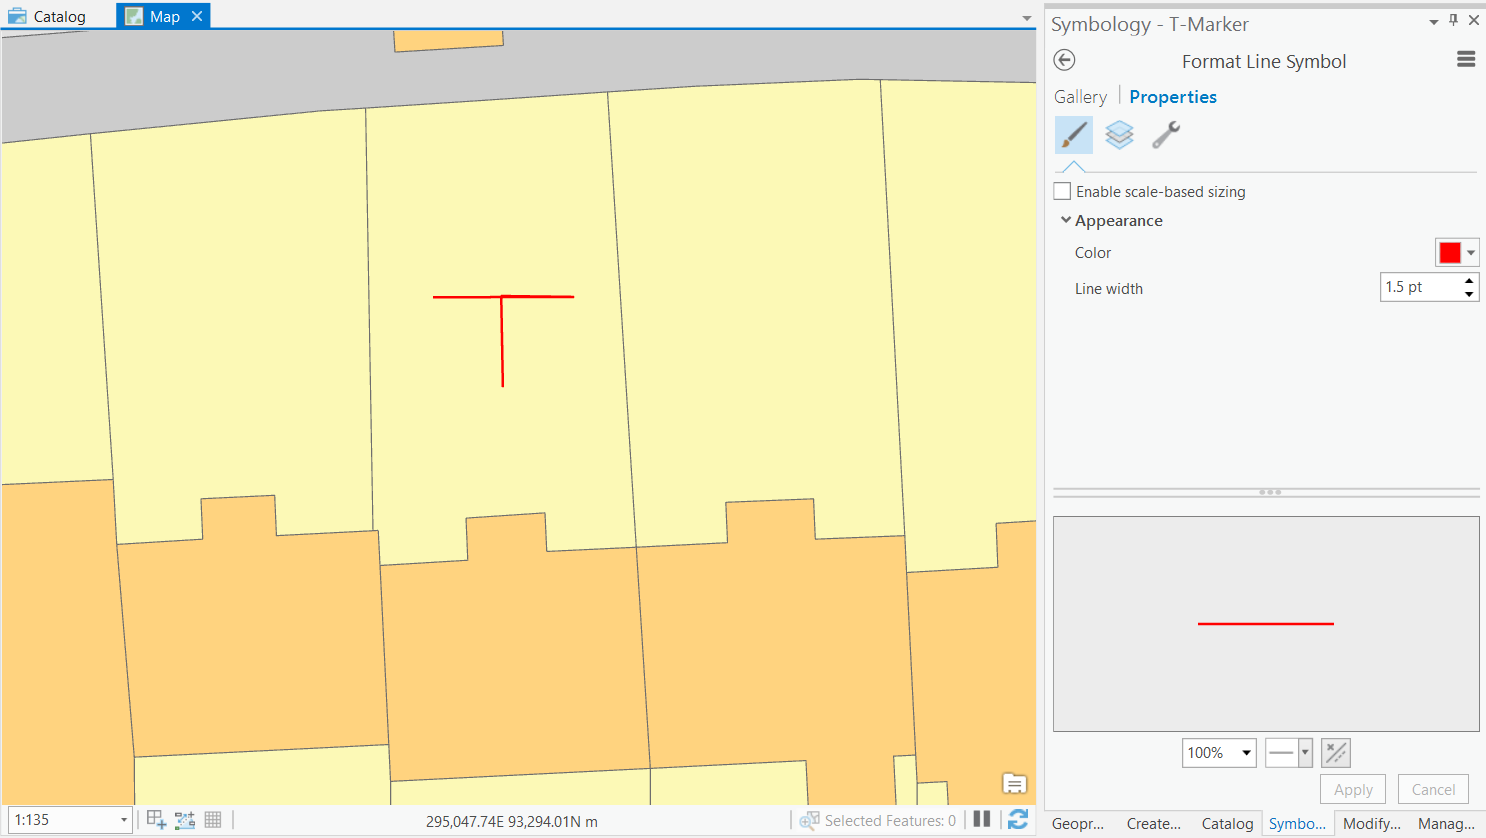
The T-Markers’ will need to sit inside their own feature class, so I started by creating a new line feature class for the T-markers and added it to the map. In the Create Features pane I selected the new T-Marker layer and drew a single T symbol. Then I used the Symbology pane to style the T-Marker. I set it to a bright red with a line thickness of 1.5pt.
Saving the T-Marker Template
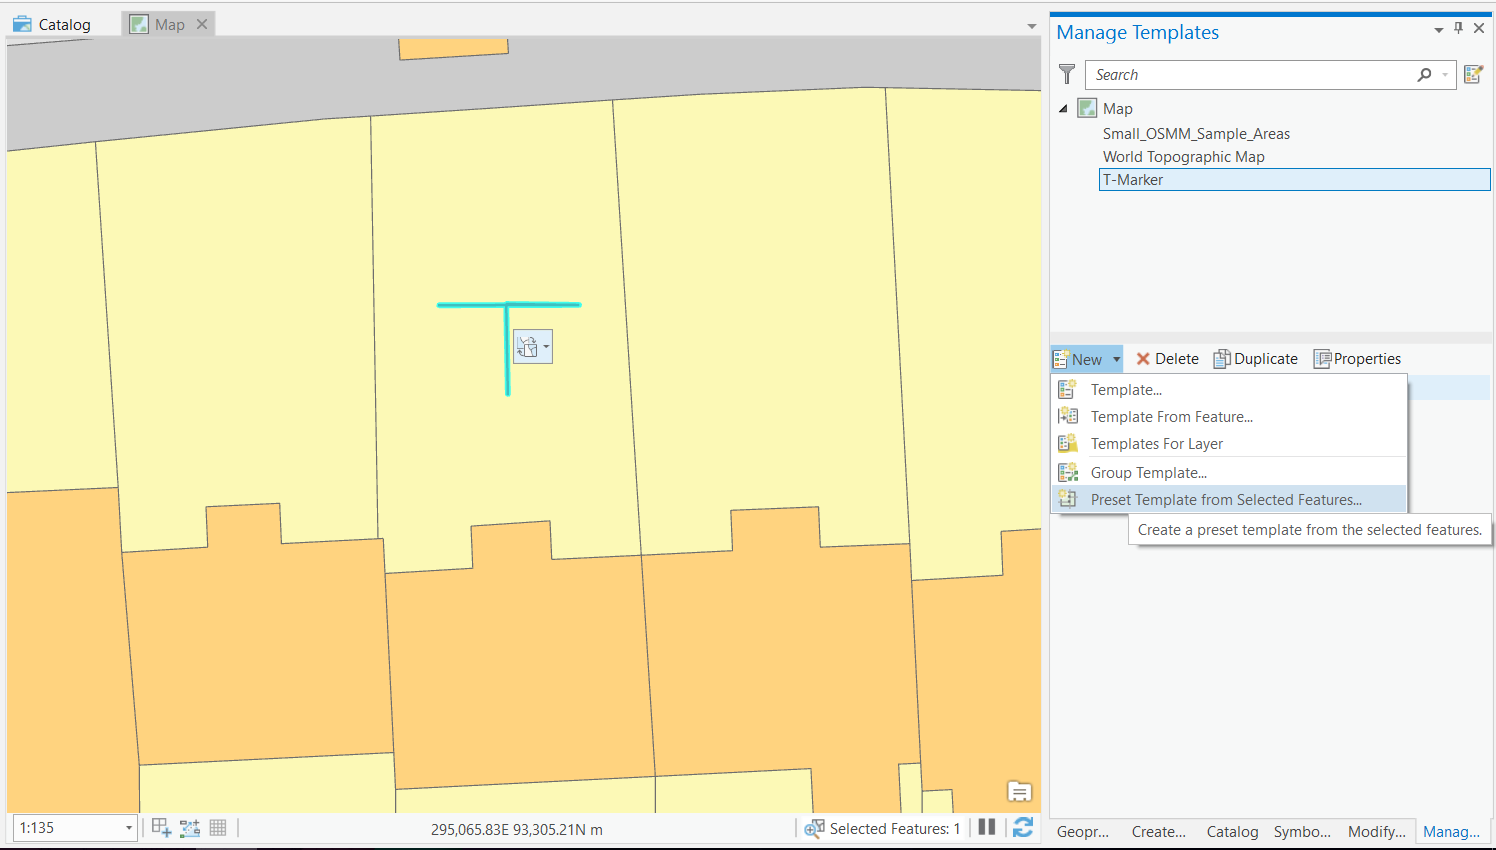
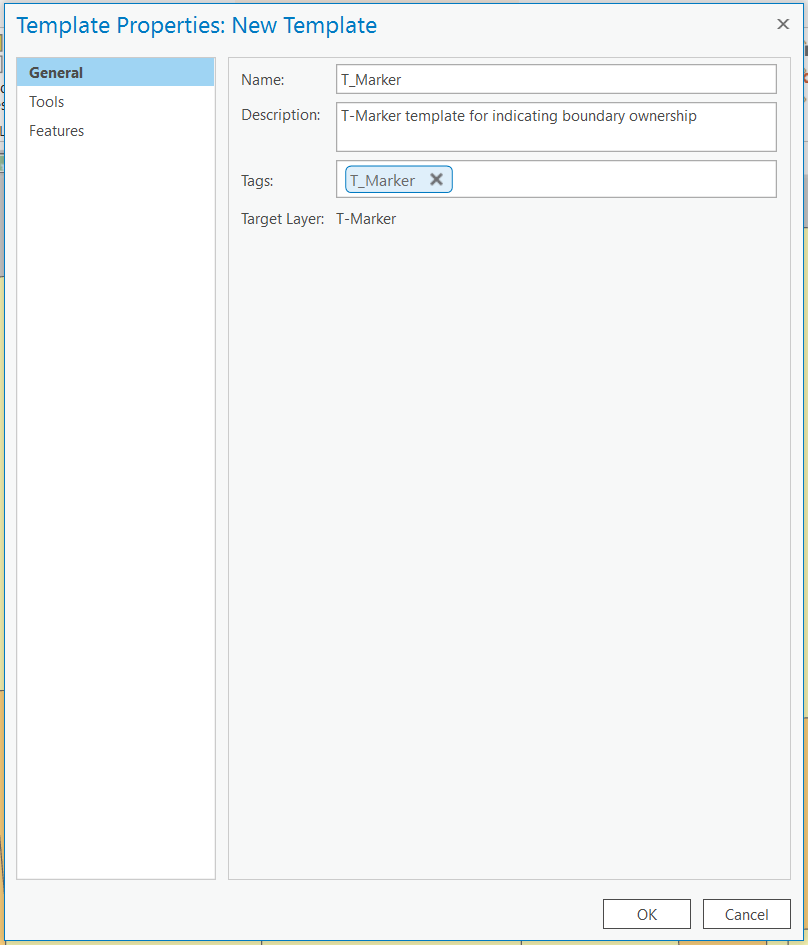
I then saved my T-Marker as a preset template so I can use it across my projects by following these steps:
-
Select the feature in the map and click New
-
In the top righthand corner of the Create Features pane, click Preset Template from selected features

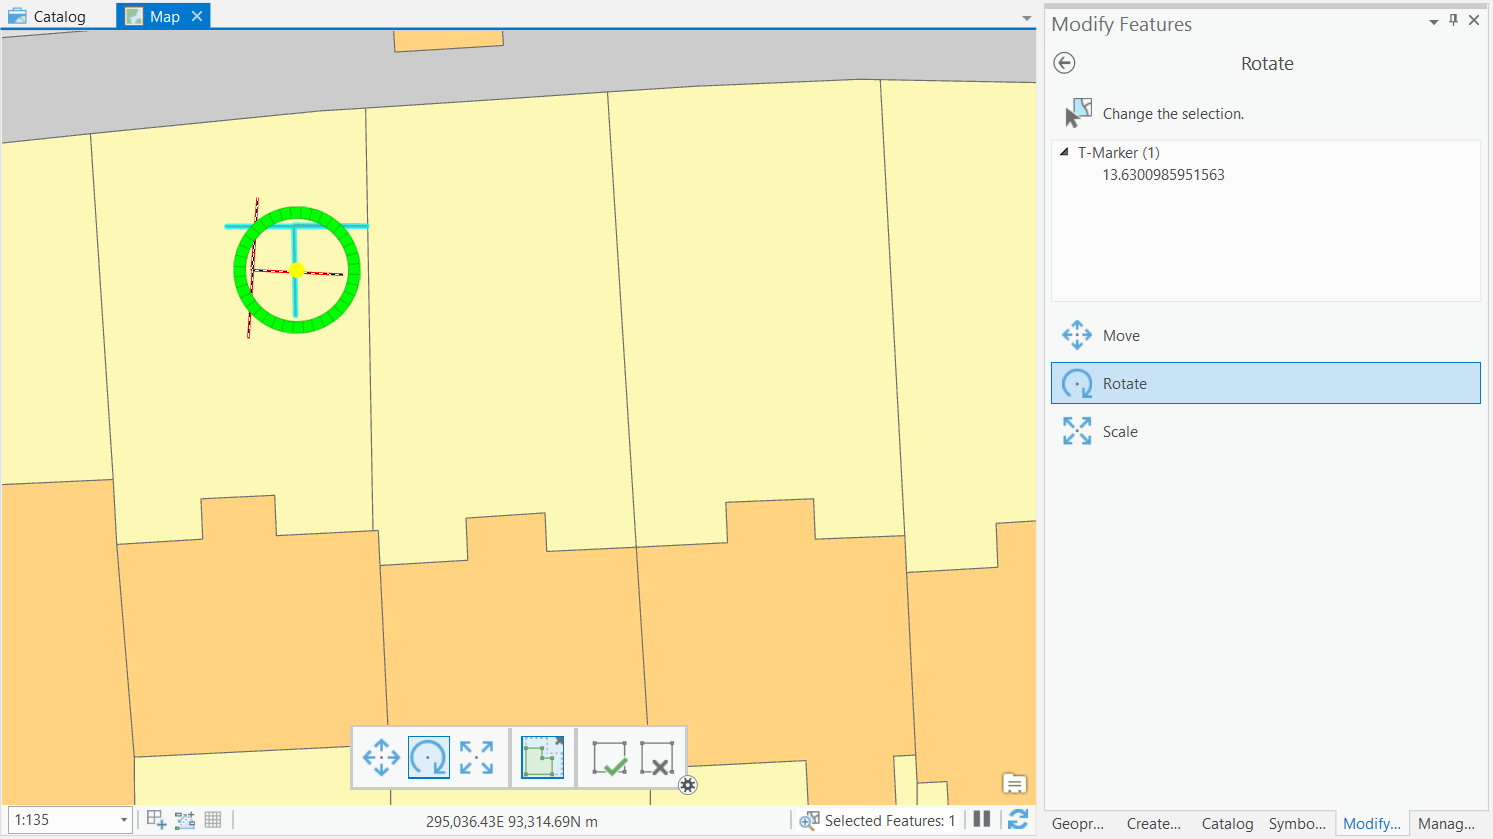
Next, you’ll need to rotate the T-marker. Select it and click Modify on the Edit tab of the ribbon. From the Modify Features pane you can visually Rotate and Move your T-marker around as required.
Now you know the method it’s easy to create as many T-markers as you like!
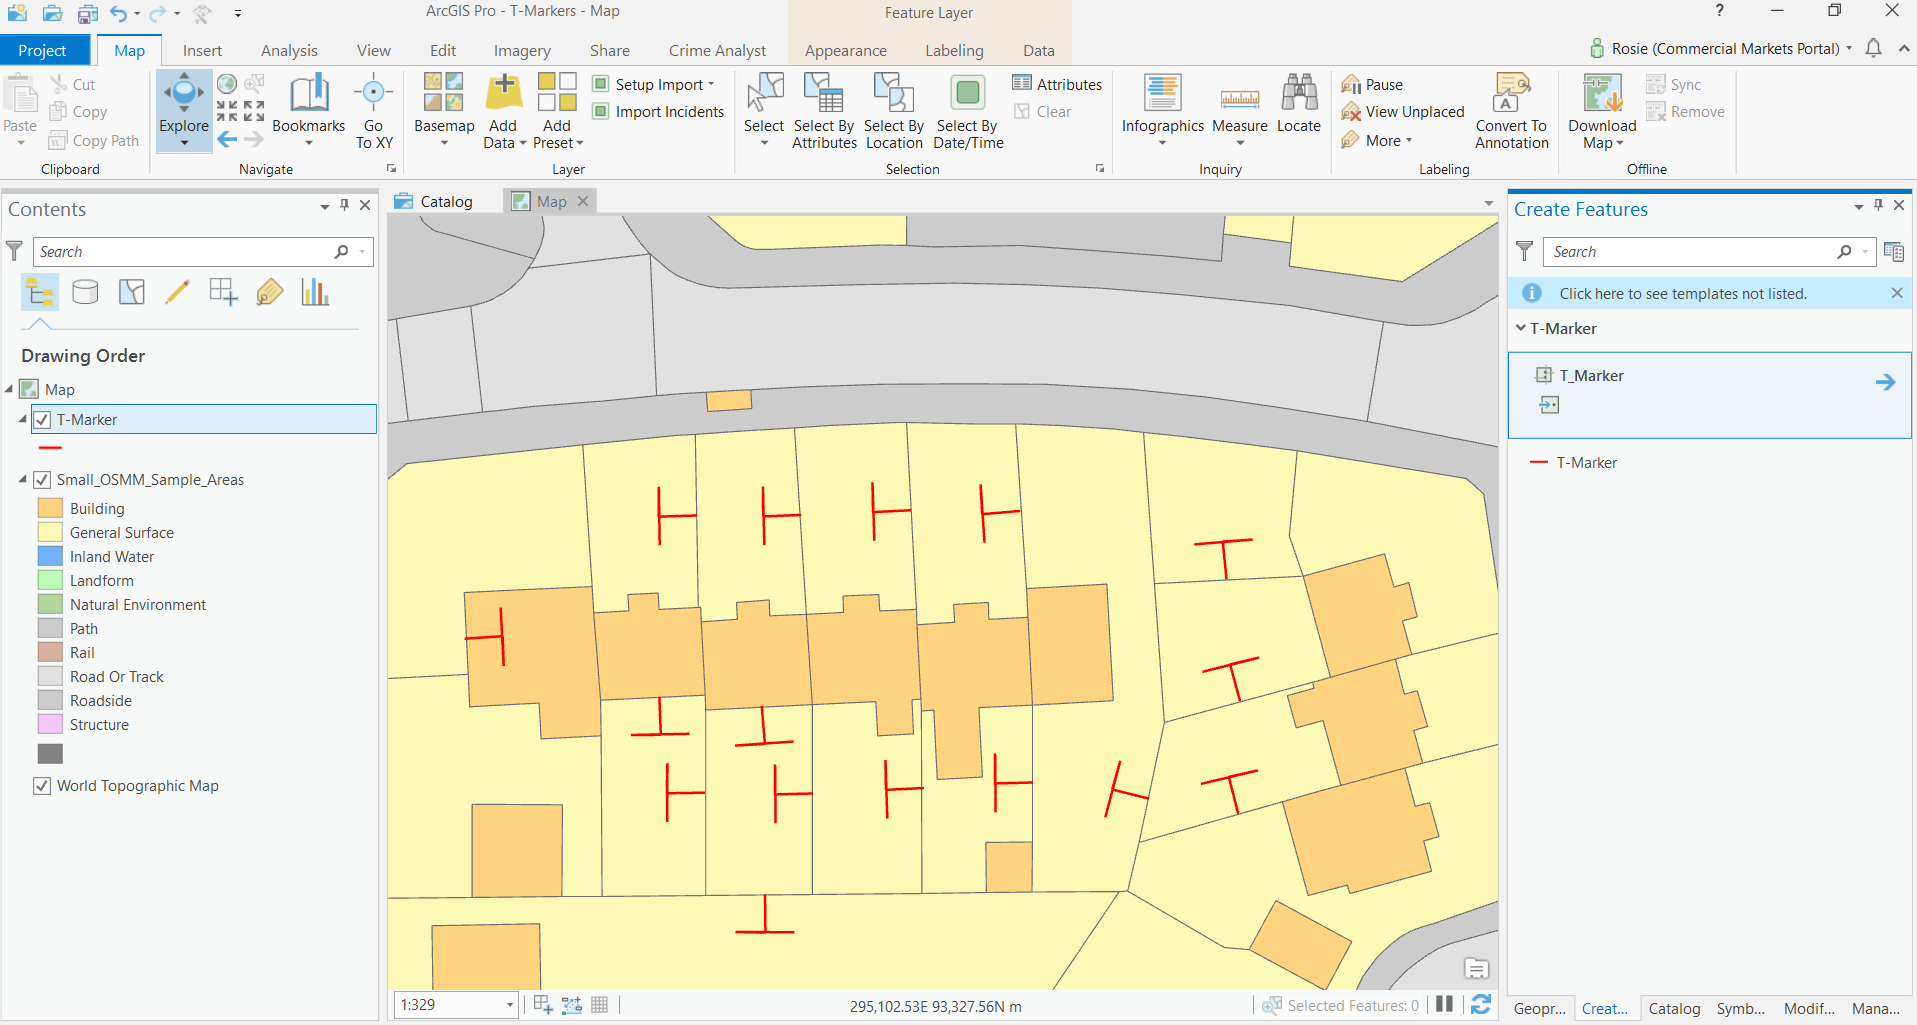
So there you go: Red Lining and T-markers out of the box in ArcGIS Pro – easy!