Over the years I’ve been waxing lyrical about everything Sweet for ArcGIS can do from topology to auto calculating attributes. For this Sweet Treats blog, I’m going to cover five of my favourite possibly lesser-known capabilities.
Builder
Preview
I’m not going to spend too long in the builder, but I wanted to highlight one sometimes overlooked feature and that’s Preview.

Preview option in Sweet Builder
Preview allows builder users to configure functionality and you guessed it, preview it before they save any changes. This is a favourite of mine as it means I can test the experience of different capabilities before rolling them out to users.
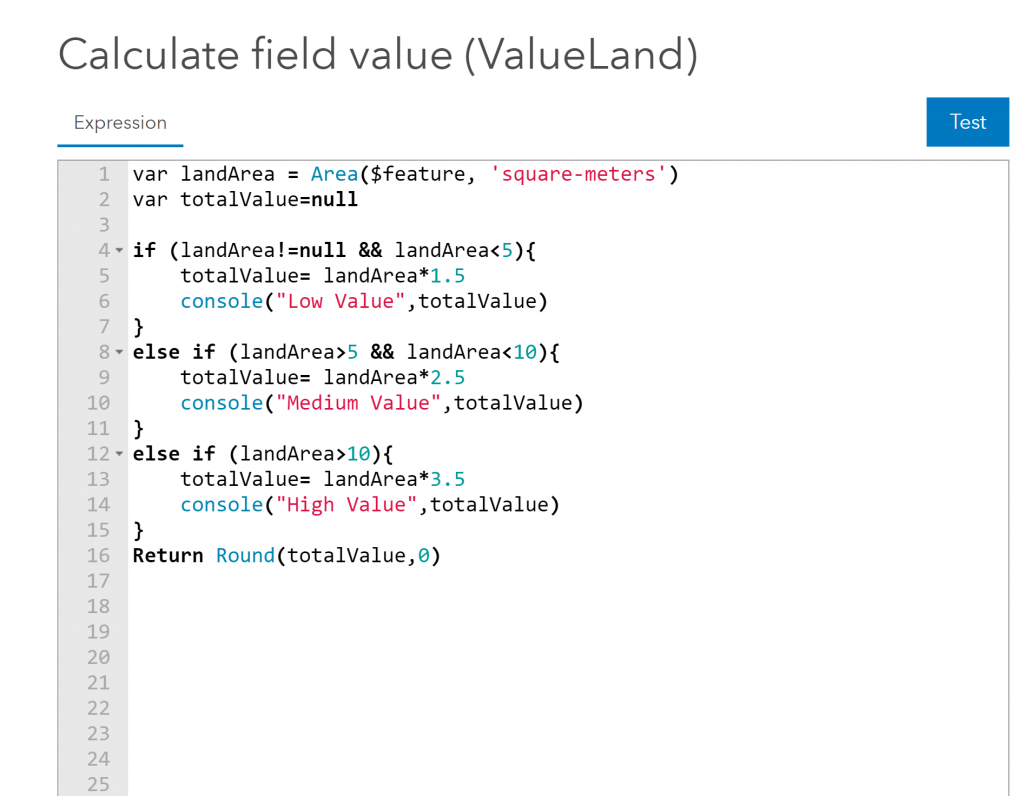
Where it gets interesting is when I’m using Arcade (the scripting language Sweet for ArcGIS uses to power a multitude of different areas such as attribute rules, custom commands and dynamic feedback).
The console function in Arcade is super useful when building or troubleshooting scripts. The console function enables me to output messages to a browsers console so I can see how far I’m getting in a script or see the values its returning.
In this example, I’ve scripted an attribute calculation that will tell me the potential revenue of a land parcel with a few console messages to tell me the classification and value.
Console function being used in an attribute calculation
The handy thing about Preview is that it has its own console window, which shows the Arcade scripts that are being run in real time. In this example I can see my script being executed and console messages being displayed when I create my land parcel.
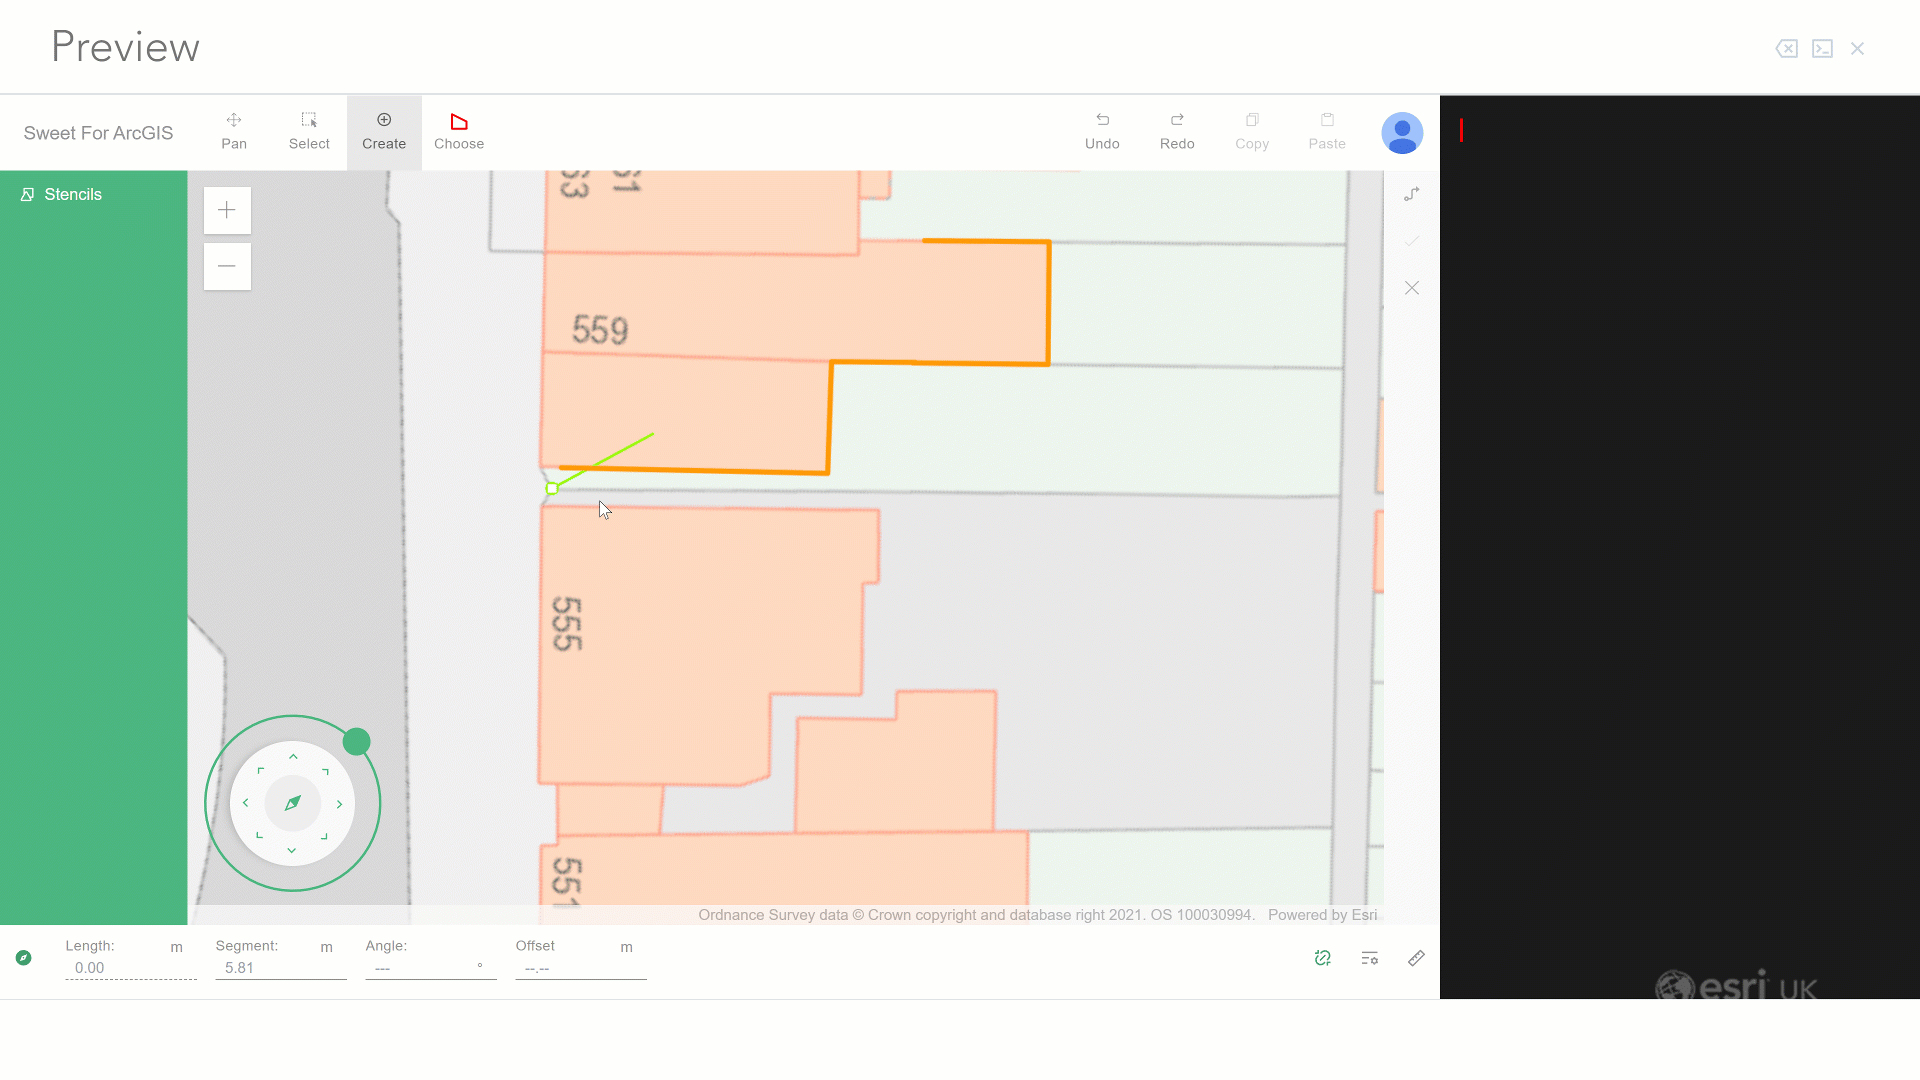
Preview showing the output of the Console function
Let’s head on over to the app
Drawing modes
Many years ago, back when Sweet for ArcGIS was but a proof of concept there were only two real ways to create new features – vertex by vertex (Standard) or using stencils. Both are well used methods today, with Standard still the most popular drawing mode. However, we now have lots of drawing modes available, let’s explore.
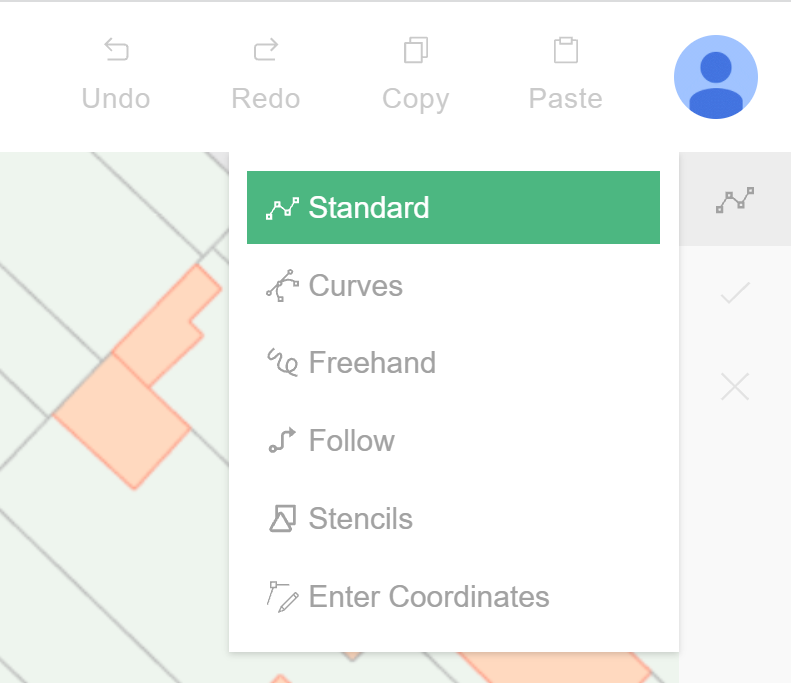
Drawing modes available in Sweet
We got feedback that it was time consuming to capture all the intricacies of natural features using Standard mode. We took this on board and released the freehand drawing mode. This functionality really shines when using it on a tablet with a stylus but can be used just as easily with a mouse in a browser.
Phase 1 Habitat’s being captured using Freehand mode
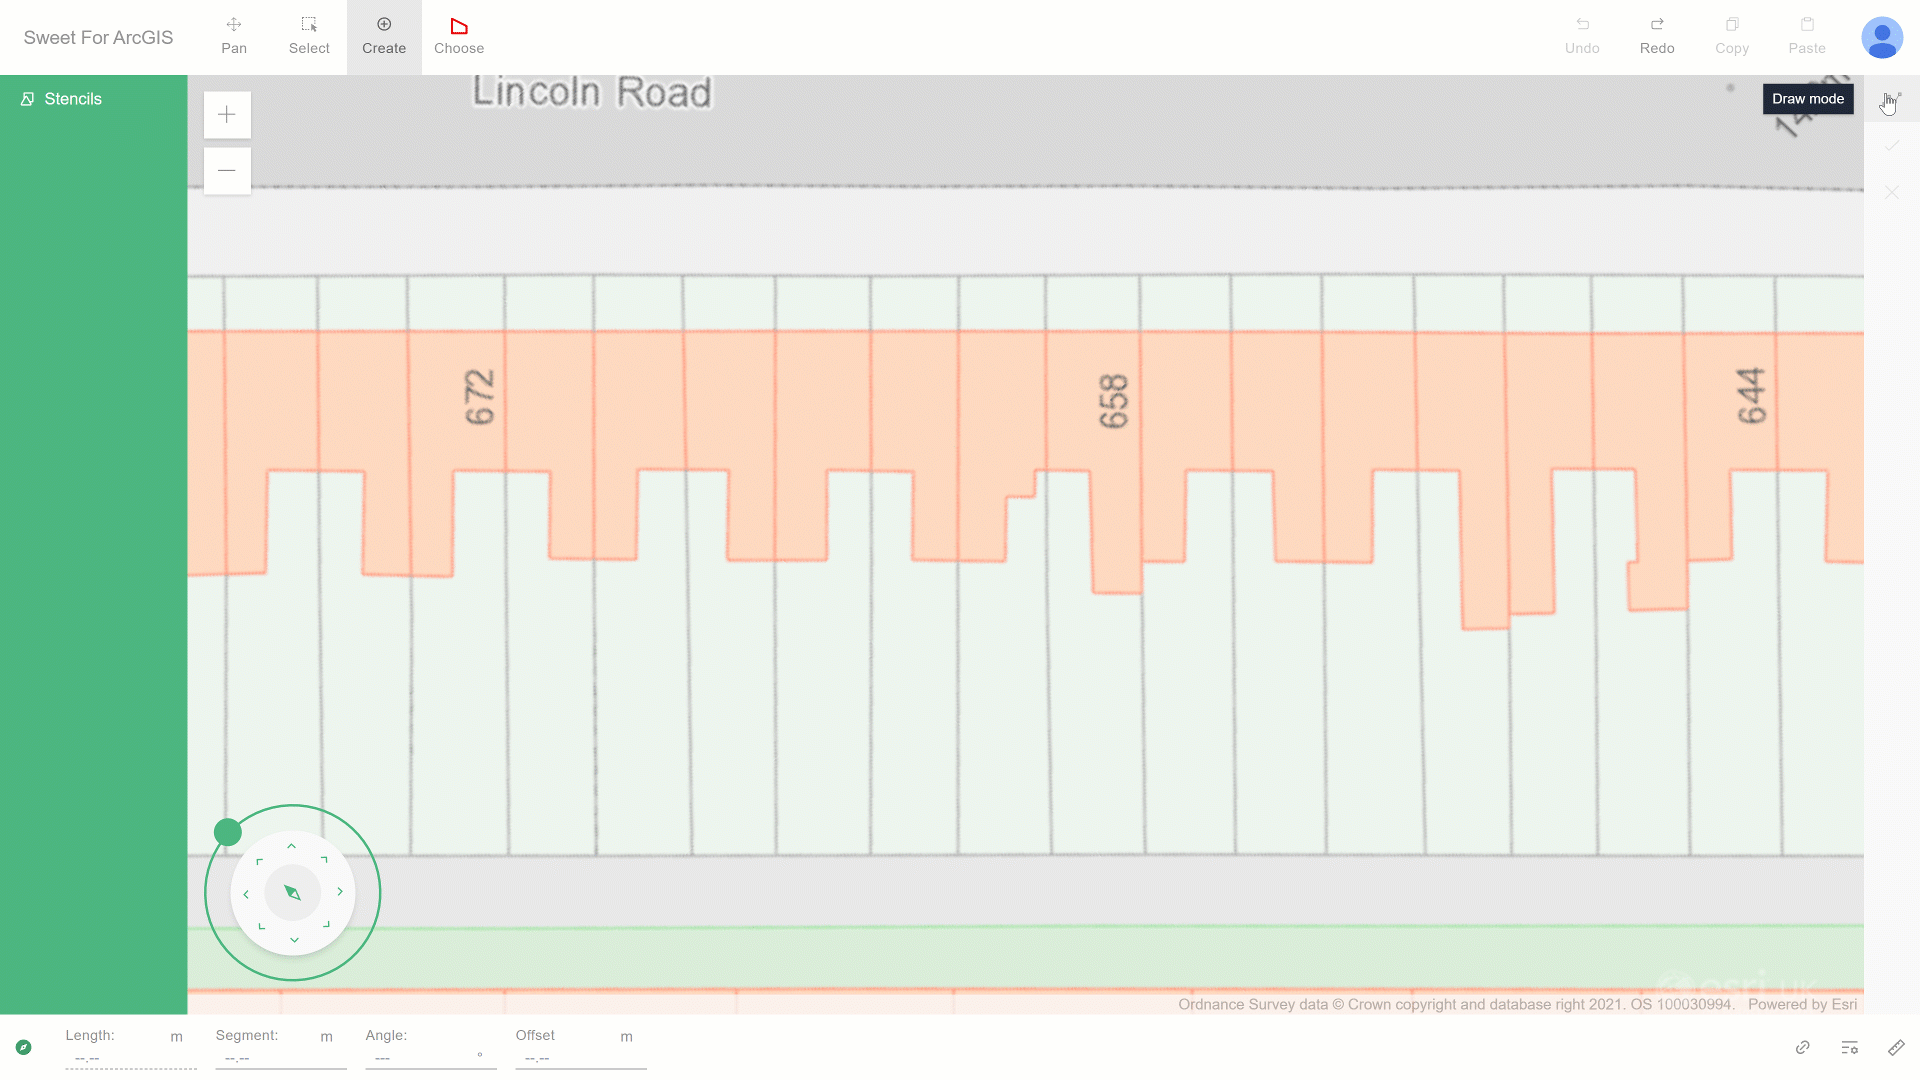
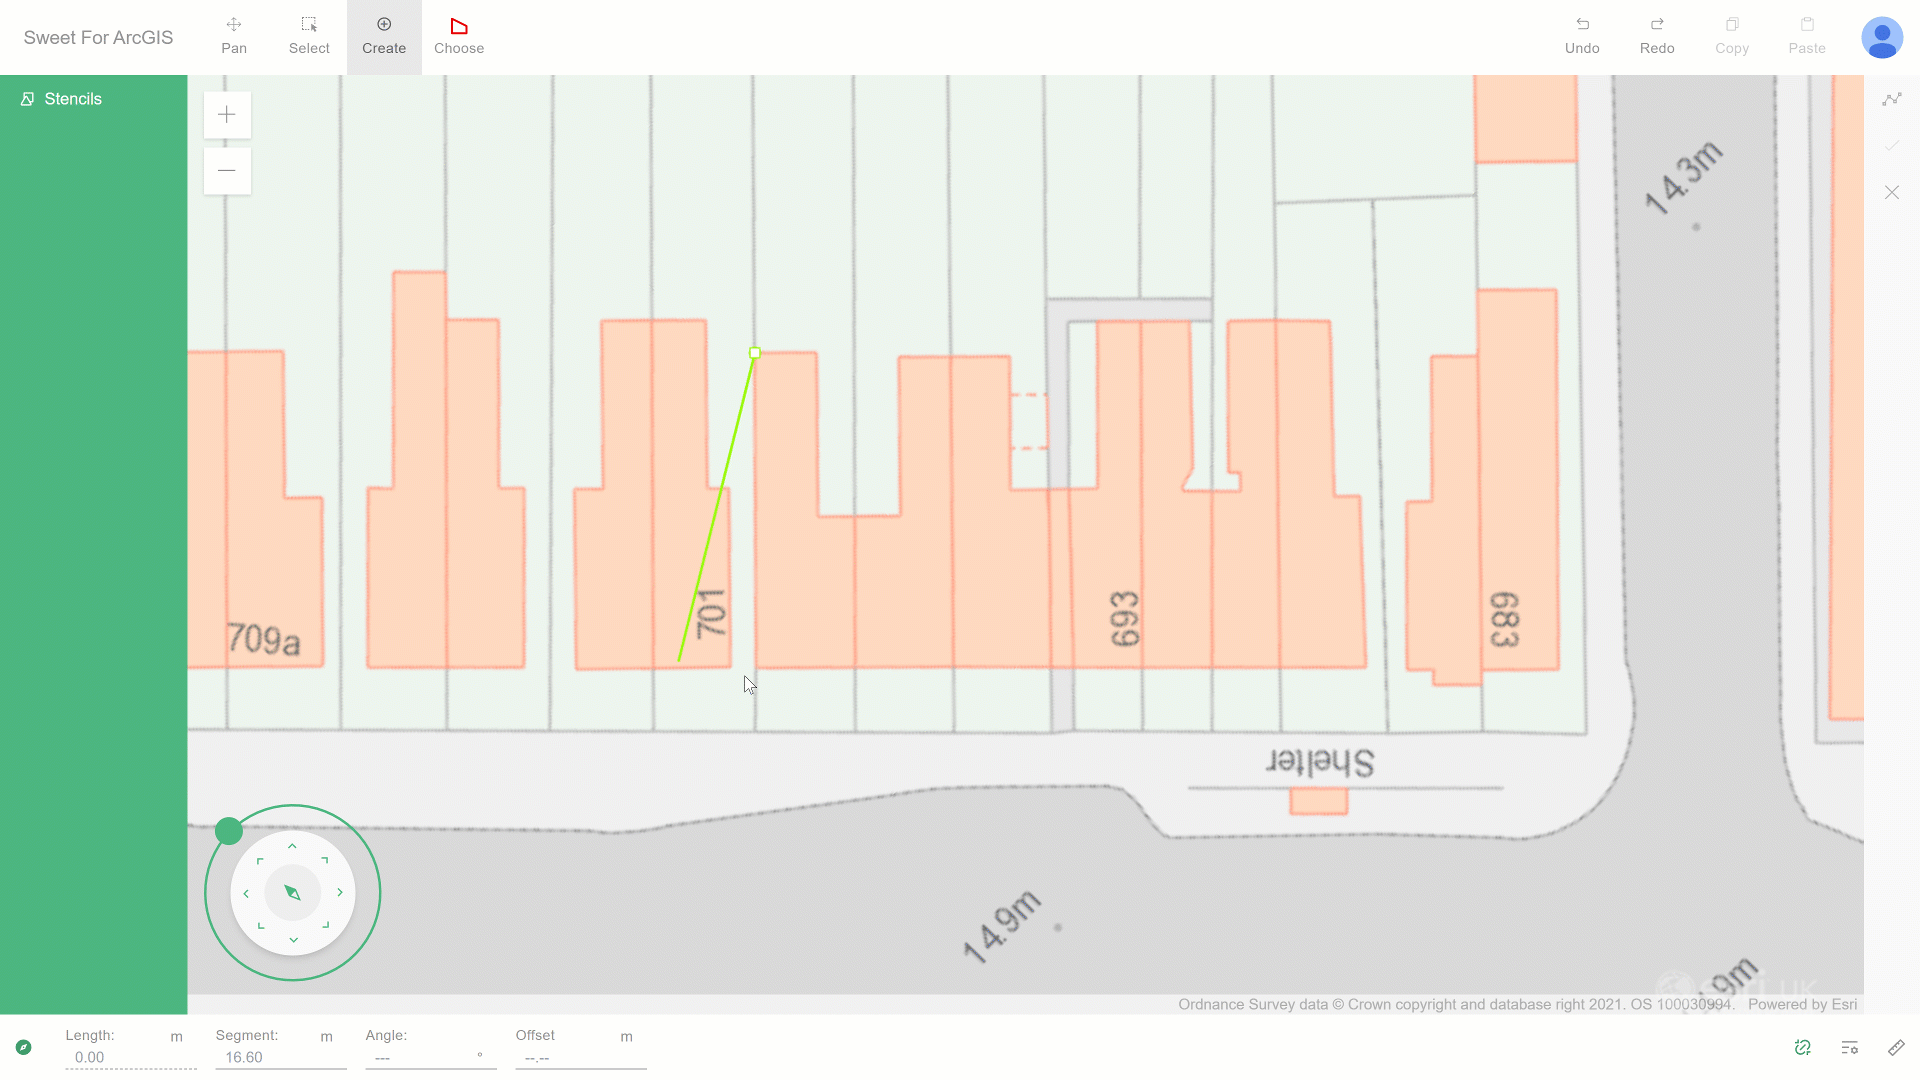
Next up is by far one of my favourites, Follow mode. Follow mode allows you to trace the vertices of other features to create edges for new features.
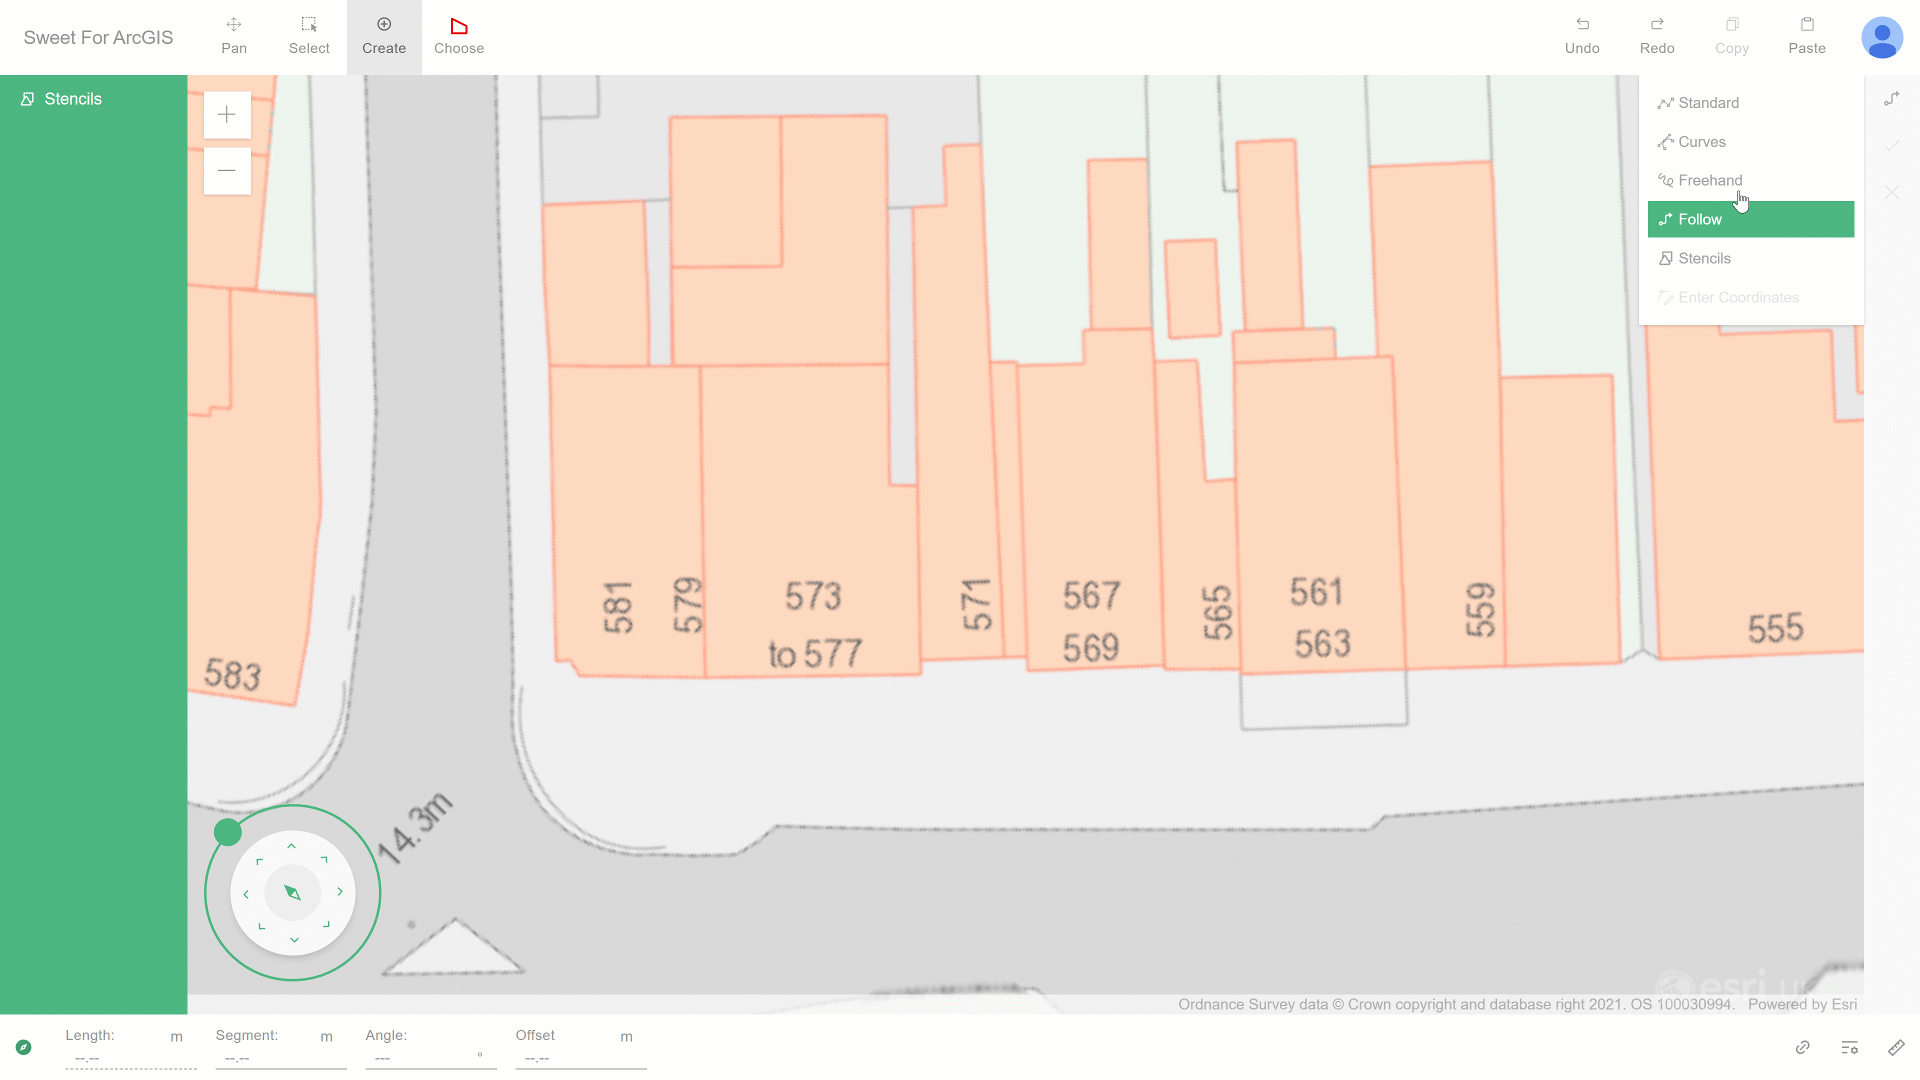
Using Follow mode to trace around buildings
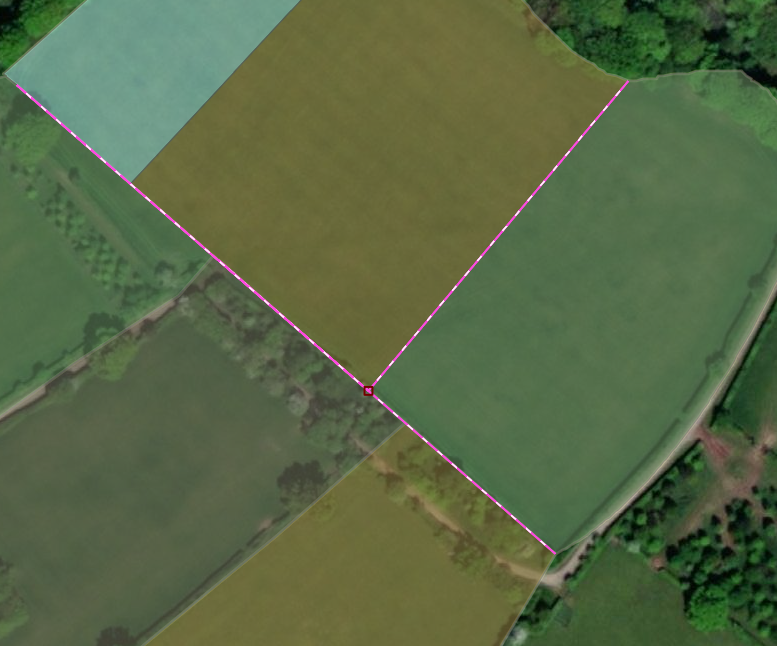
Before we move on, I can’t not mention curve mode. Curve mode allows you to drop a start and end point of a curve and then define the curvature with a third point. The really nice thing about curves is you can enable it using a keyboard shortcut (M to be precise).
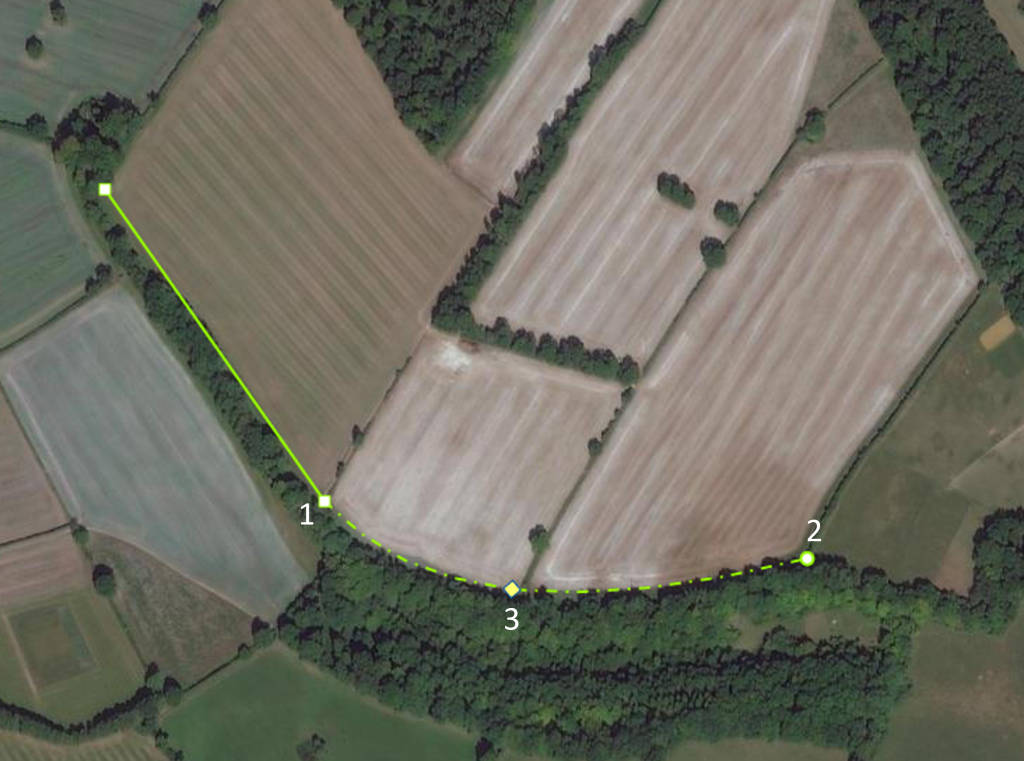
Using three points to define a curve using Curve mode
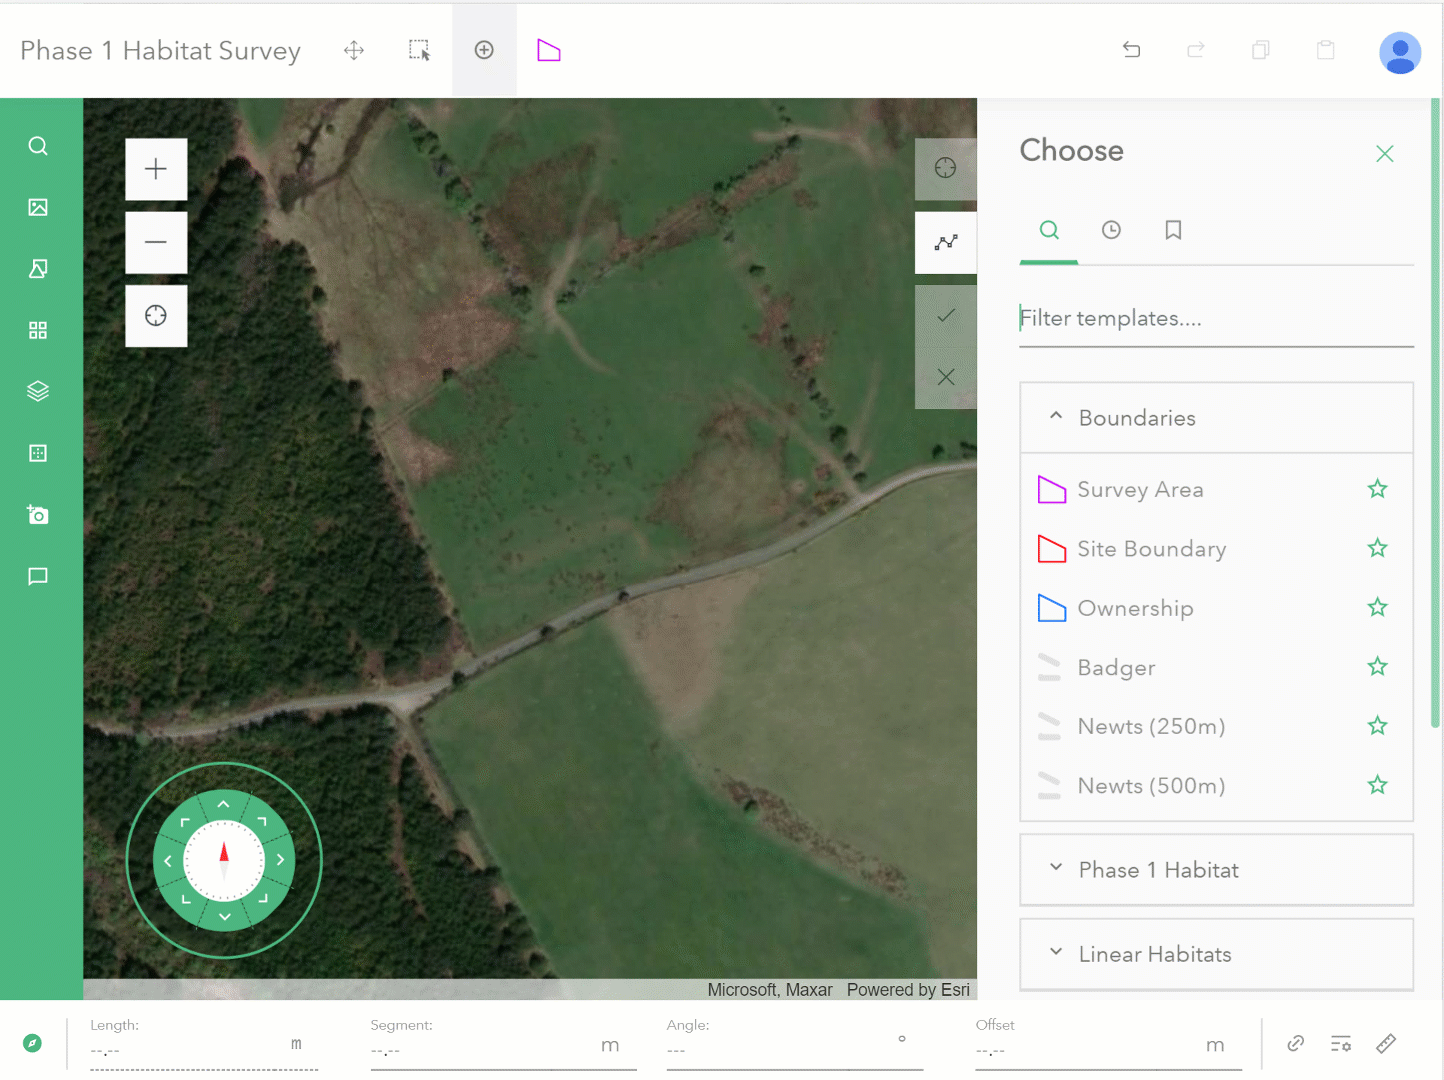
Coordinate input for features
Now this is technically a drawing mode, but I think it deserves its own section. Coordinate input for creating and editing features was one of the most requested features we had. Two years ago, we knew we had to add this in. To enable this drawing mode for users, app builders need to head into the builder and select the drawing options and enable Coordinate entry.
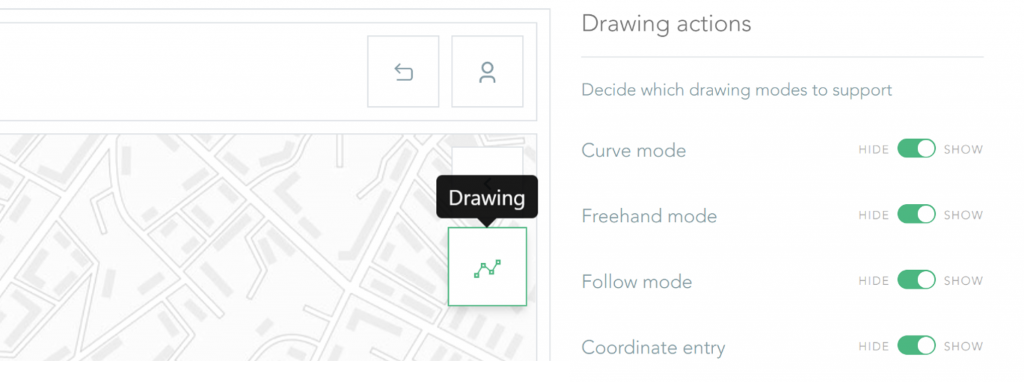
Enabling coordinate drawing mode in Builder
Now when users open their app they will see Enter Coordinates in the drawing modes menu and be able to enter individual coordinates or bulk enter multiple coordinates.
Entering multiple coordinates to create a feature
Hinting
We designed two modes of hinting: feature, and layer hinting.
Feature hinting help users understand when they are at right angles or parallel to a segment of the feature they are creating.
Hinting is enabled in the app by toggling snapping on in the bottom right hand area of the app. Once snapping is enabled when you create a line or polygon feature hinting will display when you are at right angles or parallel to other segments.
Sweet displaying layer hints at right angles and when parallel
Layer hinting is designed to show users when they are in line with features from different layers. It’s enabled by opening layer settings and turning on Show layer hints. This will show hints when you’re in line with other features on the map. Be prepared for lots of hinting if you have lots of features on your map.
Hints display when a vertex is aligned with other features
Copy and Paste between layers
Where would we without good old copy and paste. There are lots of different options for copy and paste in Sweet such as the ability to copy and shrink or grow the pasted feature. Another is to allow copy and paste between layers and even take the attributes if the data schemas match. Here I’m copying MasterMap data and pasting it into a Land Records feature service. The rules are topology rules that for the layers I’m pasting into still run so it removed the hole and merged the features together to create one whole land parcel.
Copy and Paste from MasterMap into another feature service
Hope you enjoyed this whirlwind introduction and maybe even start using some of my favourite lesser-known features of Sweet for ArcGIS in your editing. If you would like more hints and treats check out the rest of the Sweet treats blog series or if you’re new to Sweet and want to have a go and try out some of these capabilities get our 30 day free trial.