ArcPy Basics
I completed an Esri UK instructor-led ArcPy course a few months ago and have since been trying to keep what I was taught fresh in my mind. So I thought that writing this blog would be helpful and I’m hoping you will find it helpful too.
ArcPy is a Python module, used for ArcGIS processes. This blog specifically covers ArcPy with regard to ArcGIS Pro. The scripts are being written using PyCharm Community Edition, an Integrated Development Environment, but any IDE will do the trick.
Setting up ArcPy
Before you can start writing a script, you first need to link ArcGIS Pro to your IDE of choice. If you open ArcGIS Pro and navigate to Python you will then see arcgispro-py3 and a list of modules already included in this environment.
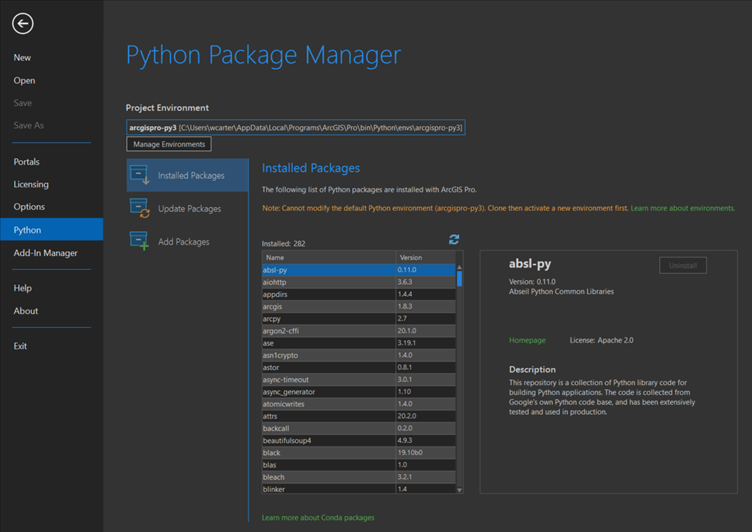
Note This environment cannot be modified. You will instead need to clone the default environment. I would recommend cloning the environment when you have plenty of time to spare…
Make a note of the environment path as you will need to find it when linking it to your IDE.
At this point, you’re nearly ready to start using ArcPy. Open up your IDE, which in my case is PyCharm.
Using ArcGIS Pro with an IDE
To get set up in PyCharm you start by going: File -> New Project ->
Then choose a location for your project and click on Previously configured interpreter, the … to the right and then, as you have cleverly made a note of the ArcPy environment path, you will quickly be able to find it and click on python.exe.
You are now ready to start using ArcPy.
The ArcPy Module
We are going to start off with a point creation script, marking the locations of some Scottish Castles.
The very first and most important thing is to
import arcpy
Otherwise, everything else you write will be useless nonsense!
This will make all functions and tools related to ArcPy available in the script you are writing. To use it within the script, you will write:
arcpy.
If you are familiar with Python modules then the structure of something like arcpy.env.workspace = will be simple enough. If not, let me explain.
So, as mentioned before arcpy allows us to access everything within the ArcPy module.
arcpy.env. is a continuation of this. We have now gained access to everything within the environment section of ArcPy.
Finally, in this example, arcpy.env.workspace will allow us to set our workspace to a desired location.
arcpy.env.workspace = r"C:\Users\wcarter\Documents\ArcPy"
I would then recommend assigning this workspace to a variable, such as ‘wksp’.
We are now ready to do something more exciting like creating a geodatabase (GDB).
Creating a geodatabase in ArcPy
In this next very quick section we will be creating a geodatabase (.gdb) and assigning it to a variable.
To do so, we’ll first type:
arcpy.CreateFileGDB_management
followed by:
(wksp, "castles")
So, what we are doing is using the tool CreateFileGDB_management to create a GDB with the parameters ‘wksp’, which is the variable that we created earlier, storing our environment workspace and the name of our new GDB ‘castles’.
We’ll then assign our new GDB to a new variable, so that it can be easily called later in the script. To do that, we’ll use an f string:
castlegdb = f"{wksp}\castles.gdb"
Dictionaries
Dictionaries can have several values per key and as such can be a useful way to store data. Arguably, for larger datasets than the one in this example, a script reading a CSV or database would be a better option. However, for the select few castles chosen for this script, hosting them in a dictionary is fine.
So, the key in the dictionary ‘castlesdict’ is the castle name. The values are the longitude, latitude and dates of when they were built. What we are going to do with this dictionary is map the points and populate the created feature layer with attribute data.
But one step at a time.
First of all, copy and paste the dictionary into your own script. Feel free to add more castles if you wish!
castlesdict = {"Edinburgh": [55.9485977,-3.2021022, 1103],
               "Stirling": [56.12291,-3.9477502, 1490],
               "Culzean": [55.354698,-4.7915147, 1792],
               "Balmoral": [57.0396675,-3.2314249, 1856],
               "Inverness": [57.4763275,-4.2277073, 1836],
               "Dunnotar": [56.9457796,-2.1993788, 1392]}
We then want to set our project’s spatial reference. This is an easy enough task:
WGS84 = arcpy.SpatialReference("WGS 1984")
What we are doing here is using the spatial reference function of ArcPy to assign WGS 1984 to the variable WGS84, as this saves us time in the future.
Now, to store any future outputs into our castles GDB, we will need to set our workspace environment as the GDB. I’ll let you figure that one out.
Hint: look at how we set it the previous time, but also remember that we have created a variable that stores our “castlegdb” path.
Creating a feature class
Now we are ready to create a points feature layer which will be stored in our previously created GDB.
To do this, we will use:
CreateFeatureclass_management()
This function takes a number of parameters. In our case these will be: workspace, name of the output, feature type (in this example it will be a point) and spatial reference.
So, the following line of code should look something like this:
arcpy.CreateFeatureclass_management(arcpy.env.workspace,
 "Castles", "POINT", spatial_reference=WGS84)
We have now created a feature class! But let’s not get too excited yet, there’s still nothing in it.
For that, we’ll need some data. In this example, the data is stored in our dictionary. But the code could be easily modified to pull data from another source, such as a text file or spreadsheet.
The function:
AddFields_management
Is used to add fields to our newly created feature class’s attribute table.
Adding multiple fields at once requires the name of the feature class followed by a list of lists. Each list requires details, such as a name, type, alias and length.
arcpy.AddFields_management("Castles",
                           [["Name", "Text", "Name", 20],
                           ["Year", "Short", "Year", 4],
                           ["Lat", "Float", "Lat", 9],
                           ["Lon", "Float", "Lon", 9]])
Now here comes a two-birds-with-one-stone section of code and the crescendo of the script; the final act. We are going to populate the attribute table and display the points on the map using our latitude and longitude.
with arcpy.da.InsertCursor('Castles', ["Shape@", "Name", "Year", "Lat", "Lon"]) as icur:
    for key,value in castlesdict.items():
        pGeom = arcpy.PointGeometry(arcpy.Point(value[1], value[0]), WGS84)
        row = (pGeom, key, value[2], value[0], value[1])
        icur.insertRow(row)
So let’s go through this last section of code line by line.
with arcpy.da.InsertCursor('Castles', ["Shape@", "Name", "Year", "Lat", "Lon"]) as icur:
We are finding the fields of our feature class ‘Castles’ and assigning them to the temporary variable ‘icur’. The da stands for ‘data access’. You can read more about this module here. The InsertCursor function of the data access module is used for adding rows of data.
for key,value in castlesdict.items():
Creates a for loop that will go through our key and values in the ‘castlesdict’ dictionary. Be sure to use ‘items to grab both the key and values.
pGeom = arcpy.PointGeometry(arcpy.Point(value[1], value[0]), WGS84)
PointGeometry and Point is then used to grab our longitude (value[1]) and latitude (value[2]) from our dictionary.
row = (pGeom, key, value[2], value[0], value[1])
We are then assigning a variable to all the data that we are going to insert, row by row, into our feature class. These are geometry, name of the castle, year, latitude and longitude.
Finally, we insert them into the feature class:
icur.insertRow(row)
And that’s it: we have created a geodatabase, created a feature class that has been added to it, added data to the feature class and plotted it onto a map.
The following, if you’re interested (perhaps put the kettle on and have a breather first!), are a couple of basic geoprocesses that can be applied to the points. This first blog won’t go overboard with geoprocessing, just some basic analysis to begin with.
Geoprocesses and The Living Atlas
The next step is to access a feature class from Living Atlas and convert it to a usable feature class that we can use in our project.
scotCounties = arcpy.FeatureClassToFeatureClass_conversion(
    "https://services.arcgis.com/P3ePLMYs2RVChkJx/arcgis/rest/services/GBR_Boundaries_2019/FeatureServer/4",
    "",
    "ScottishCounties",
    "ID LIKE 's1%'")
(You’ll have to put this all on one line)
Feature class to feature class does what it says on the tin. It converts a pre-existing feature class to a brand new one. Depending on what parameters you set, it will modify the feature class.
For the example above, we have accessed the ‘counties’ feature layer of the GBR_Boundaries_2019 feature class. We have then called it ‘ScottishCounties’ and as all the Scottish county ID’s in the attribute table start with ‘s1’, using a bit of SQL allows us to create a new feature class for all counties that contain ‘s1’ in the ID.
So, the output of this is a feature class containing all Scottish counties.
To finish off, we will perform a spatial join between Scottish counties and castles.
arcpy.SpatialJoin_analysis(
    f"{castlegdb}/Castles",
    scotCounties,
    f"{castlegdb}/castlescounties",
    "#", "#", "#", "CLOSEST")
Here we are using the spatial join ArcPy tool and using an f string to find the castles feature layer. We then provide the tool with the feature layer to join Castles to and the name of the output to be created from this join. There are a number of parameters we can include. The hashes have skipped over join operation, join type and field mapping’. The only parameter wanted is the match option, with this being ‘CLOSEST’. This will join each of the two feature classes’ features to whichever are closest to one another.
When we run this in our ArcGIS Pro project, we should now see an output called ‘castlecounties’. If we open up the attribute table, there will be the two attribute tables of ‘Castles’ and ‘scotCounties’ combined, showing which castles are in what county.
Here is the whole script:
import arcpy

arcpy.env.workspace = r"C:\Users\wcarter\Documents\ArcPy"
wksp = arcpy.env.workspace
arcpy.env.overwriteOutput = True
desc = arcpy.Describe(r"C:\Users\wcarter\Documents\ArcPy")

fc = "C:/Users/wcarter/Documents/ArcPy/Practice.gdb"

#arcpy.CreateFileGDB_management(wksp, "castles")

castlegdb = f"{wksp}\castles.gdb"

castlesdict = {"Edinburgh": [55.9485977,-3.2021022, 1103],
               "Stirling": [56.12291,-3.9477502, 1490],
               "Culzean": [55.354698,-4.7915147, 1792],
               "Balmoral": [57.0396675,-3.2314249, 1856],
               "Inverness": [57.4763275,-4.2277073, 1836],
               "Dunnotar": [56.9457796,-2.1993788, 1392]}

WGS84 = arcpy.SpatialReference("WGS 1984")

arcpy.env.workspace = castlegdb

# For each coordinate pair, populate the Point object and create a new
# PointGeometry object

arcpy.CreateFeatureclass_management(
  arcpy.env.workspace,
  "Castles",
  "POINT",
  spatial_reference=WGS84)

arcpy.AddFields_management("Castles",
                           [["Name", "Text", "Name", 20],
                           ["Year", "Short", "Year", 4],
                           ["Lat", "Float", "Lat", 9],
                           ["Lon", "Float", "Lon", 9]])

with arcpy.da.InsertCursor(
  'Castles', ["Shape@", "Name", "Year", "Lat", "Lon"]) as icur:
    for key,value in castlesdict.items():
        pGeom = arcpy.PointGeometry(
          arcpy.Point(value[1], value[0]), WGS84)
        row = (pGeom, key, value[2], value[0], value[1])
        icur.insertRow(row)

scotCounties = arcpy.FeatureClassToFeatureClass_conversion(
  "https://services.arcgis.com/P3ePLMYs2RVChkJx/arcgis/rest/services/GBR_Boundaries_2019/FeatureServer/4",
  "", "ScottishCounties", "ID LIKE 's1%'")

arcpy.SpatialJoin_analysis(
  f"{castlegdb}/Castles",
  scotCounties,
  f"{castlegdb}/castlescounties", "#", "#", "#", "CLOSEST")
Today we have covered a bit about connecting ArcGIS Pro to an IDE, setting up a workspace, creating a geodatabase, some point geometry usages and a little bit of geoprocessing.
I hope this has been helpful and feel free to continue with this script and have a play around with it. Next, I’m going to look into using polygons and some more advanced geoprocessing.
For more ArcPy information, these websites should prove to be very useful:
https://pro.arcgis.com/en/pro-app/latest/tool-reference/main/arcgis-pro-tool-reference.htm
https://pro.arcgis.com/en/pro-app/latest/arcpy/main/arcgis-pro-arcpy-reference.htm
If you want to get develop your python skills with the support of a trainer there are a one day introductory course or an in depth three day course on using python in ArcGIS Pro.