The use of data warehouses to store and analyse large amounts of information within organisations is growing. Many of those organisations are wanting to better understand how this can work with their spatial data and in particular, ArcGIS.
ArcGIS is positioned as a system that can analyse and visualise data in data warehouses, specifically Snowflake, Amazon Redshift and Google BigQuery. ArcGIS client apps do not edit data in data warehouses.
I wanted to use the Stats19 dataset around Cambridgeshire and Northamptonshire and see how it could be used in Snowflake with all the various ArcGIS clients that support Snowflake.
There is lots of information online about what you can do with ArcGIS and data warehouses and what the capabilities are, but how do you get started?
I will take you through the following:
- Basic Snowflake setup
- Getting data into Snowflake using ArcGIS Data Interoperability / FME
- Using ArcGIS Data Pipelines to pull Snowflake data into ArcGIS Online on a schedule
- Connecting to Snowflake and viewing the data in ArcGIS Pro
- Publishing an ArcGIS Enterprise feature layer referencing Snowflake data
- Analysing Snowflake data in ArcGIS Insights (Enterprise)
Basic Snowflake Setup
For this article I created a 30-day trial Snowflake subscription and chose AWS as the cloud provider in the Europe (London) region.
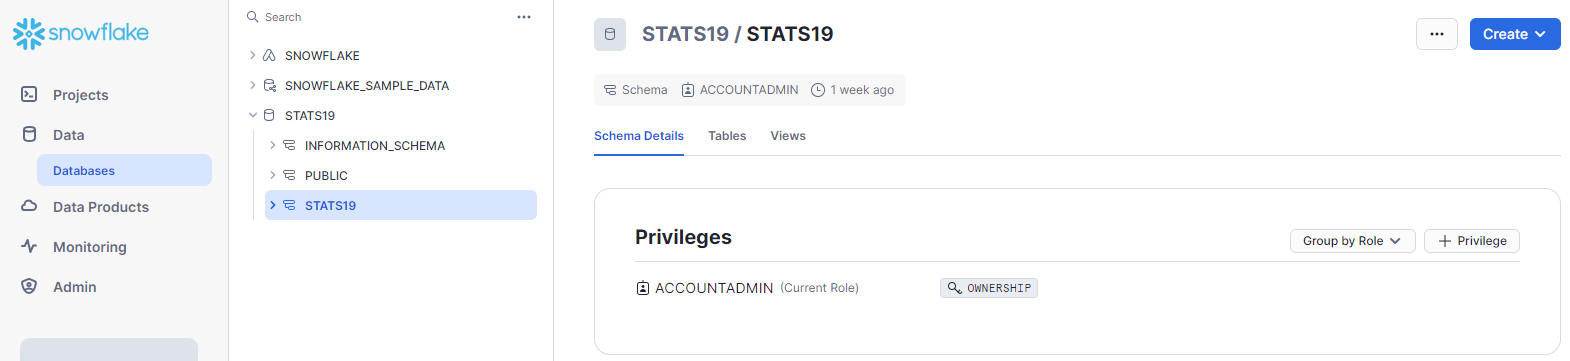
First, I had to create a database and a schema. In this case I created a database called STATS19 and a schema called STATS19 simply using the Snowflake interface with default options.
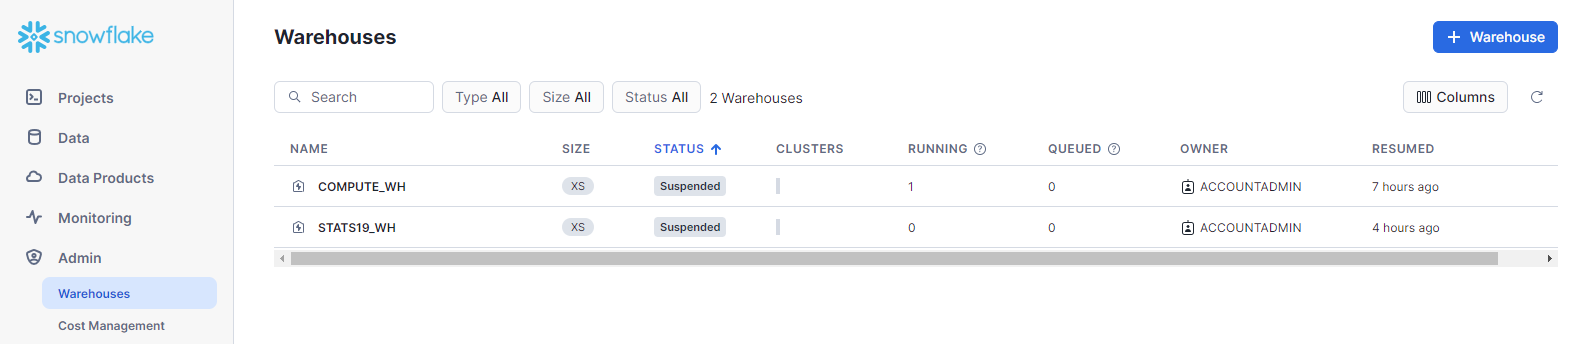
I then created a Standard / X-Small Warehouse to do the work called STATS19_WH.
At this point you can take a note of your service name on the Admin -> Accounts tab using the “…” -> Manage URLs option as you will need this later when connecting from other clients.
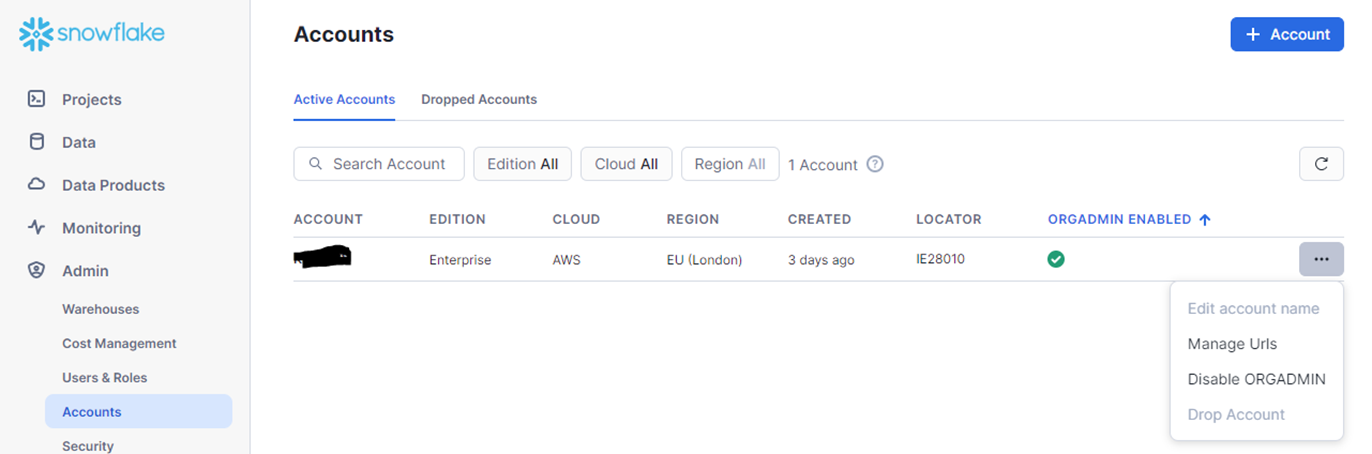
This will be in the form https://<yourservice>.snowflakecomputing.com
Getting data into Snowflake using ArcGIS Data Interoperability extension / FME
ArcGIS Data Interoperability extension / FME allows you to extract, transform and load (ETL) your spatial data using simple models without writing any code.
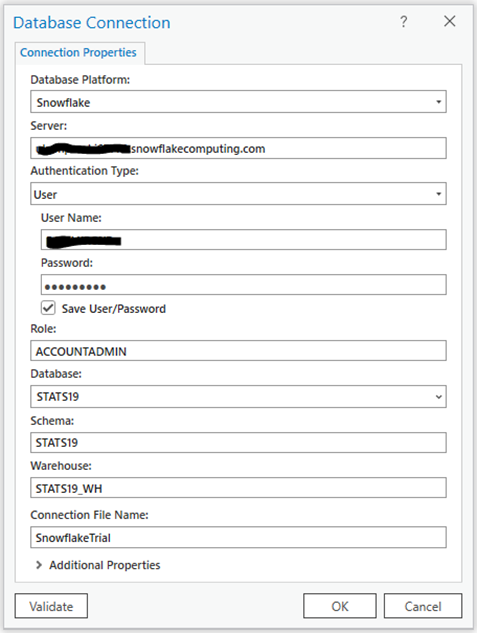
Create a database connection by going to Tools -> FME Options and choosing Database connections, then add a new connection to your Snowflake database, noting that:
- Account name is the first part of the URL before .snowflakecomputing.com, and without the https://
- You create the connection as the owner of the database/schema you created
Add a Writer to your workbench for the Snowflake database, choosing the connection you created earlier and choose GCS_WGS_1984 as the coordinate system. Note: ArcGIS currently only supports the Snowflake Geography data type, not Geometry (which was added to Snowflake in early 2023).

Add a Reader to your spatial data. In my case I pointed the reader at a File Geodatabase. Use the Parameters -> Tables dropdown to select the table(s) you want to use and choose the relevant coordinate system for the source data.
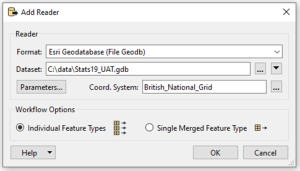
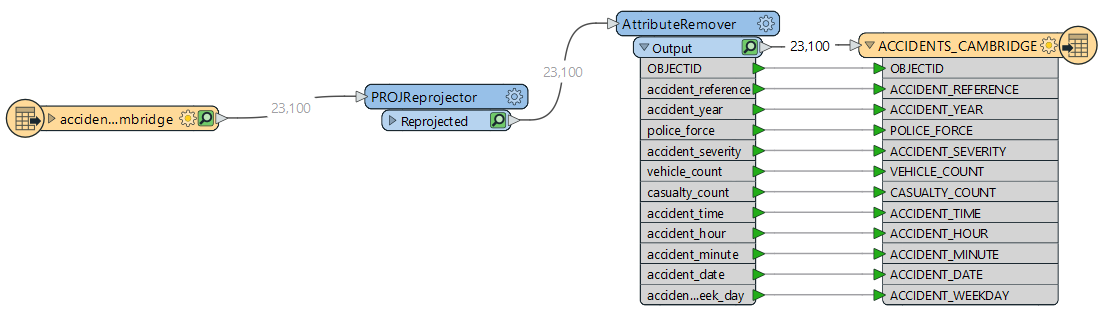
Add a PROJReprojector transformer to project the data from BNG (27700) to WGS84 (4326) as ArcGIS only supports the Geometry spatial type in Snowflake in WGS84.
Add any other transformers you want – I added an AttributeRemover to get rid of several attributes I was not interested in.
Connect up the Reader, Transformer(s) and Writer.
Rename the output table to have an UPPERCASE name, otherwise ArcGIS Pro won’t be able to work with it later.
Also rename all the fields to be UPPERCASE too, otherwise it doesn’t work well when publishing to ArcGIS Enterprise.
Note that Snowflake does allow the use of lowercase table names and column names but they usually require to be surrounded by “ when queried by clients, so easiest and safest to stick with all UPPERCASE.
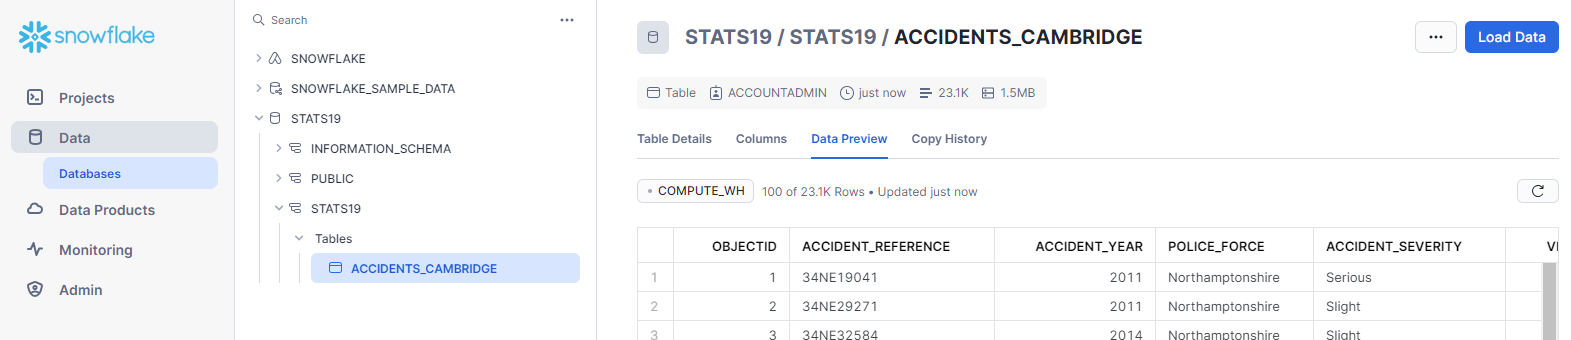
Run the model to load your data into your Snowflake database.
In Snowflake you can now see the newly loaded table and data.
Using ArcGIS Data Pipelines to ingest the data into ArcGIS Online
ArcGIS Data Pipelines is a capability within ArcGIS Online which allows you to ingest spatial data into your organization using a model builder interface and run that on a schedule.
Note that ArcGIS Data Pipelines consumes credits whilst the UI is open, or when the Pipelines are running as part of a schedule.
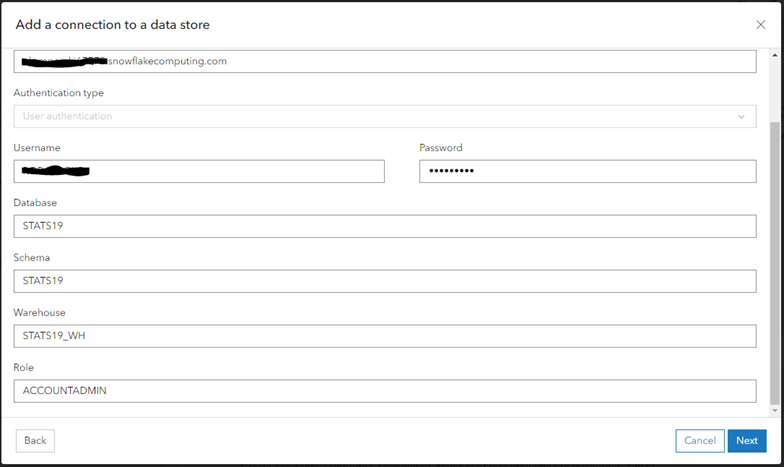
In ArcGIS Data Pipelines, add a data store for your Snowflake database noting that:
- Server is your service URL without the https:// prefix
- you should connect as your owner user
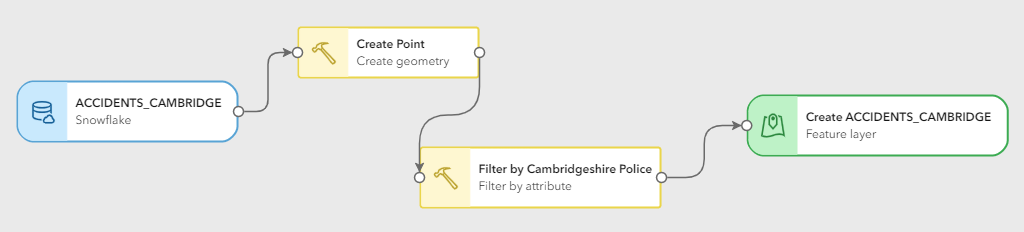
Add an Input, by selecting Snowflake as the input type, then choosing your new Snowflake data store item and typing in the table name you want to import.
Add a tool to create a geometry field specifying the format as GeoJSON and the Snowflake table geometry field GEOG and Spatial Reference WGS 1984.
Optionally add other tools to process the data as required.
Create an Output Feature Layer for the resulting features to get copied into, and choose Create as the output method.
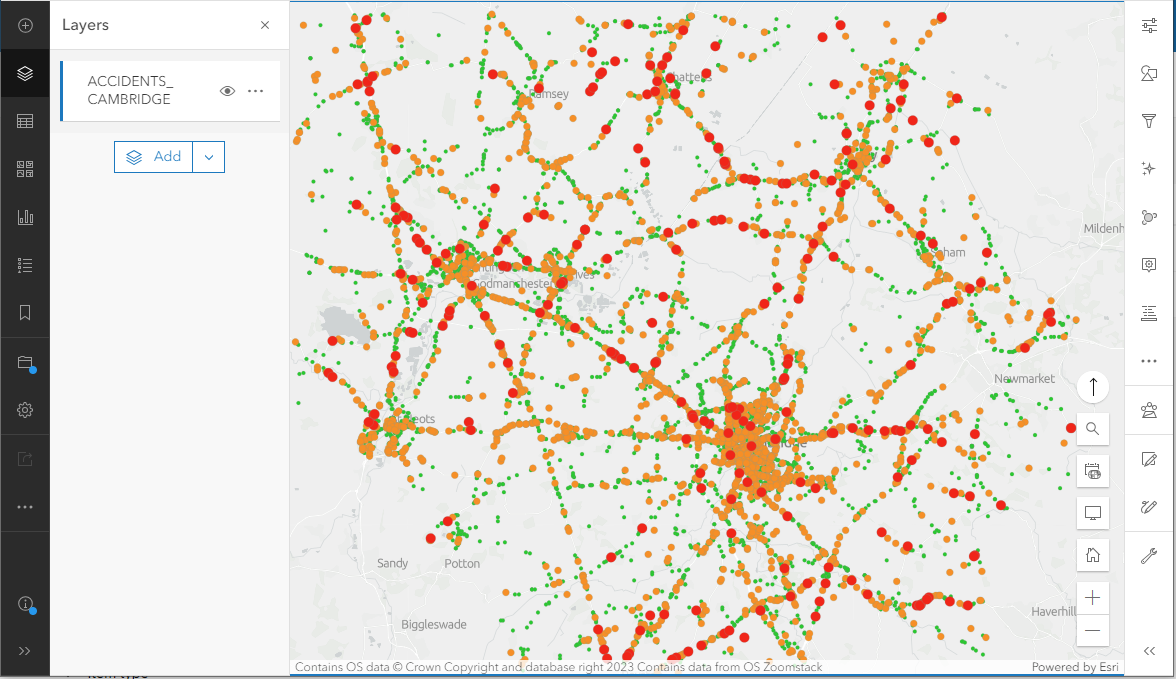
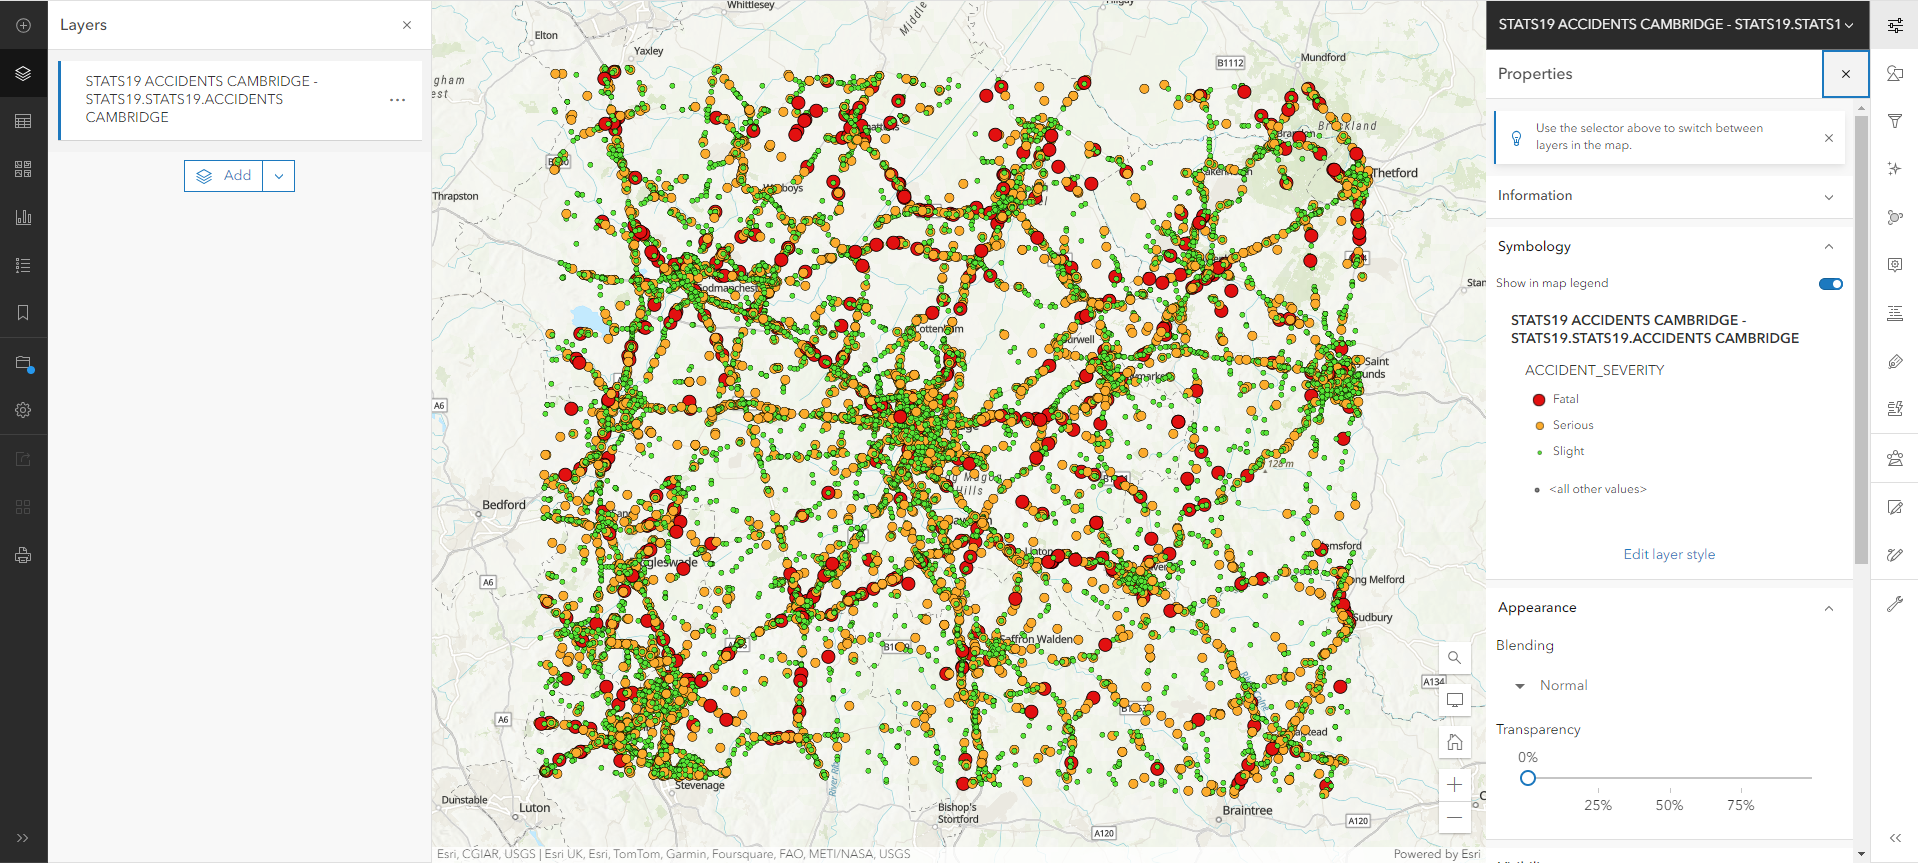
Run the data pipeline and then add the new feature layer to the ArcGIS Online Map Viewer.
Updating the data
Once you have created your feature layer you can update the data by altering the data pipeline output and choose Replace as the output method. Run the data pipeline again.
You can also create a scheduled task for the pipeline:
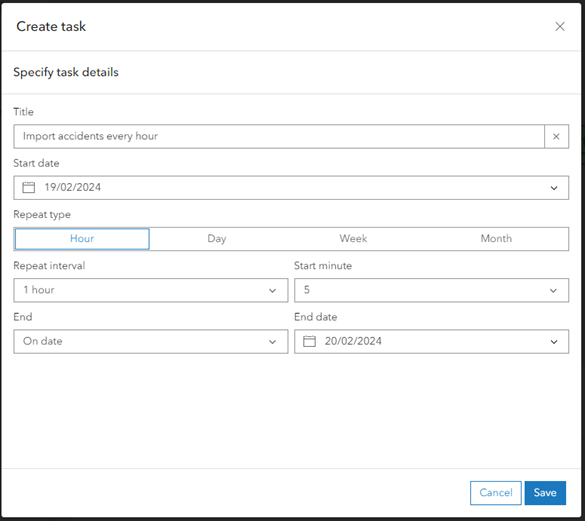
Connecting to Snowflake from ArcGIS Pro
First download and install the Snowflake ODBC driver: https://developers.snowflake.com/odbc/
Next create a new database connection in ArcGIS Pro.
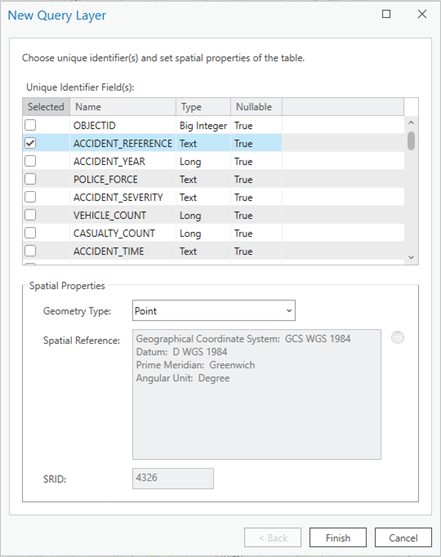
Drag the table from the Snowflake connection onto the map and the New Query Layer dialog will appear. Choose the unique identifier field(s), in my case ACCIDENT_REFERENCE, and click Finish.
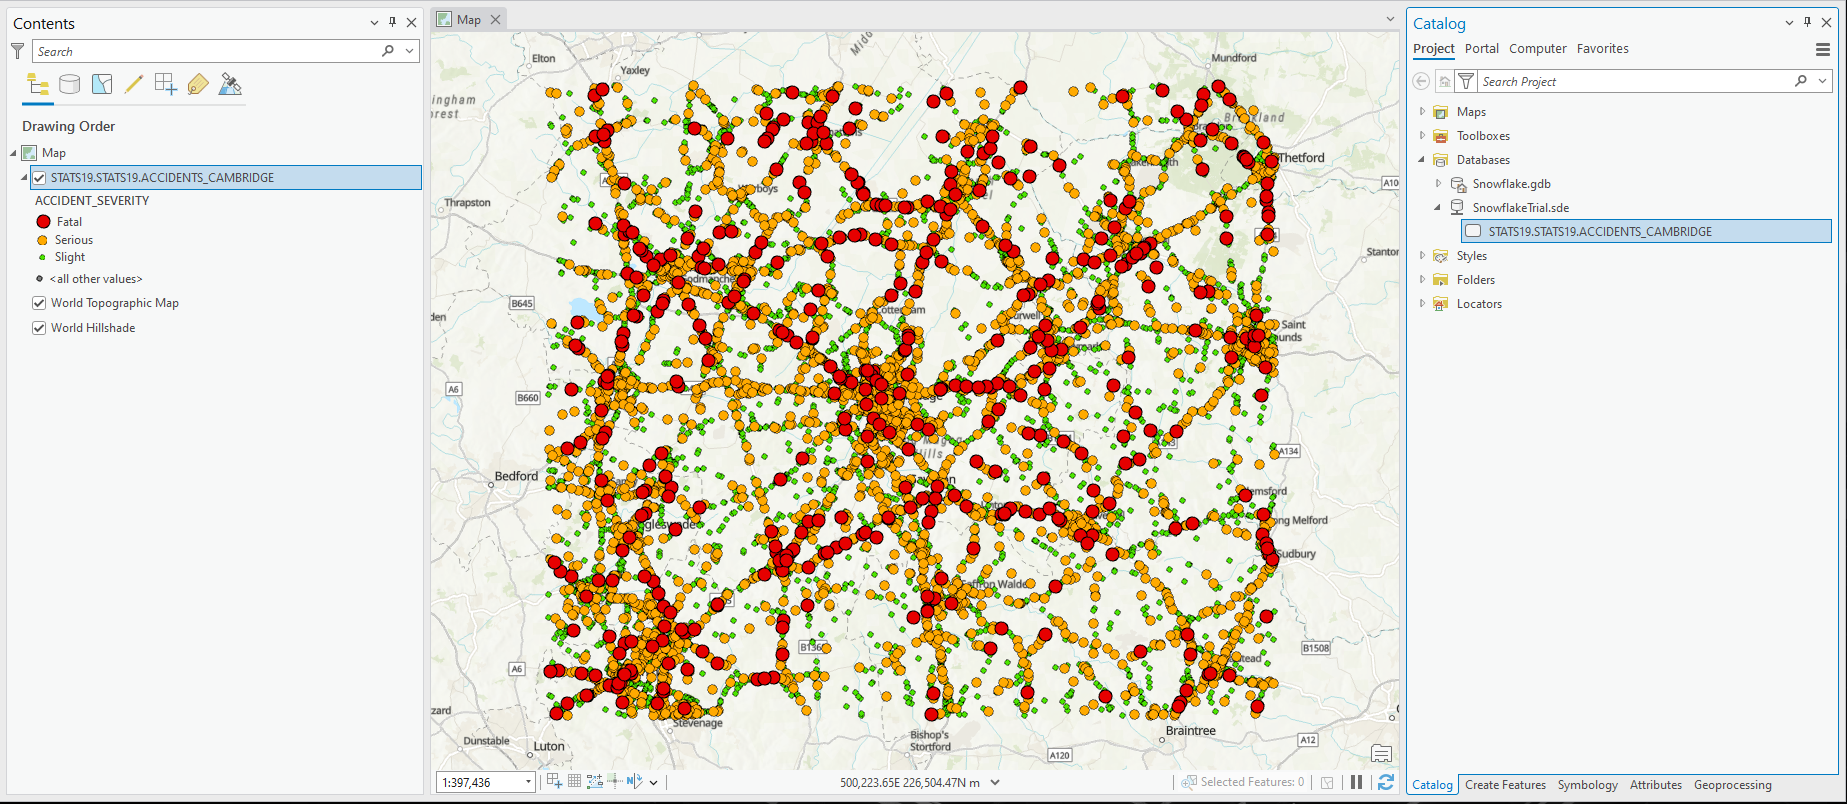
You can now see the features on the map and setup the symbology.
Connecting to Snowflake through ArcGIS Enterprise
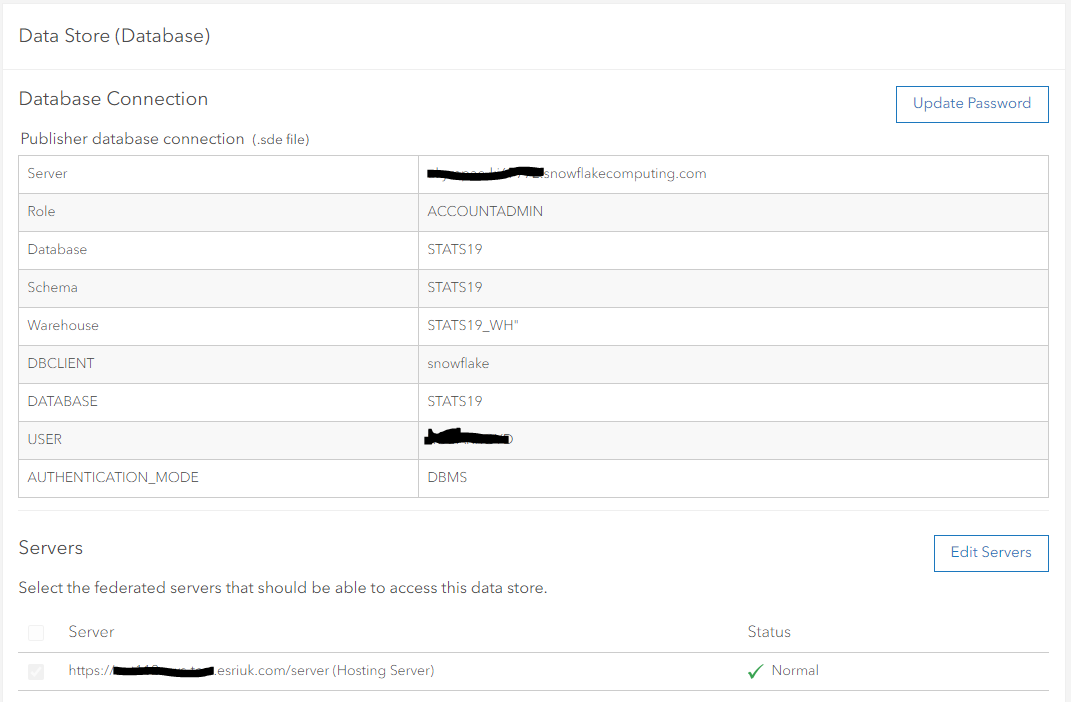
First, you’ll need to register the Snowflake database connection so that ArcGIS Server knows where to get the data from when the service is published. In Portal, in your content:
- add a new Item of type Data store -> Database -> Cloud data warehouse
- drag your Snowflake sde connection file that you used in ArcGIS Pro onto the dialog
- select the ArcGIS Servers you want to use that connection
- give it a name
Use your existing ArcGIS Pro map to publish the layer as a web layer with “reference registered data” chosen. Note: you will have issues if your table name or field names are not UPPERCASE.
This creates a view in the Snowflake data warehouse and publishes the service against that.

You then have an ArcGIS feature layer in your content you can use like any other feature layer.
Connecting from ArcGIS Insights (Enterprise)
Ensure you have a valid license for ArcGIS Insights in your Portal and you are an admin (so that you can administer ArcGIS Insights).
Download the Snowflake JDBC driver from: https://docs.snowflake.com/en/developer-guide/jdbc/jdbc-download
Install that driver via the Insights web app -> Settings -> Connector types page.
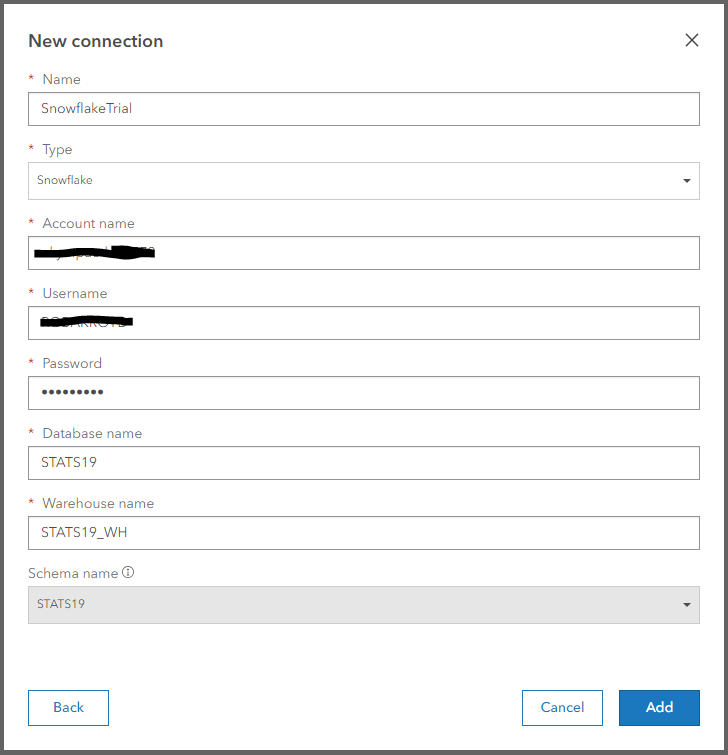
Go to Insights home page -> Connections -> New Connection -> Database.
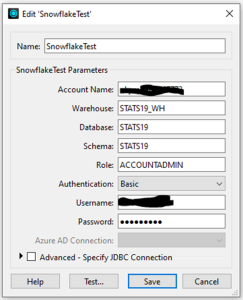
Choose Snowflake and enter the connection details.
Create a new Workbook and in the Add to page dialog, select Databases -> Your Snowflake connection -> Any table(s) you want to use.
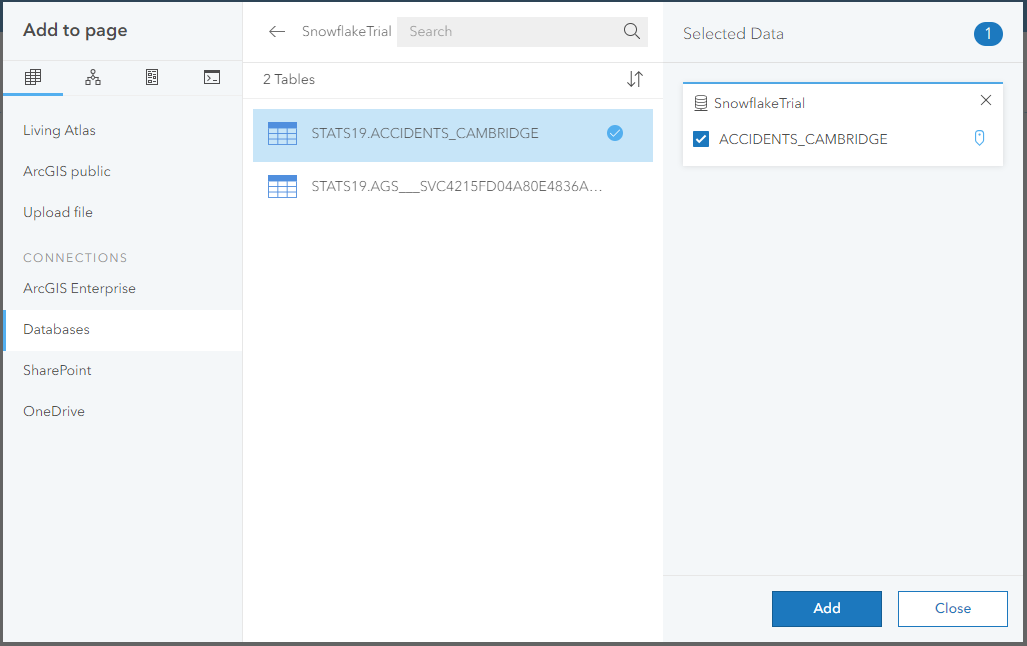
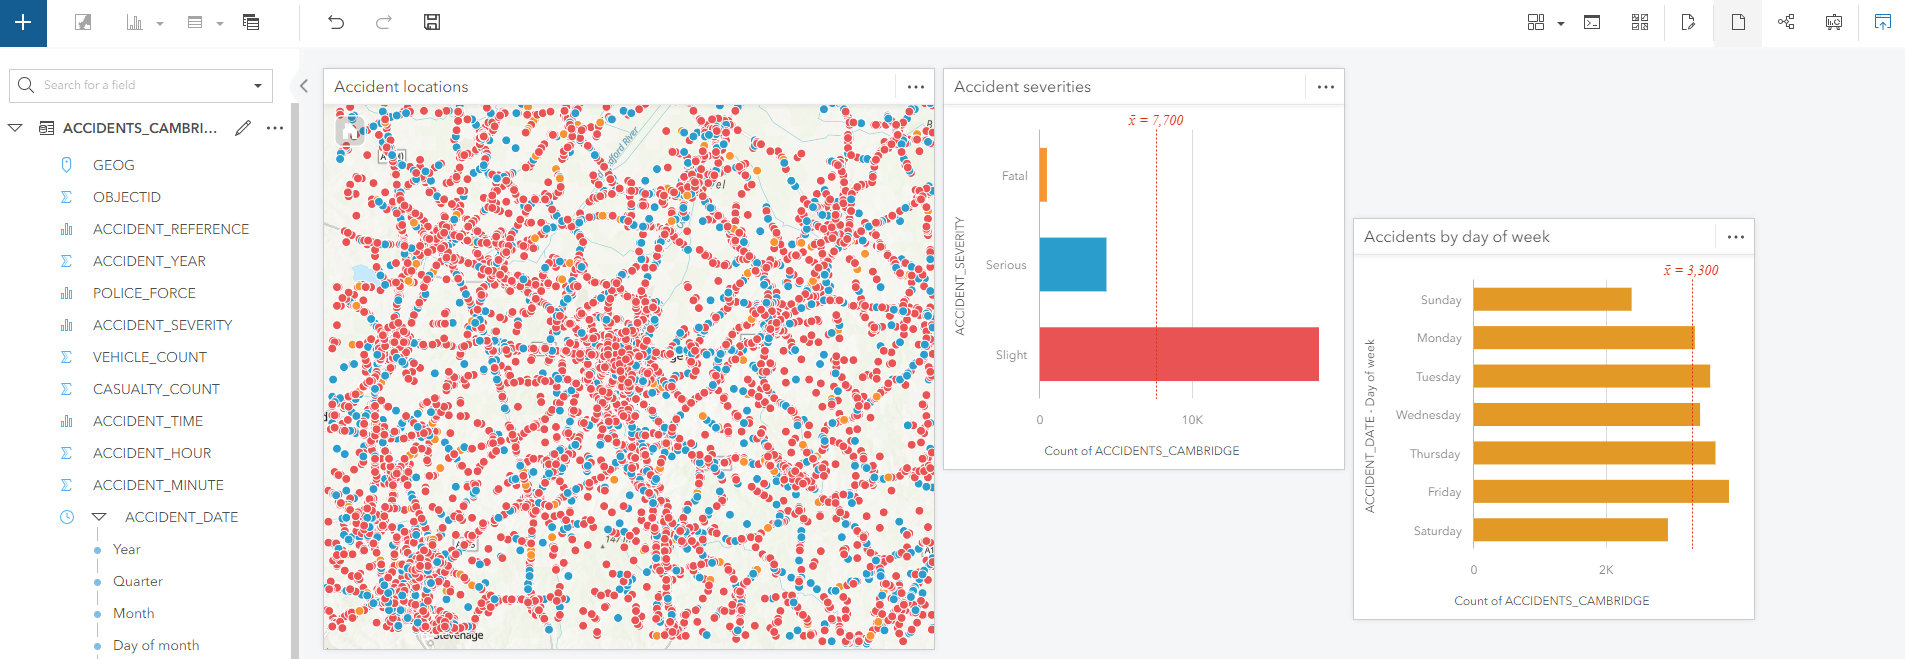
Drag the relevant data onto the cards as you need.
Findings and Summary
There are a few things that could catch you out, but if you follow this guide then you won’t make the same mistakes along the way as I did – all of which you can discover if you read all of the documentation, but there is a lot to read and spread over many places. The key things that I found were:
- Use the GEOMETRY spatial data type with WGS84 in Snowflake.
- Use UPPERCASE table names and field names in Snowflake.
- Using ArcGIS Data Interoperability / FME to write your data into Snowflake is straightforward.
I hope you found this useful. You can see that once you get started, it is straightforward to use spatial data in Snowflake with ArcGIS, whether it’s ArcGIS Pro, ArcGIS Enterprise, ArcGIS Insights (Enterprise) or ArcGIS Online via ArcGIS Data Pipelines.