If you have used ArcGIS Pro then you have probably used the geoprocessing toolbox. However, do you find yourself using the same sequence of tools? Or do you need to share workflows with colleagues? Or better yet, schedule tools to run at specific times? Yes that’s right! You could be having a cuppa and still produce valuable data!
I am going to show you how to weave your geoprocessing together with the ModelBuilder, and provide a few tricks of the trade along the way.
Getting started
You have a bunch of points and need them counted within a boundary dataset, and then converted to an appropriate format to upload to ArcGIS Online? Don’t tell me you’re going to run each tool individually every time you need this workflow…Automate it!
For this example there is sample data if you want to follow along. I will insert .KML data on bus stops & charging points. Then I will count it to Lower Layer Output Areas (LSOA). Be sure to download the LSOA as a shapefile and rename it to something that makes sense!
The data currently isn’t useful and is not in a favourable format. Time to fix that!
 Go to the Analysis ribbon and then the Geoprocessing section. Click on ModelBuilder:
 You will now have a new blank model viewer. On the Analysis tab again, click on Tools. This will open the Geoprocessing menu which is where I can drag & drop tools to the model.
First, I will convert some data to shapefiles. Type in Feature To Point and drag the first result into the viewer. Right click the Feature To Point box and select the Bus Stops layer as the input. There is now a blue circle reflecting data input. A yellow box for the tool and a green circle for the output file: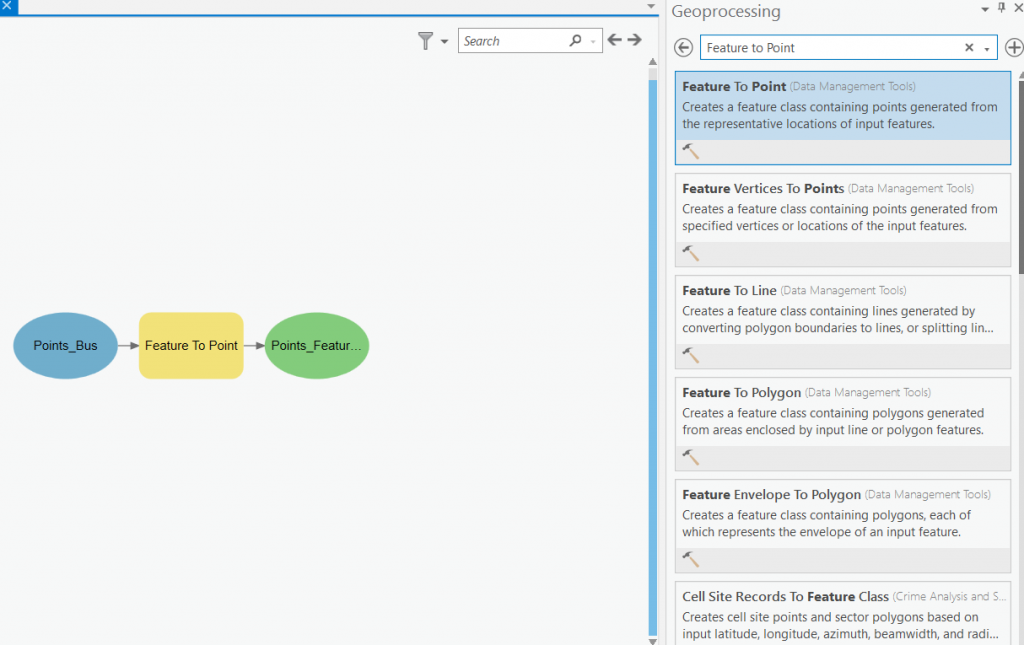
Finishing your first Model
Using the same drag and drop approach, I can insert the Feature to Point tool again for the Electric Charging Points layer. Things are already looking messy… Hit the Auto Layout button!
Now I just need to plug in a few new tools. Type in Aggregate Points and add the GeoAnalytics Desktop Tools version. Right click and set the point layer as Bus Stops and the polygon layer as LSOA. Next, I merge the two-point layers, but because of the aggregation tool I have two datasets with a Count field. If I want to maintain separate counts of Electric Charging Points and Bus Stops I need to give unique names to the Count fields. To do this I add the Alter Field tool. Use this tool twice, on both your point layers, using an appropriate Field Name and Alias.
After this I add the Merge tool and select the new outputs as inputs. Right click on the output (green circle) after the merge tool and toggle Add to Display. Your model will look something like this: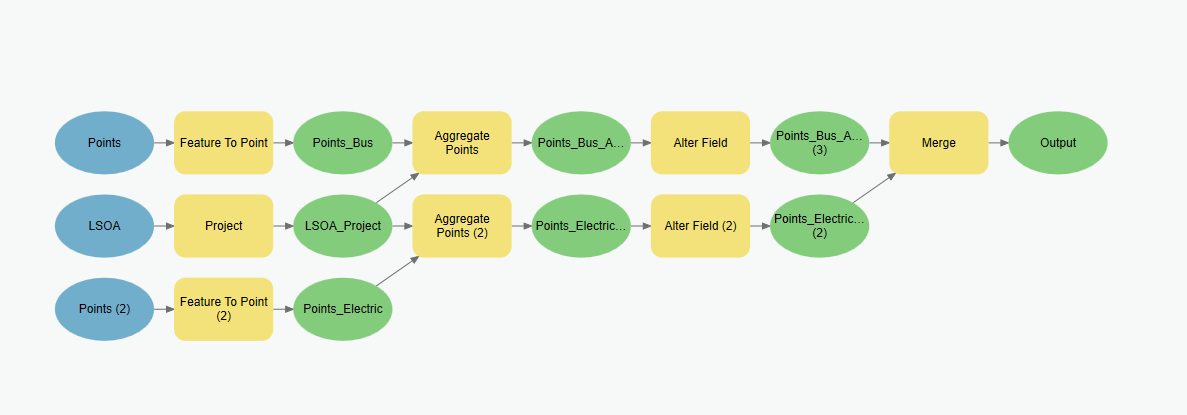
In the ModelBuilder ribbon, go to the Run section and select Run. Enjoy a coffee while ModelBuilder does its thing.
Tab back to the map view and you will have the Output layer. Give it a symbology. I recommend using bivariate colours for bus points and charging points: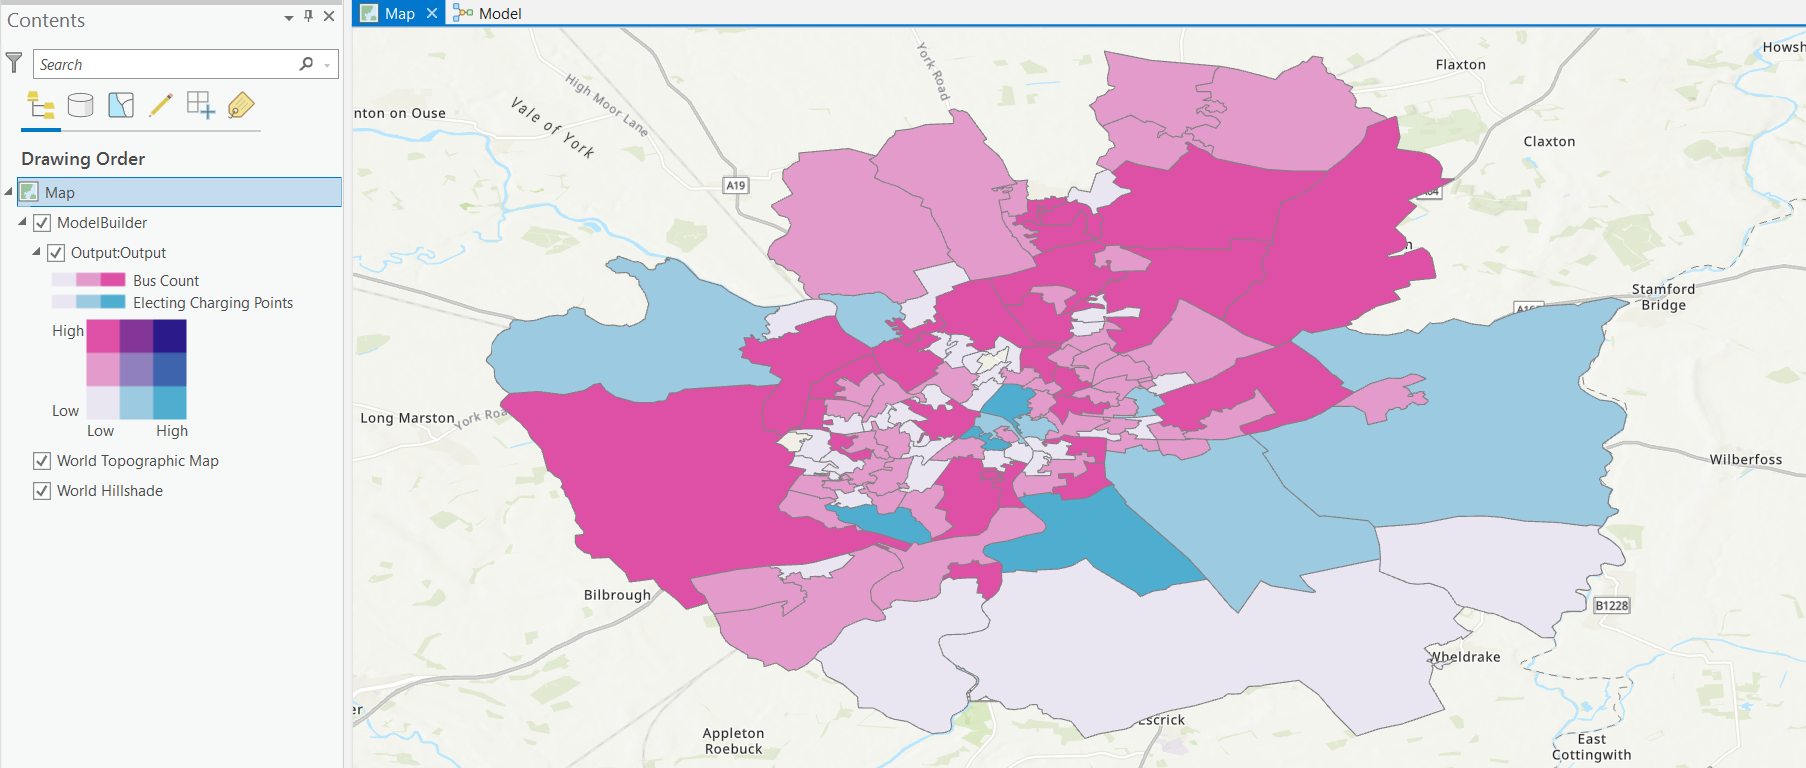
Sending outputs to others
I now have a model that counts the number of points within a set of boundaries and has maintained two separate counts. This is an automated workflow!
That is great and all but what if you need to run this every day and send it to a colleague? Don’t worry that can be automated too.
For emailing data: use the Extract Data Email Task tool and use the LSOA polygon layer as the clipping feature. Select your output as the area of interest and ensure you select the appropriate data format. Then pop your email address in.
For uploading to ArcGIS Online: use the Share Package tool and enter your output package. Provide a summary and tag, and you’re good to go.
For Scheduling: save the model and search for it in the catalogue. The run button will have a drop down which will let you schedule the tool.
Batch processing numerous datasets
Wait you have more than two point datasets you want merged? Ok you could add many, many, many branches to the model… or you could insert an iterator.
Go to the ModelBuilder tab, then to the Insert section. Click on the Iterators and select Iterate Feature Classes: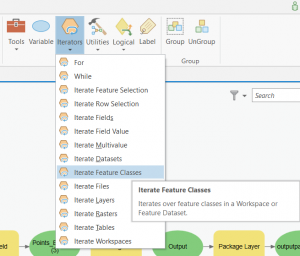
Drag this to the model, then right click and open on the Iterate Feature Classes block. Insert the workspace with all your files and select the Feature Type. Join the output to one of the Feature Point branches, then delete the other branch.
Tricks of the trade
- Through the Model ribbon, you can export your model as a Python script. This is useful for sharing and inserting IF & ELIF statements.
- You can also run a model within a model! Access your model from the catalog and drag and drop it into your new model.
- If you need to run numerous tools on one piece of data you can use a single variable to refer to this. This will prevent you having numerous data inputs such as Bus Stops, Bus Stops (1), Bus Stops (2)…
- With the release of 2.7. The new tool Iterate Layers lets you process layers in your map based upon filters.
- Also with 2.7 you can add all outputs to the contents page under a ModelBuilder group. Useful for keeping new data separate from data outside of the model.
- As with anything IT related save you as you go along!
In my example I merged numerous point datasets and have their features counted to a common geography. This only scrapes the surface of what ModelBuilder can offer. If you are interested in learning more then check out these tutorials:
If you want to get the most mileage out of ModelBuilder then please check out this course from our learning services team for an in depth introduction.