The ability to share your content, maps, and apps with other users is a key benefit to the ArcGIS system. It’s also critical that users can make use of a variety of ArcGIS apps and software to maximise their use of ArcGIS. With the updated user types, effective from June 2024, users with a Creator user type and above now have access to ArcGIS Pro Basic. So, this raises the question, with wider ArcGIS access, how do I use these apps together and share content between the different parts of the system?
In this blog, we’re going to explore how ArcGIS Online and ArcGIS Pro can be used together, sharing content between users in both desktop and online environments by using the Portal.
What is the Portal?
No matter which ArcGIS you use, behind the scenes you are probably accessing ArcGIS web services. Your connection to these, and the central data behind them, is managed through the Portal. The Portal is what brings it all together to allow you to access ArcGIS as a single system (also the case in ArcGIS Enterprise). Not only that, it also has capabilities of its own. Let’s take a closer look:
Identity & Security
Identity is your access to the ArcGIS system. It’s a unique, secure identity which defines which apps you have access to and the capabilities you are granted by your portal administrator.
Managing Content
ArcGIS is only powerful if you can access, use, and share data to create the maps and apps that perform. In doing so, it’s also critical that the data is appropriately managed. With the required administrative privileges, users can manage content through tasks such as categorisation, transferring content ownership, deleting items and much more. This simplifies the use of the data to your users and effectively organises all your GIS data in one single place.

Managing content in ArcGIS Online. This includes categorising content, changing owner, moving to a different folder or deleting content.
Sharing & Collaboration
Sharing and collaboration is at the heart of the portal. It enables you to share your content with others, even if they’re working in a different part of the system. Connecting different environments together through the portal enables you and your organisation to achieve distributed collaboration, working collectively on your ArcGIS workflows.
How do I set up the Portal between ArcGIS Pro & ArcGIS Online?
Well, this question is simple, you don’t need to do anything. Granted that you have a Creator user type or above and you’re signed into ArcGIS Pro, the portal will be connected by default. If you are a member of multiple portals, you will need to connect any additional portals manually via the portal URL. Accessing or sharing data to the portal is also straightforward and can be accessed directly in ArcGIS Pro’s content directory.

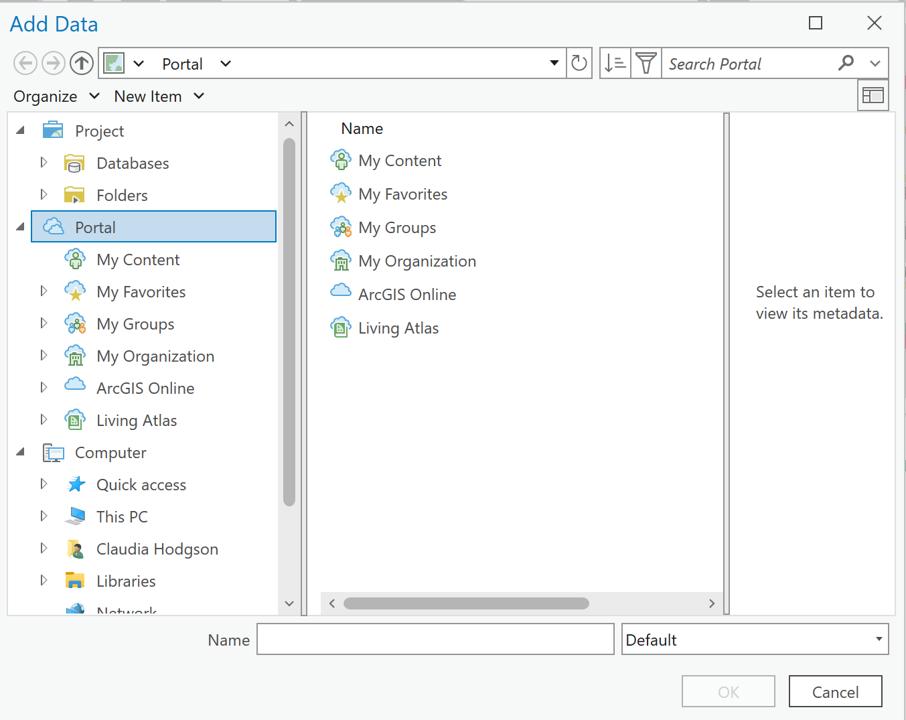
When adding data to your ArcGIS Pro project, you will see Portal as an option for adding content. This gives you access to your ArcGIS Online content, along with your organisation, groups and ArcGIS Living Atlas data.
An example workflow for working with ArcGIS Pro & ArcGIS Online
Let’s demonstrate this with an example workflow for working collaboratively between both ArcGIS Pro and ArcGIS Online.
Step 1 – Tidy the data. While some of you may be lucky and have data ready to use, a GIS workflow often starts with tidying and organising your dataset. With Creator user type and above, you can make use of ArcGIS Pro’s performance and cut credit costs by using the Data Management toolbox.
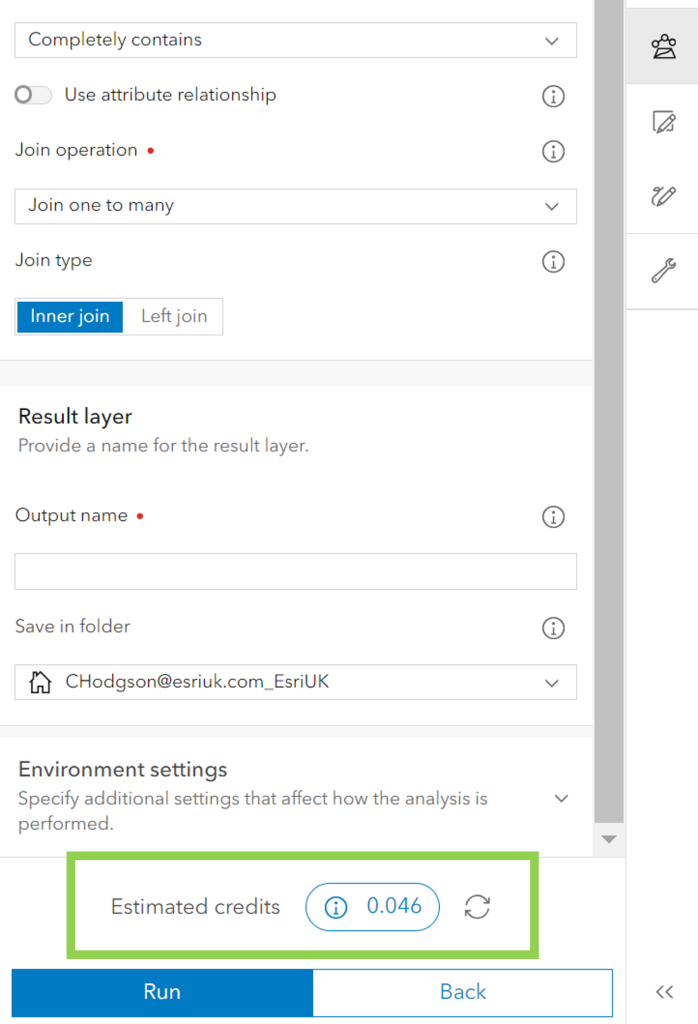
Note that Data Management tools are also available in ArcGIS Online but will consume credits. A handy built in credit checker will inform you how many credits the tool will use before you run it.

A credit cost calculator is available in ArcGIS Online to understand how many credits a tool will consume before you run it.
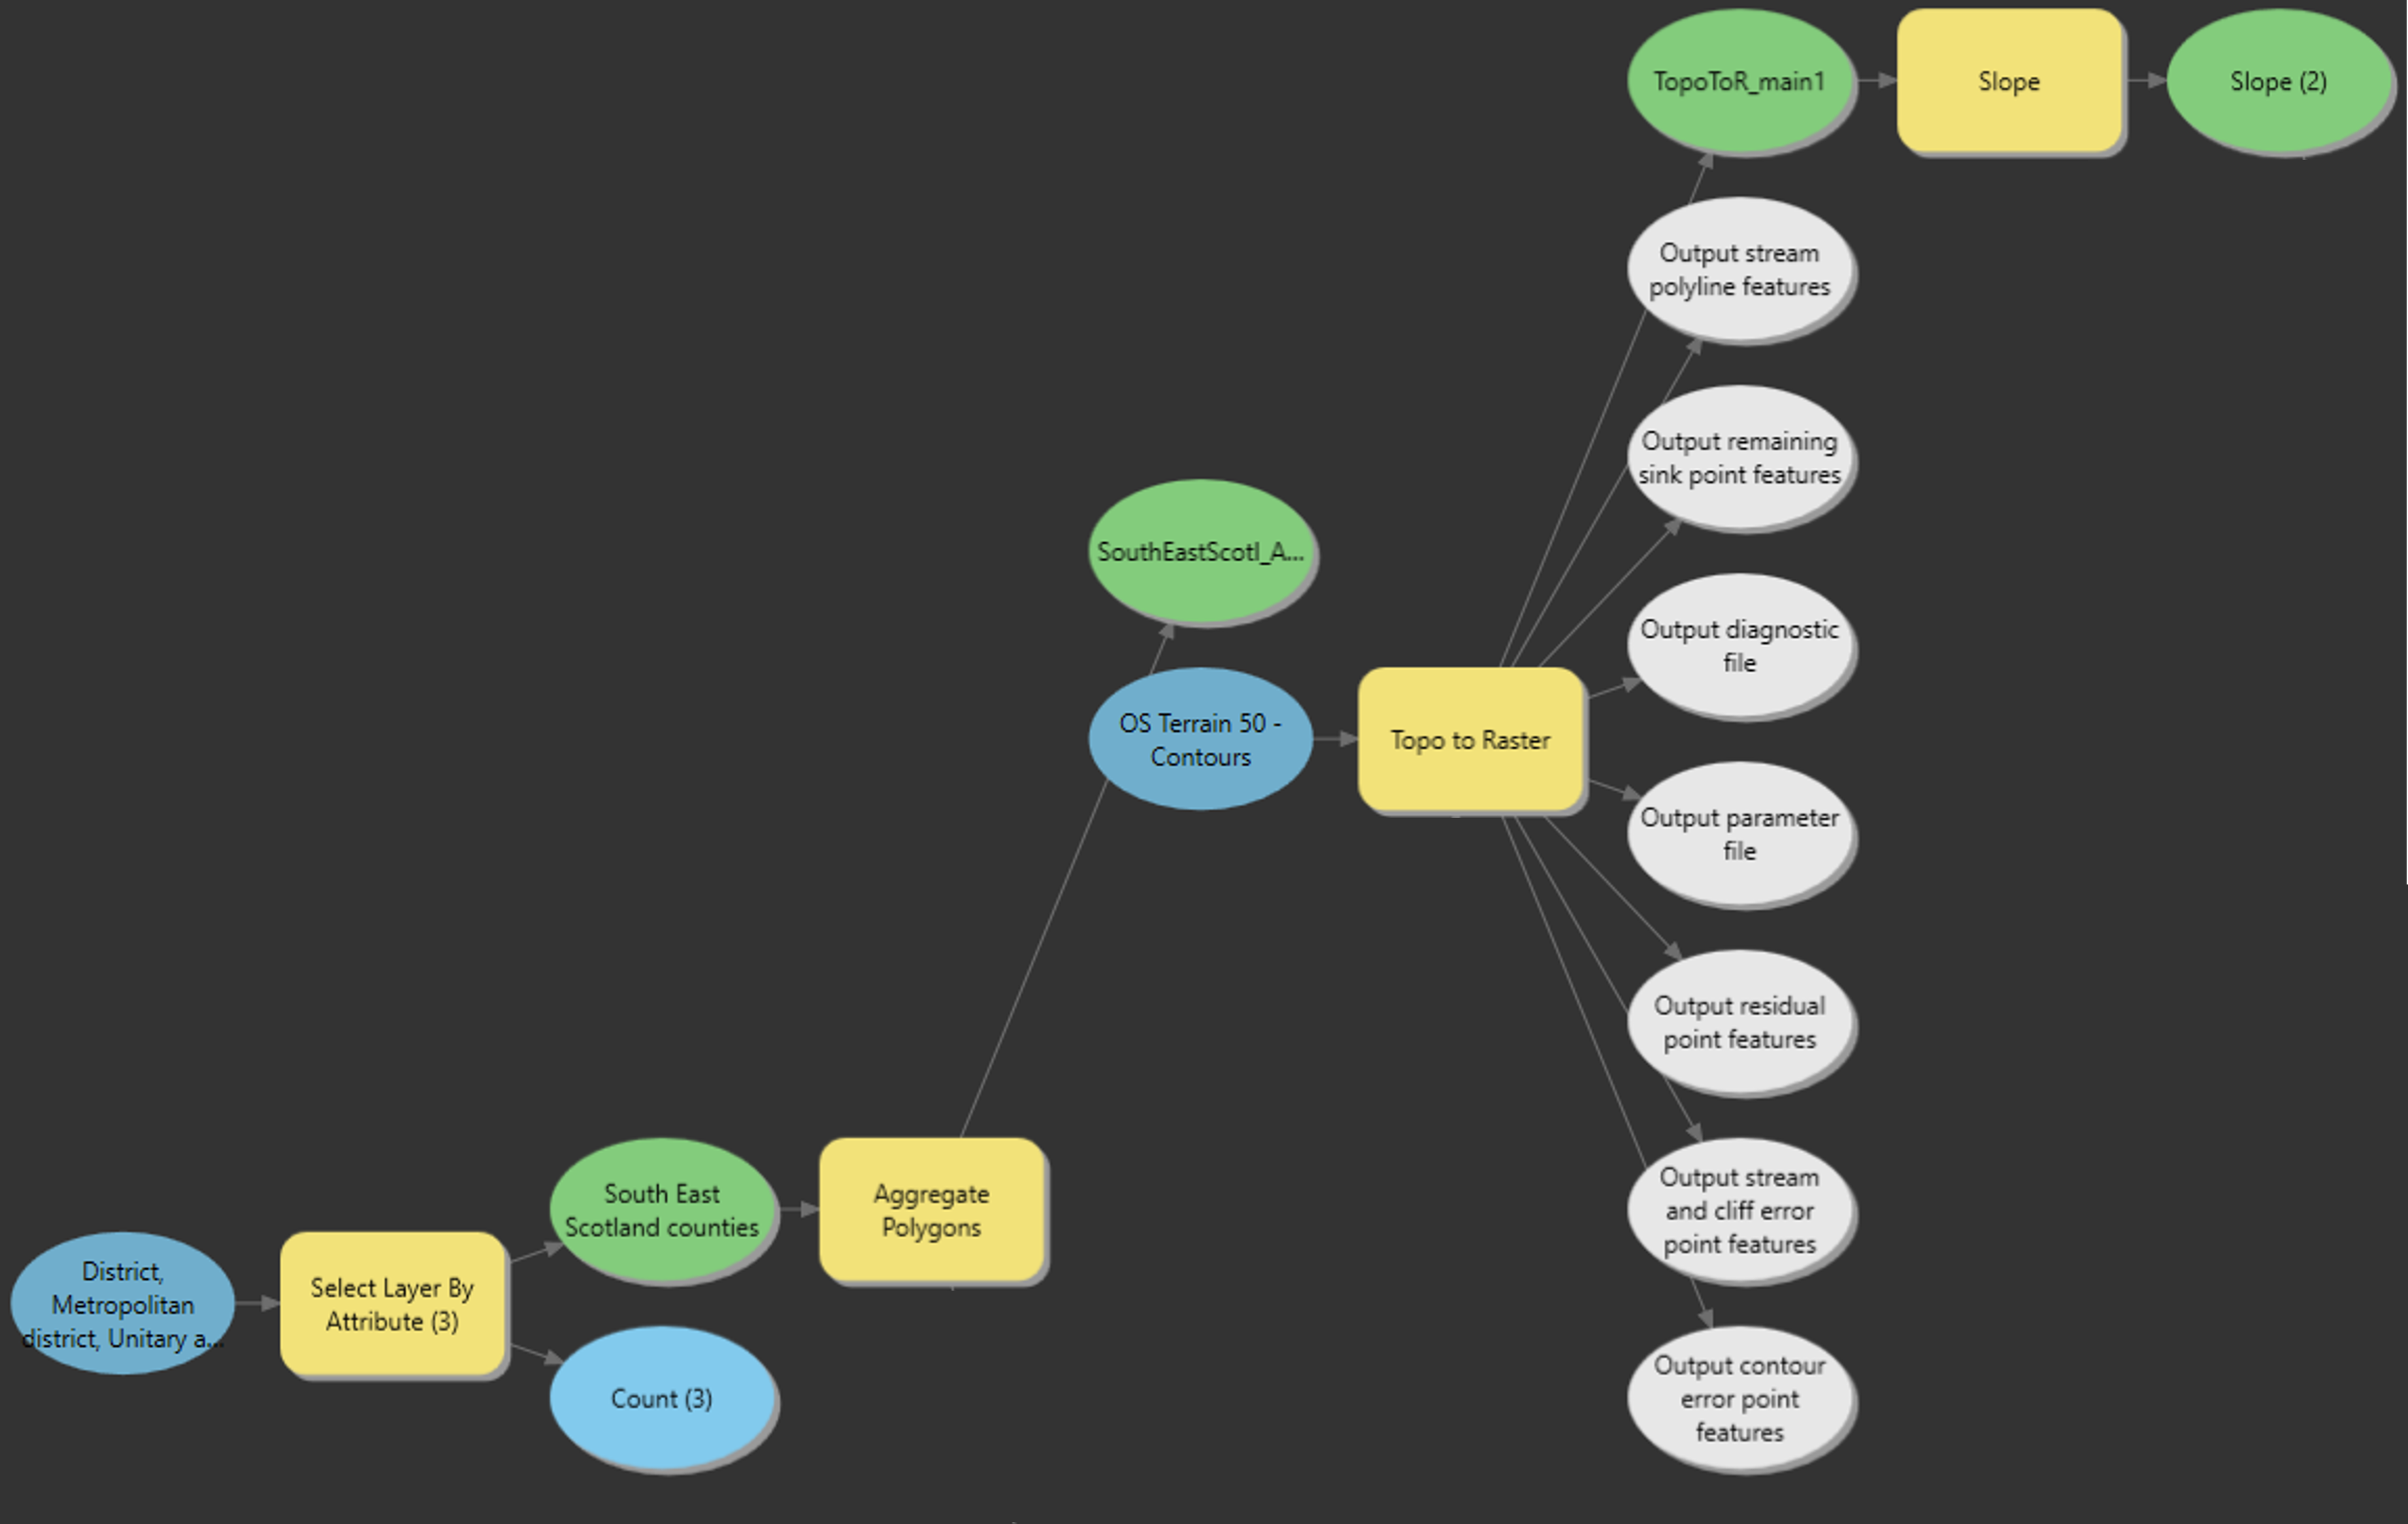
Step 2 – Perform analysis. Typically the next step is carrying out analysis. ArcGIS Pro and ArcGIS Online both offer analytical toolboxes. I recommend first checking whether both offer access to the tool, or tools, you require. Granted they both do, it’s worth considering whether it’s a workflow you will only require once, or if it will need iterating. If so, ArcGIS Pro offers Model Builder for creating repeatable analytical workflows that can be shared with users for repeating the workflows with future datasets. Something else to consider is your credit consumption allowance in each of the environments, and looking at how many credits the workflow will consume in each. It may also be worth considering the size of your dataset and workflows, typically the larger the dataset and workflow, it may be better suited to ArcGIS Pro since it runs on desktop.

An example workflow with ModelBuilder in ArcGIS Pro.
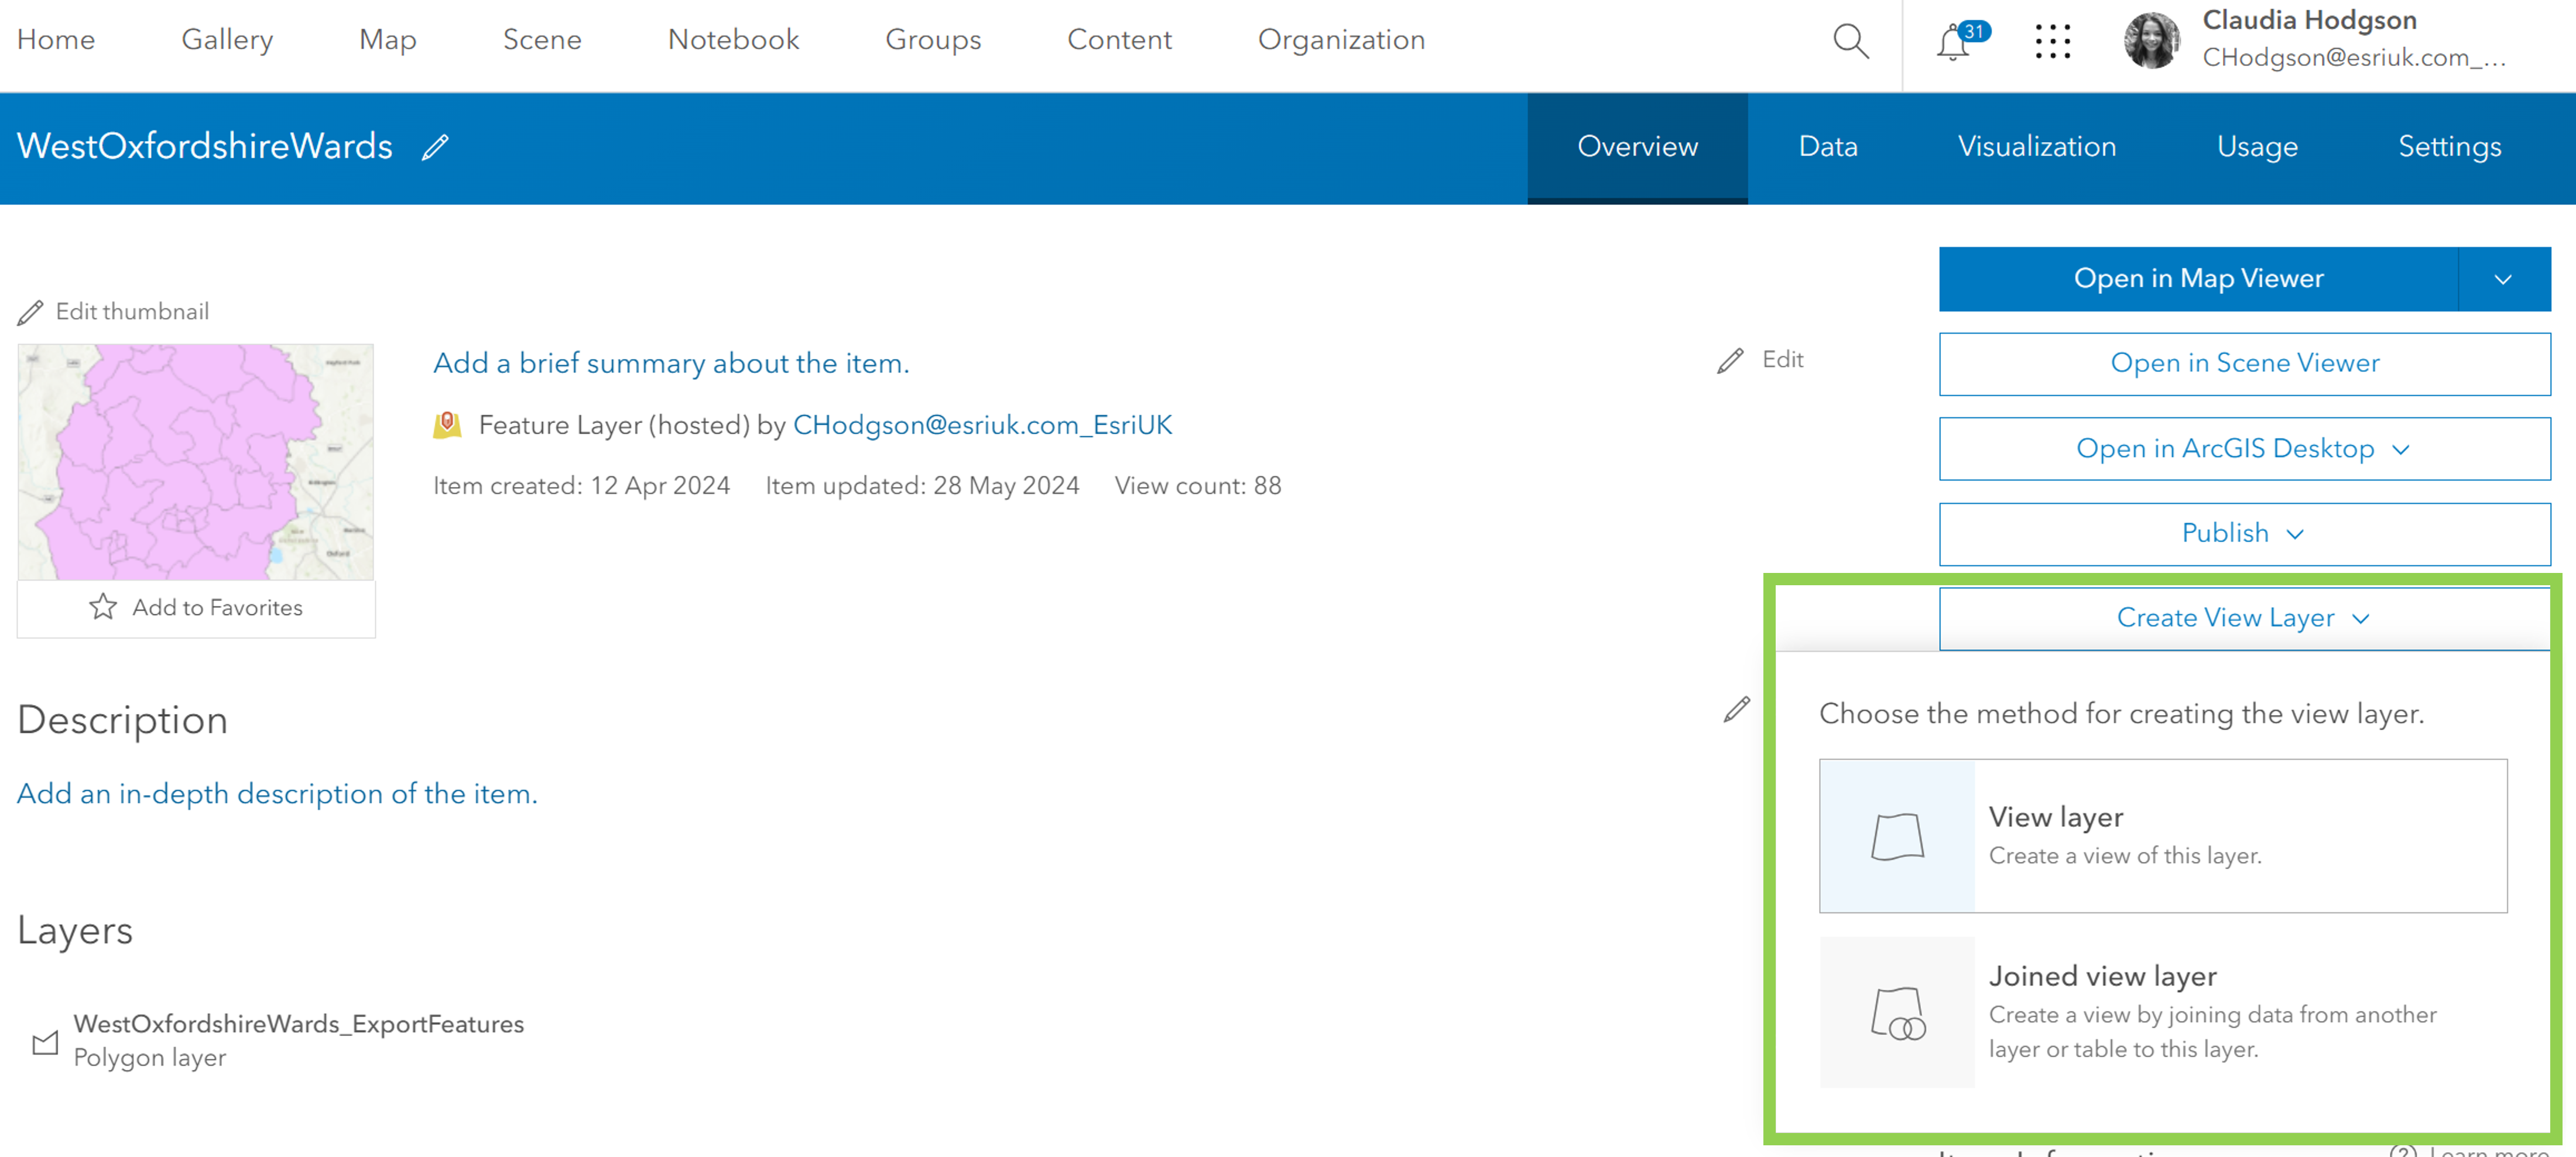
Step 3 – Publish to ArcGIS Online. Making use of the Portal, results from the data management and analysis tools can be published to ArcGIS Online and shared to other users in the organisation. Here you can also set up different feature layer views of the data, to control when fellow users of your organisation’s portal can only view or can update, add, and delete features in the dataset.

Create feature layer views from the items details page in ArcGIS Online.
Step 4 – Create a web application. ArcGIS Online is a software-as-a-service with one of its strongest capabilities being able to share maps, apps, and content with others. With a variety of app builders available in ArcGIS Online, you can bring all your work together and share it with those who need it.
This is just one example of how you can use ArcGIS Pro and ArcGIS Online together, making use of each of their tools and capabilities, but working collaboratively through the use of the Portal. Now with Creators also having access to ArcGIS Pro, hopefully this blog has demonstrated how it can be brought into your existing ArcGIS workflow, helping you to make the most out of your ArcGIS system.