Building surveys already requires planning to create something that’s easy to fill out for the end user. When you add in the need to brand the form to your organisation’s requirements or factor in efforts to structure it intuitively, it can become quite time-consuming. Enter ArcGIS Survey123.
Survey123 is a form-centric application for data collection. With its intuitive interface, you can create surveys quickly to suit your organisation’s needs. Survey123 Web Designer is, as the name suggests, completely web-based. For more control over the design and content capabilities, the desktop option, Survey123 Connect, is for you. Let’s go through some arrangement and styling options for both interfaces, going beyond the default to build a form curated with your needs in mind.
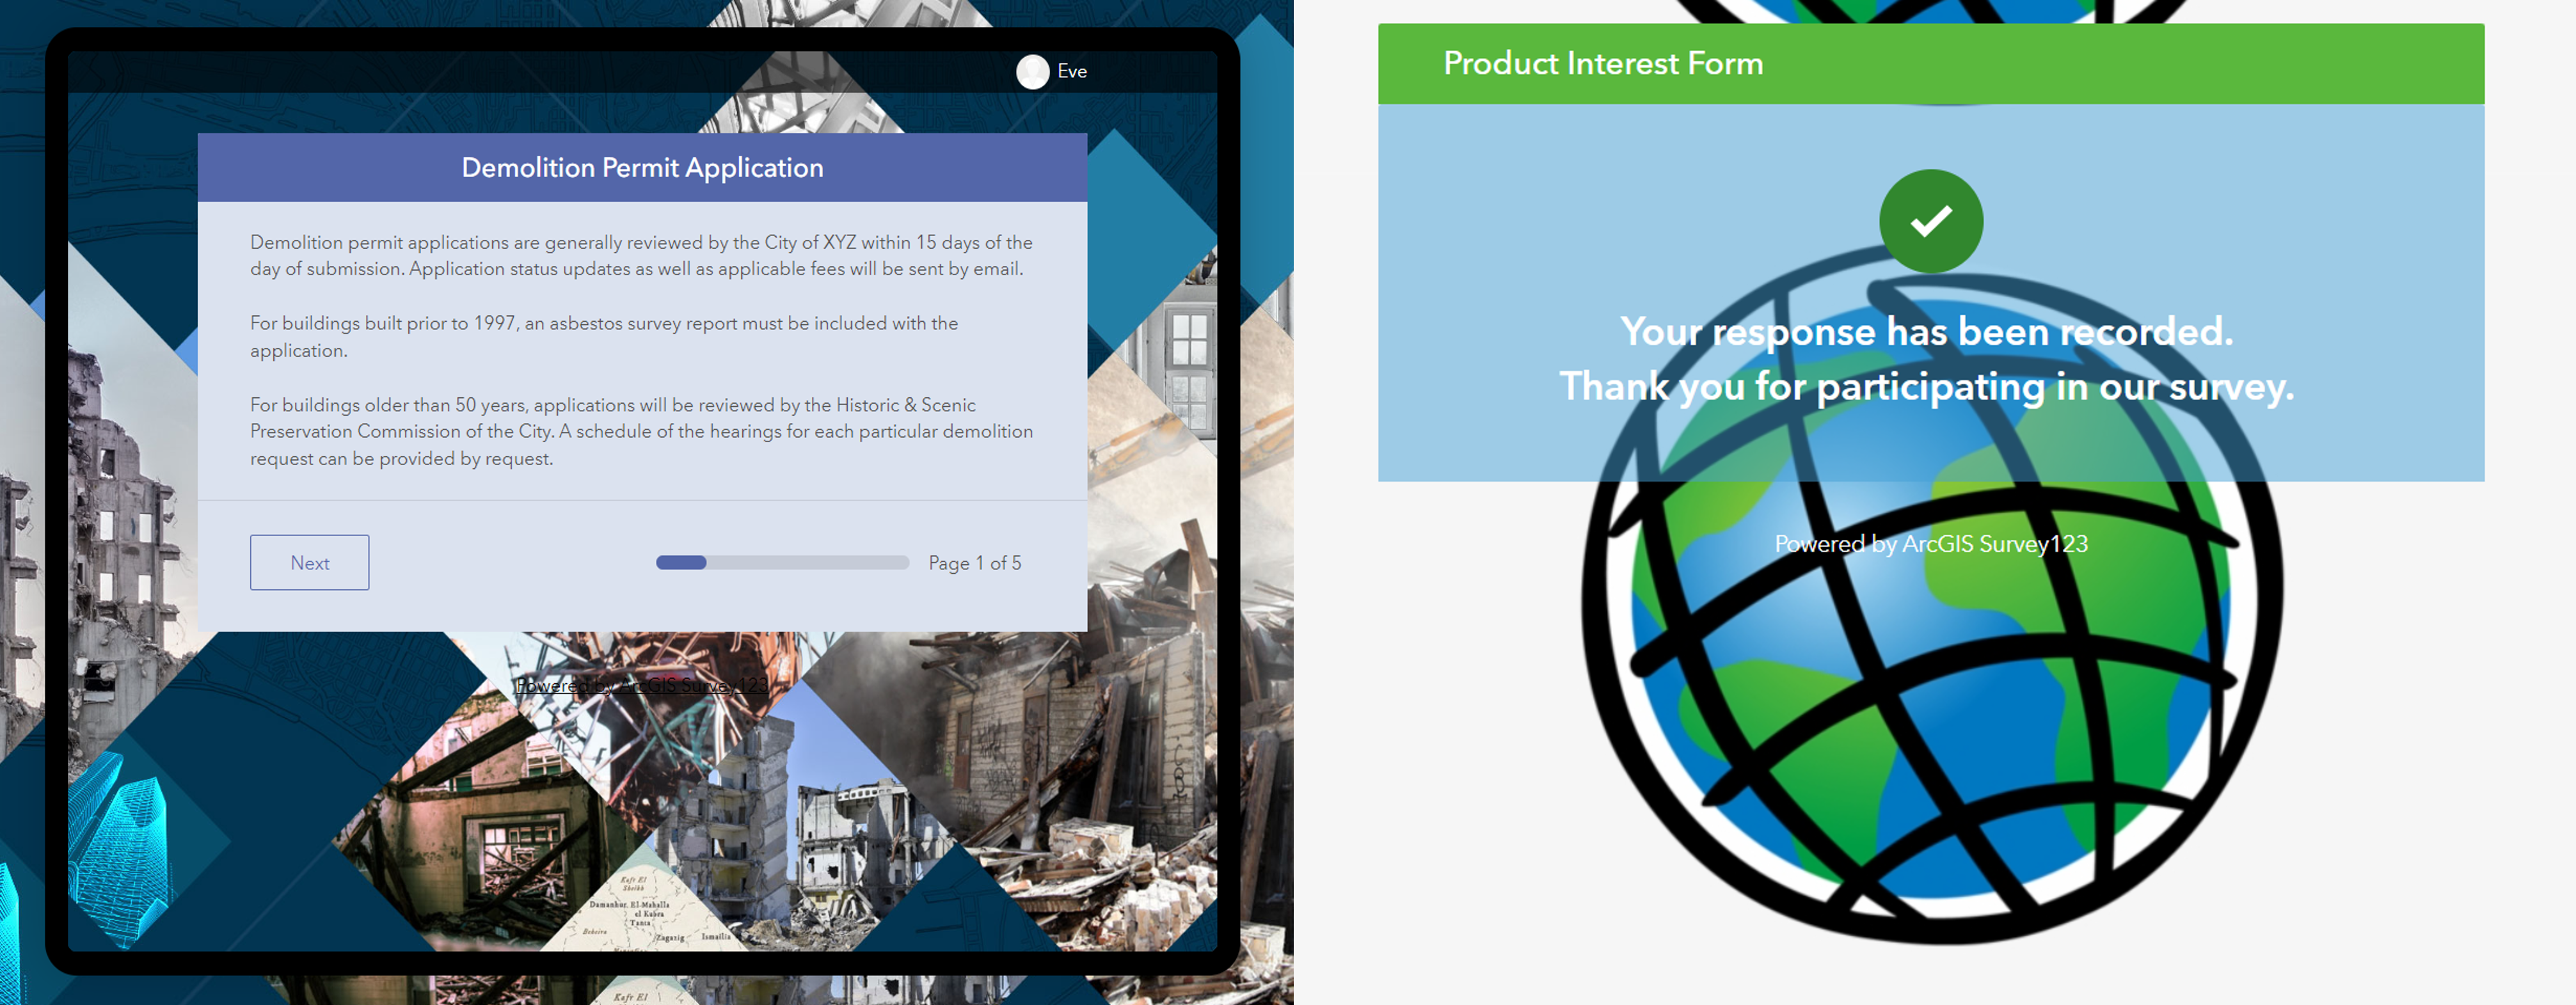
Examples of form themes in Survey123 Web Designer across devices, highlighting the endless paths for creative customisation.
Appearance
Your survey’s appearance is most likely the first thing users will notice. Appearance can be indicative of the survey’s topic, provide interesting visuals, or act as a neutral background to support whatever data is waiting to be collected. Both Survey123 interfaces let you customise the appearance, with similarities in customisation options for:
- Background
- Heading symbology
- Question symbology
- Text colour, size and alignment
- Pre-made template options
- Organisation templates*
*Creating an organisational template takes minutes with high return on effort: re-use it in future forms for speed and consistency.

A glimpse of the Appearance options in Survey123 Connect.
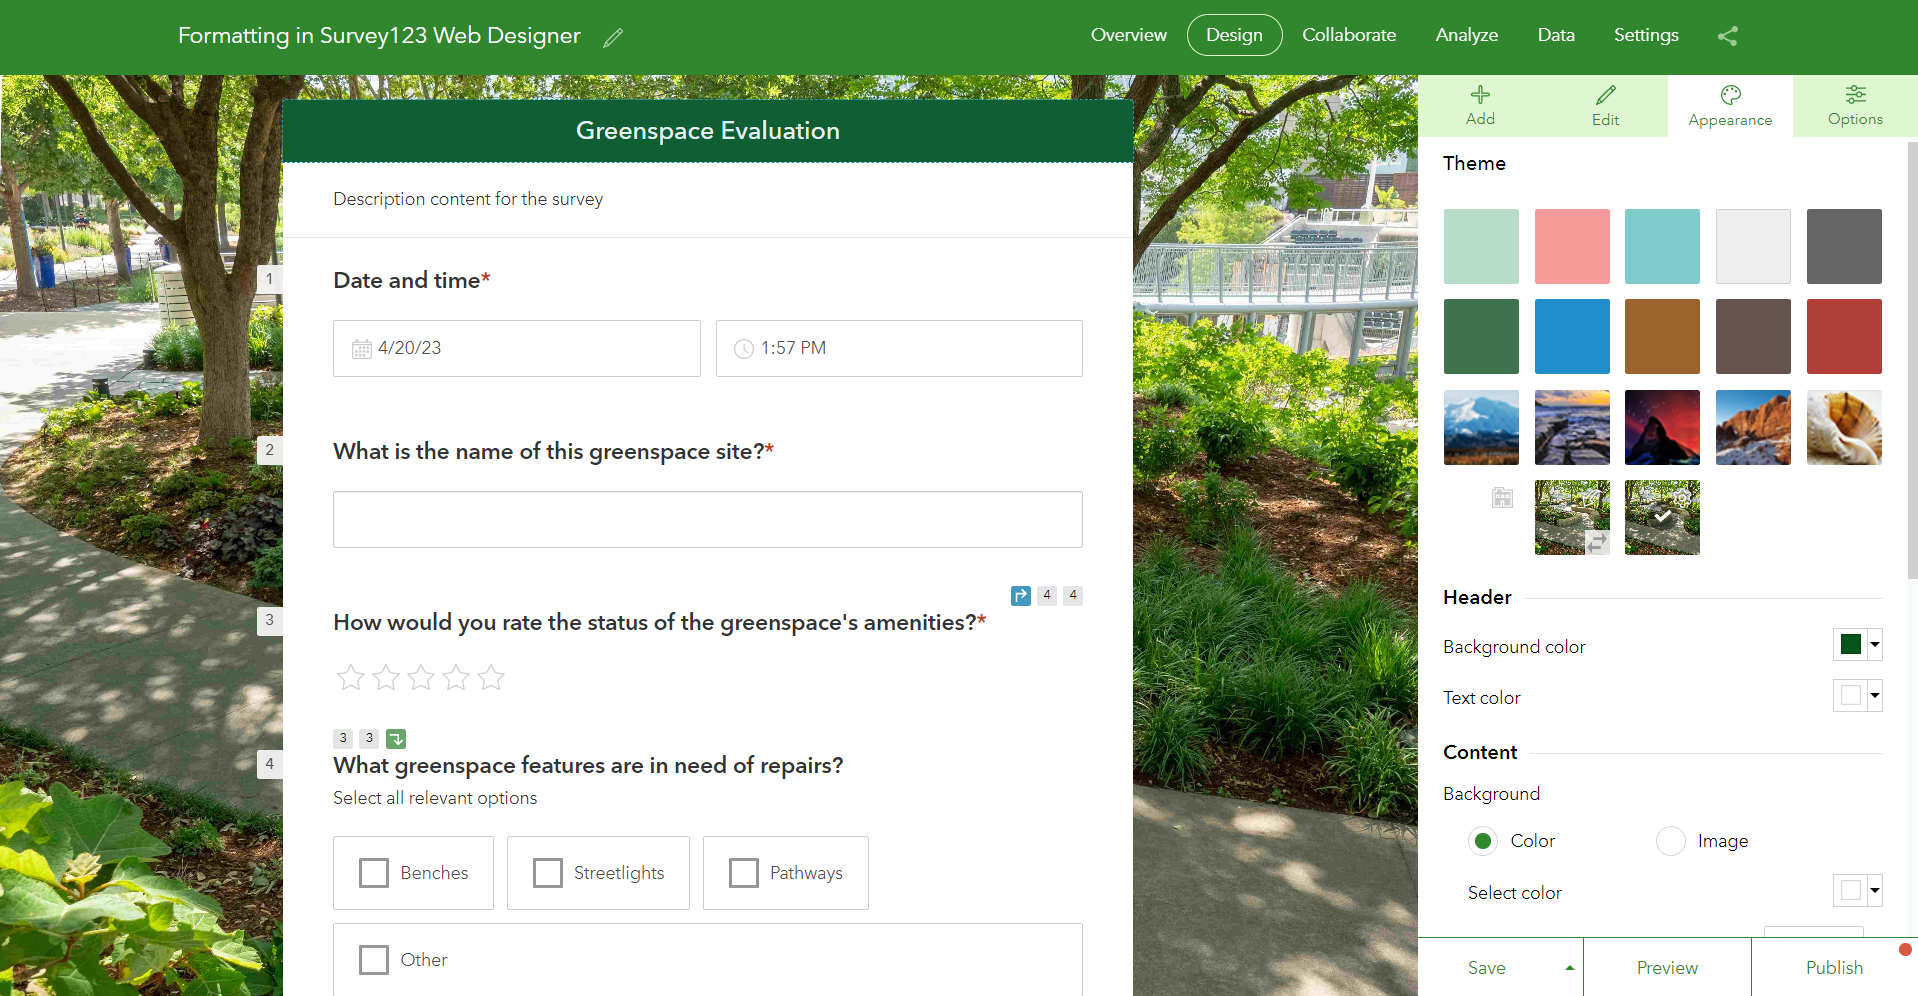
The interface for Appearance options in Survey123 Web Designer.
Individual styling (Web Designer | Connect)
Sometimes you need to style questions distinctly to shape how the end user fills out the form, such as drawing their attention to important sections. While Web Designer gives you the ability to change font colour of the entire form, Connect gives you the flexibility to style questions individually. All you need is a bit of HTML lingo. Familiarise yourself with the terminology for background and font tags and you’re set.
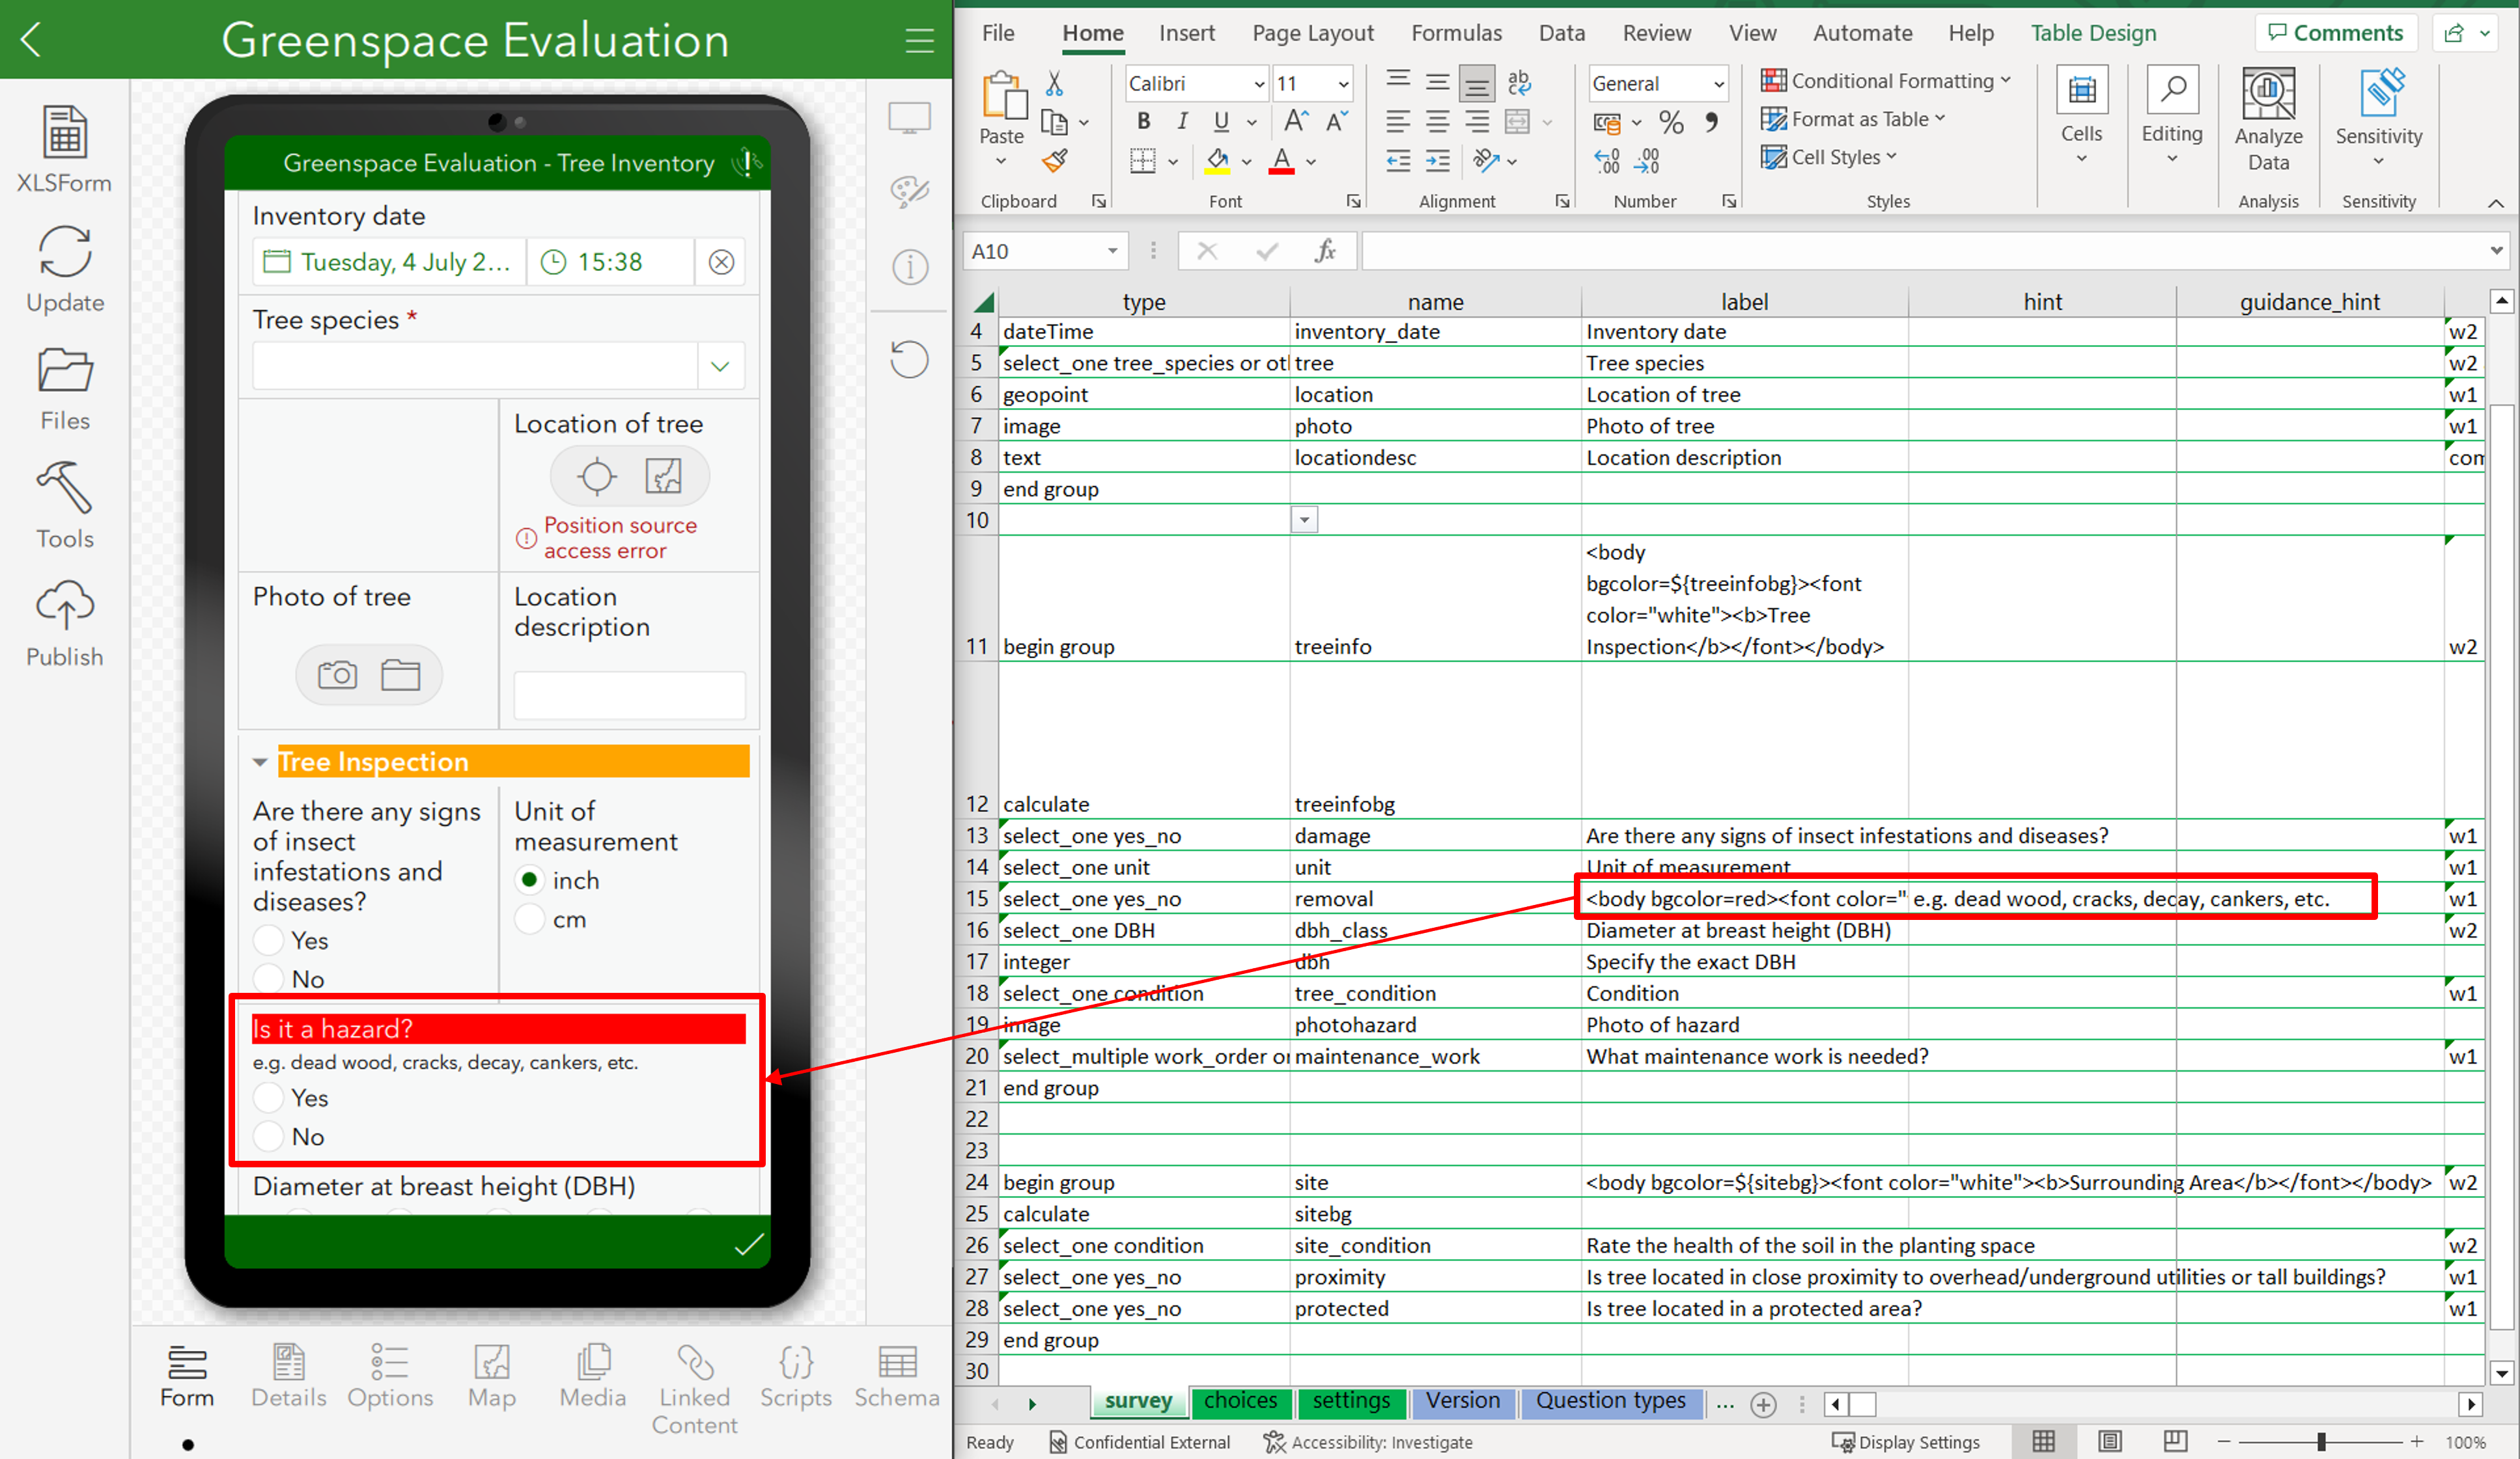
Change individual question colours so end user’s see critical information immediately.
Dynamic colouring (Web Designer | Connect)
You can take this further with dynamic colouring. This helps users sort information quickly as colours are coded to appear only if certain values are inputted. With this in place, you can categorise results on-the-fly, making it easy to instantly ID important information.
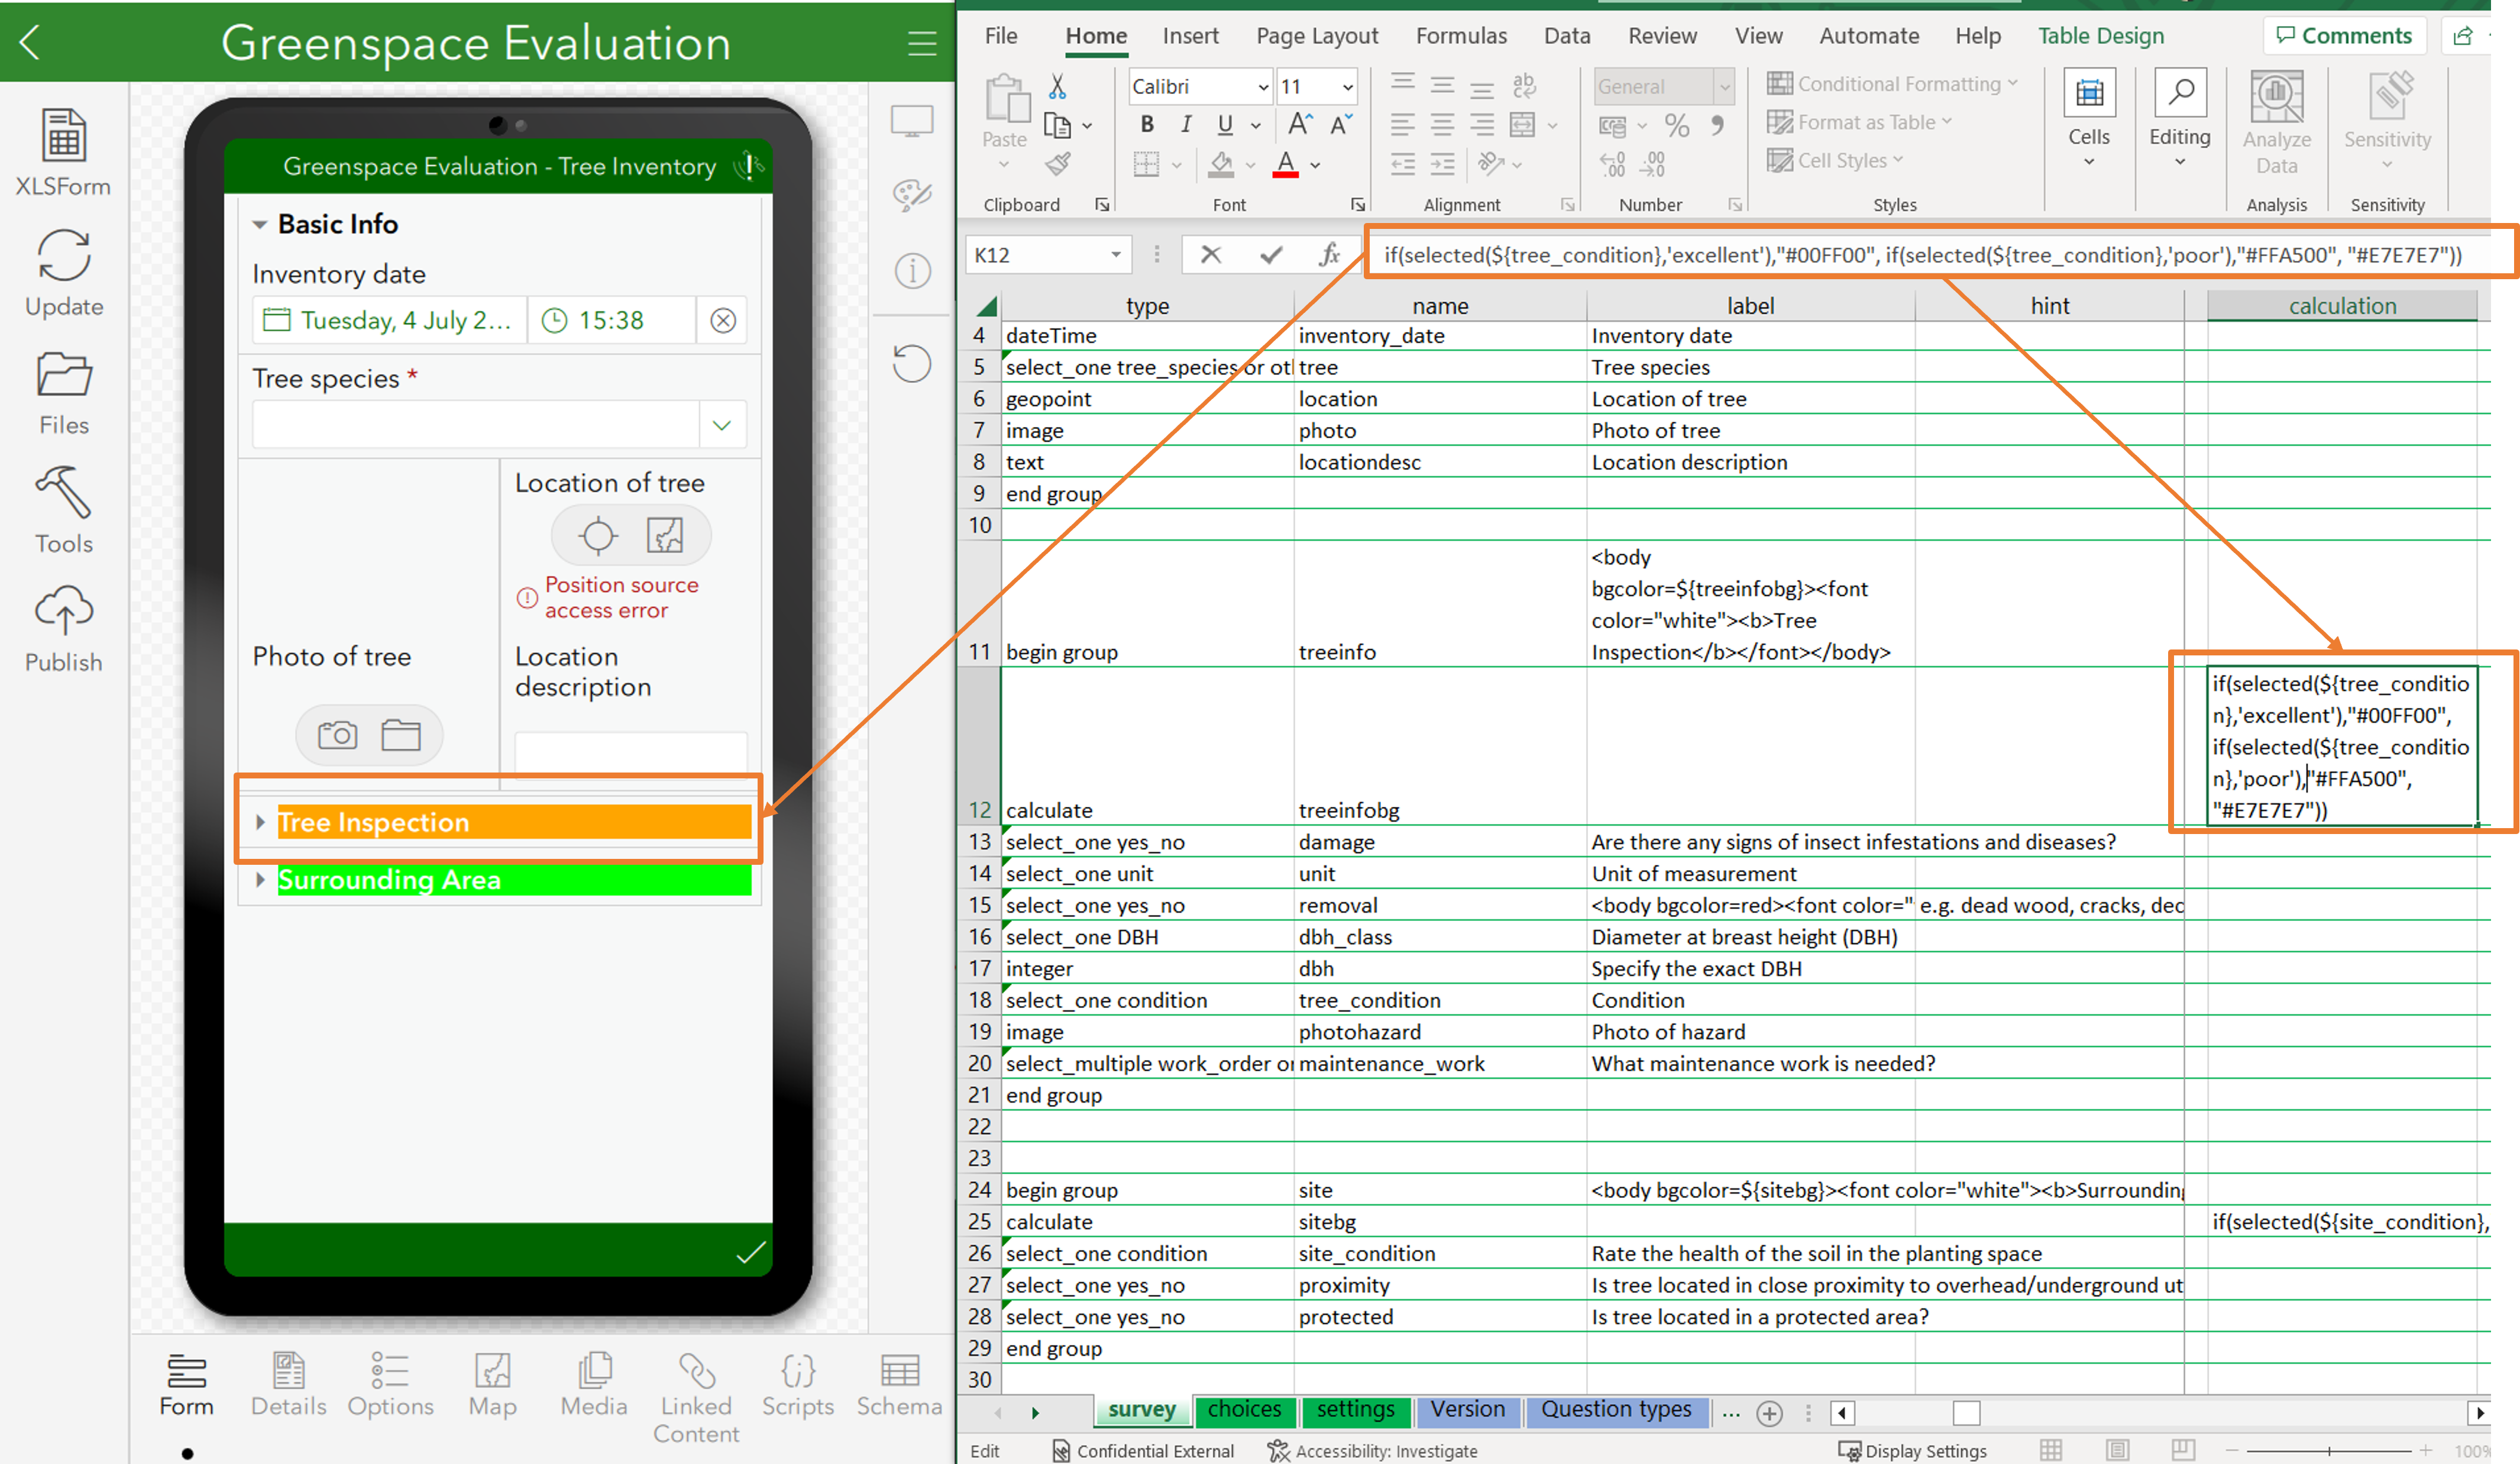
Linking variables within the XLS to create dynamic colour-coded labels.
Form Structure
If you have lots of questions for your end user, having them displayed on the screen at once could be an intimidating deterrent. Survey123 has tools to better structure your form, supporting both you and the end user. Not only does the increased organisation help you with the build, but it makes the final product intuitive to fill out, guiding the viewer through relevant sections one-by-one.
Pages (Web Designer | Connect)
Pages separate a survey into sections and serve as an indicator of progress for the end user. Pages could even be used in shorter surveys as Welcome and End sections, to explain the form’s objective and thank participants.
This capability is available across both platforms. For Web Designer, select Page within the Display and Structure section. For Connect, you’ll need to change the Style to Page within the Settings section of the XLS sheet. Then just signal the beginning and end of your pages using the Begin / End Group question type and set the Appearance to Field-list.
Examples of Welcome and End pages within Web Designer.
Groups (Web Designer | Connect)
Groups let you cluster questions relevant to one another into one place, which helps maintain the workflow for the end user. In Web Designer, just drag and drop the Group element into your form. In Connect, use the Begin / End Group question type but leave the Appearance section empty.
Another benefit to grouping questions is relevancy. If your questions only apply when certain criteria are met, you can make the Group’s visibility conditional based on an expression. Then, it will only appear to the end user if your desired requirements are inputted.
Examples of collapsible groups in Web Designer.

The mobile (left) and XLS (right) layouts for visualising and creating groups in Connect.
Repeats (Web Designer | Connect)
What if you need to collect the same information for multiple features? Having end users submit the same form repeatedly is tedious and slows down data collection. Repeats are powerful in part because of their versatility across workflows, from asset inspections to population surveys. For a comprehensive look at all you can achieve with Repeats, check out this guide.
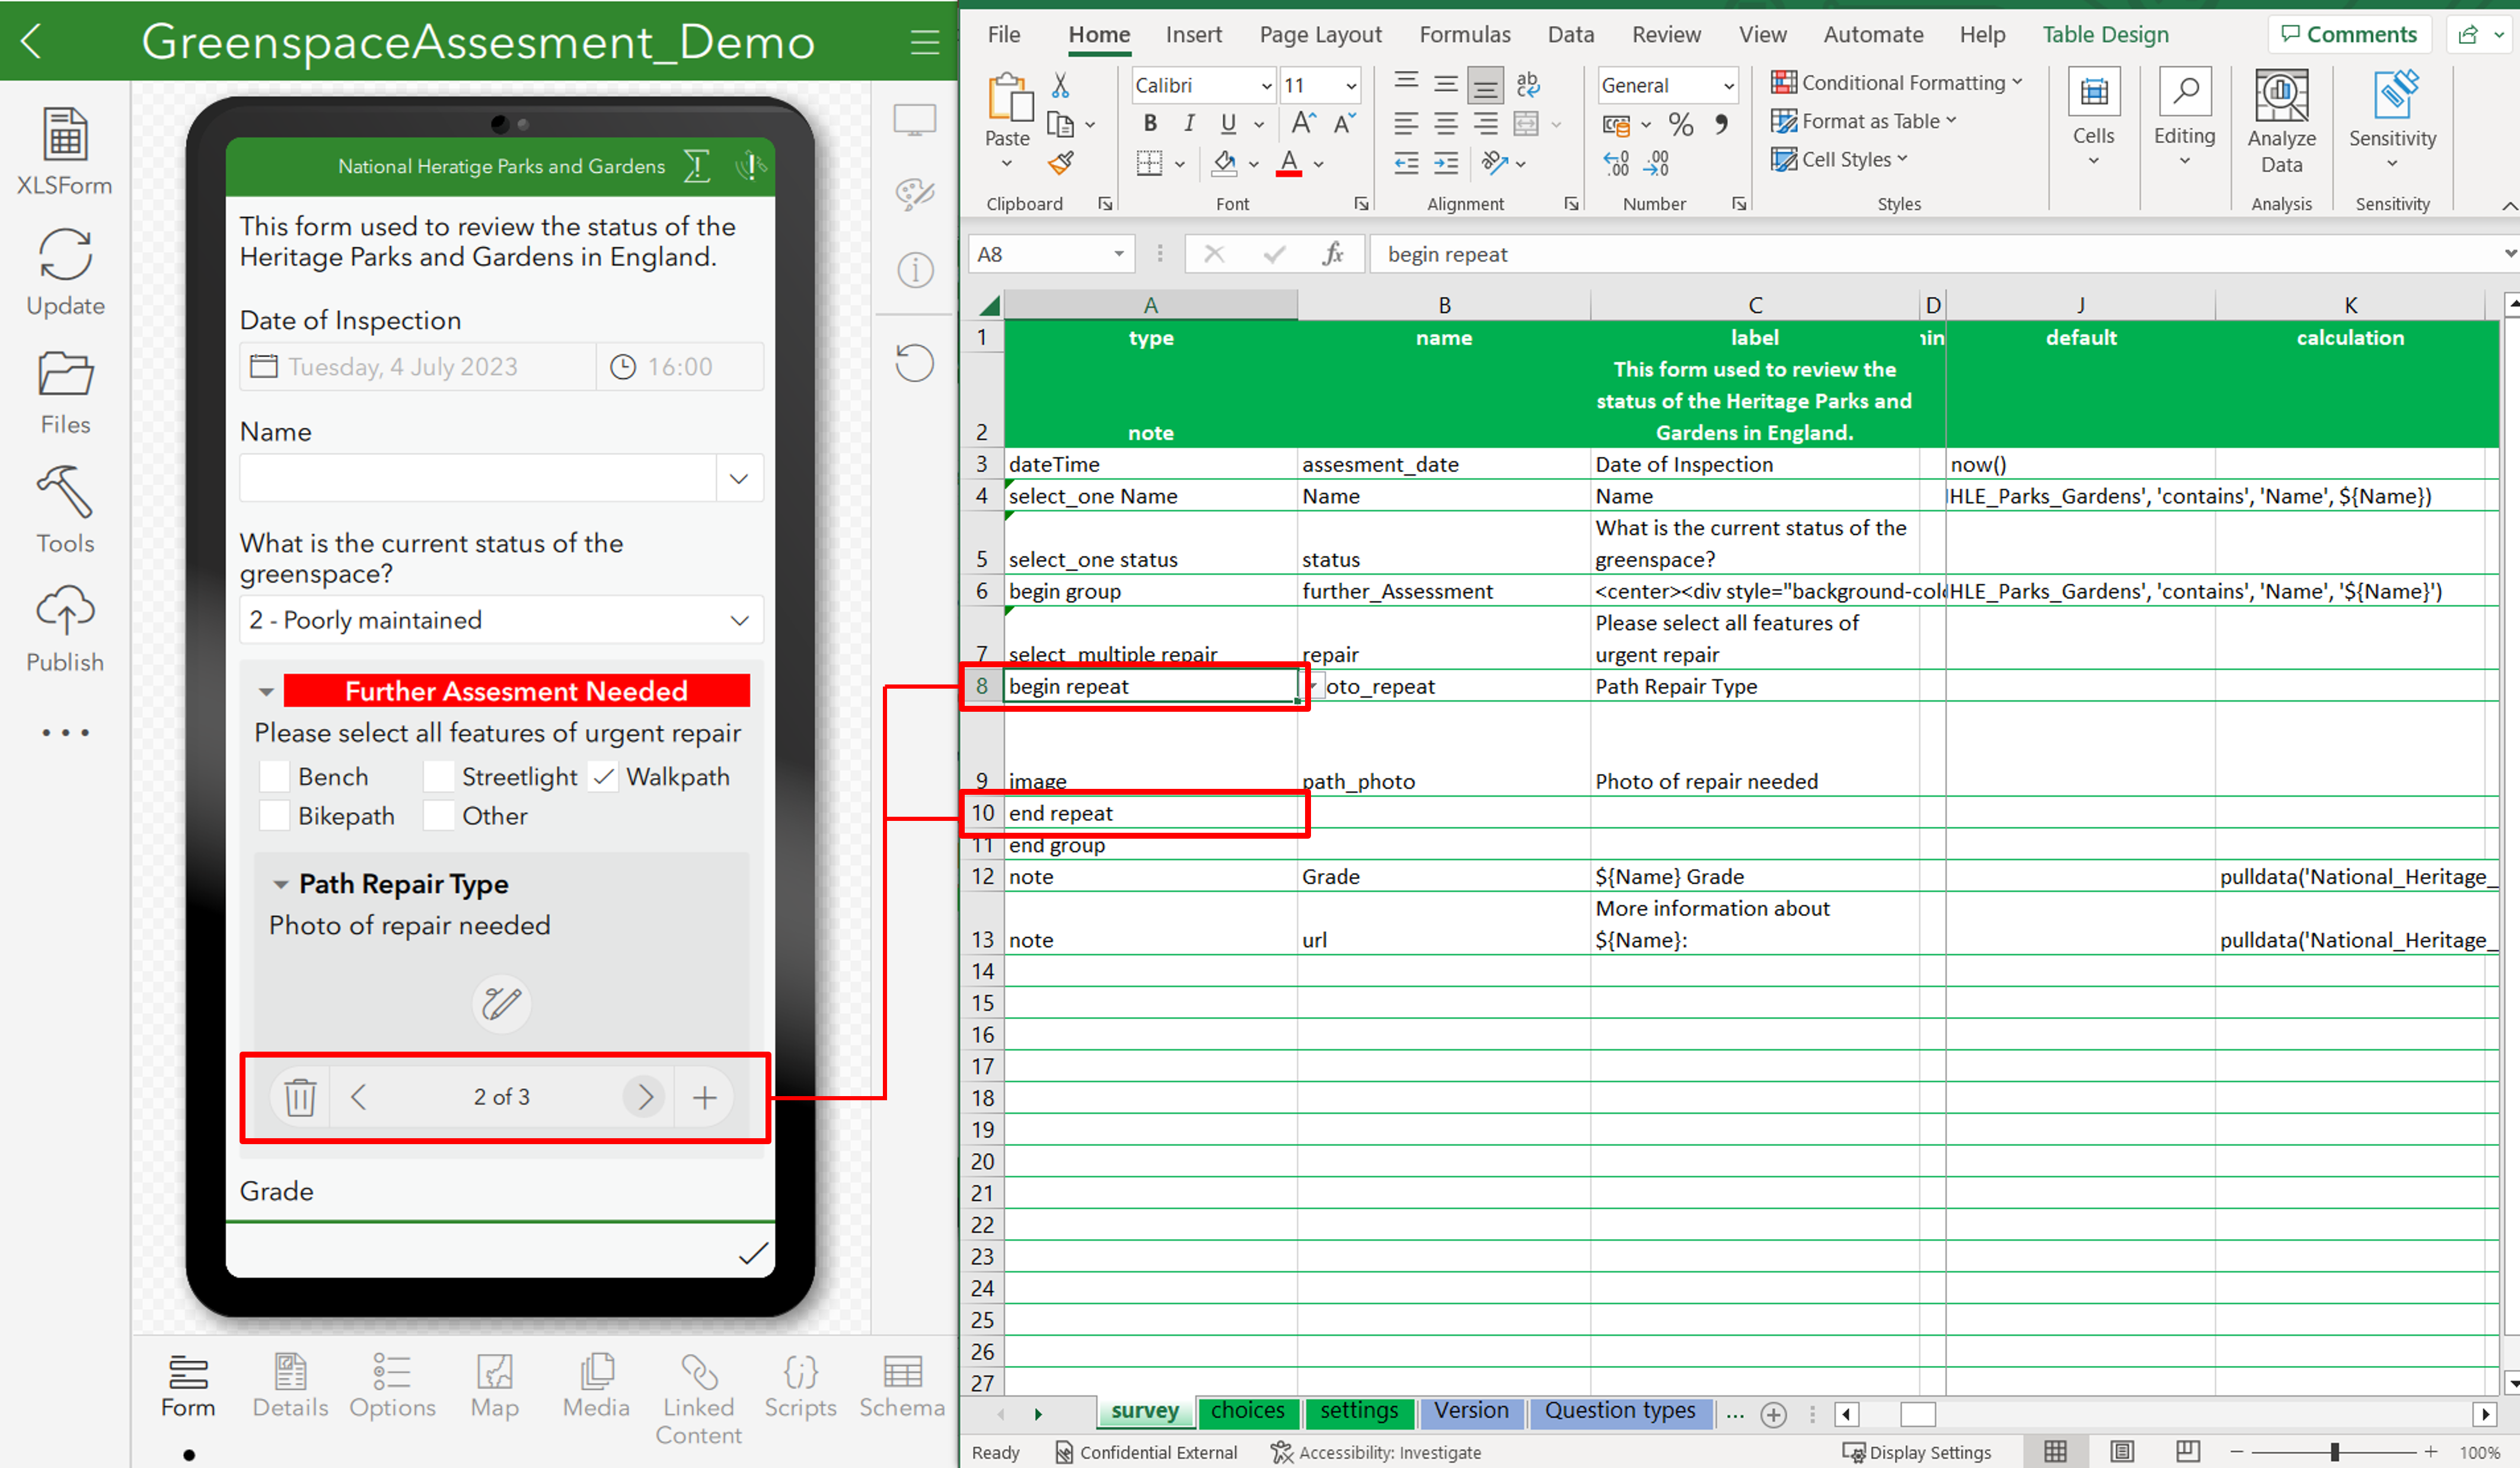
How repeats look within the mobile (left) and XLS(right) configurations in Connect.
Grid Layout (Web Designer | Connect)
And finally, Grids. While questions usually take up the entire screen width, the Grid layout lets you construct forms with multiple questions next to one another. If you’re designing surveys for end users on tablets, this is a great option to minimize continual scrolling. Aesthetically, they can be made to mimic paper forms; a handy tool for acclimating end users more accustomed to the previously non-digital process. Again, there is already some great documentation available, so I’ll just leave you with my takeaways from grid making:
FAQ’s for Grids
- Fixed vs Dynamic grid – which should I pick?
- When you have conditional questions, fixed grids keep the layout consistent while a dynamic grid will shift depending upon what’s currently visible. It’s entirely preference dependent. Are you imagining empty boxes, or do you want all empty space to be reconfigured?
- How do I customise grid width?
- For an entire group, set the number of columns in the appearance tab. w2 indicates two columns, w3 for three…and so on.
- If there’s variation within the group, specify per question.
- If you want to see Grids in action, there is a Grid template under Samples within the Connect desktop app. Just search “grid layout.”
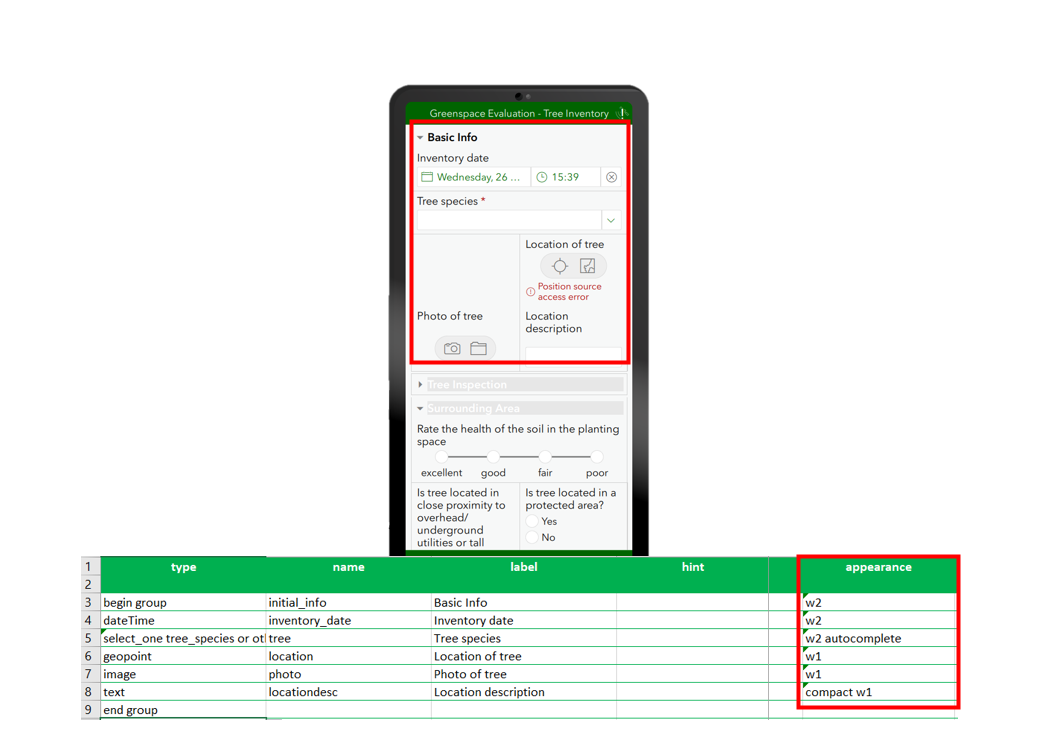
Using a fixed grid within Connect and its appearance in the mobile app (top) and XLS configuration (bottom).
Scratching the surface
While survey content is important, it is only a part of what makes an effective survey. The layout drives how the end user navigates the form, and its style supplies engagement, context or necessary branding. With the tips we’ve shared on appearance and structure in ArcGIS Survey123, we hope you’ll walk away feeling more confident in your ability to construct a survey that suits both the needs of your organisation and the patience of end users.
And if you’re wanting to learn more, there are plenty of other resources available to continue your ArcGIS Survey123 journey.