Scene Layers are optimised for displaying large amounts of 3D data, including 3D objects, buildings and integrated meshes. Web Scene Layers use a cache to provide the display performance and give a smooth viewing experience. Scene Layers comply with the Indexed 3D Scene layer (I3S) format, an open 3D content delivery format that allows 3D GIS data to be accessed with desktop, web and mobile clients. This allows Scene Layers to be viewed using ArcGIS Pro and the Scene Viewer in ArcGIS Online and ArcGIS Enterprise.
Because Scene Layers are cached, there was an issue with frequently changing data where you had to rebuild the Scene Layer cache every time features are updated to ensure that they have a live view of their 3D data. From the end of 2020 however, Scene Layers in ArcGIS Online now refer to their associated feature layer for attribute information. This means that when attributes are edited on the feature layer, these changes are automatically reflected in Scene Layer symbology and pop ups without the need to rebuild the cache. This is available in ArcGIS Enterprise 10.8 and above.
In our example use case, we have a dataset that shows room outlines within a building. Each of these rooms has a use type which we’d like to use to symbolise the data, and then we want to publish this to ArcGIS Online so that users can use the Scene Layer to visualise the different room types within an interactive 3D scene. The room types within the building evolve over time however, and so when we edit the data to reflect these updates we would like users to automatically see these changes in the Scene Layer without the need for us to rebuild the cache. 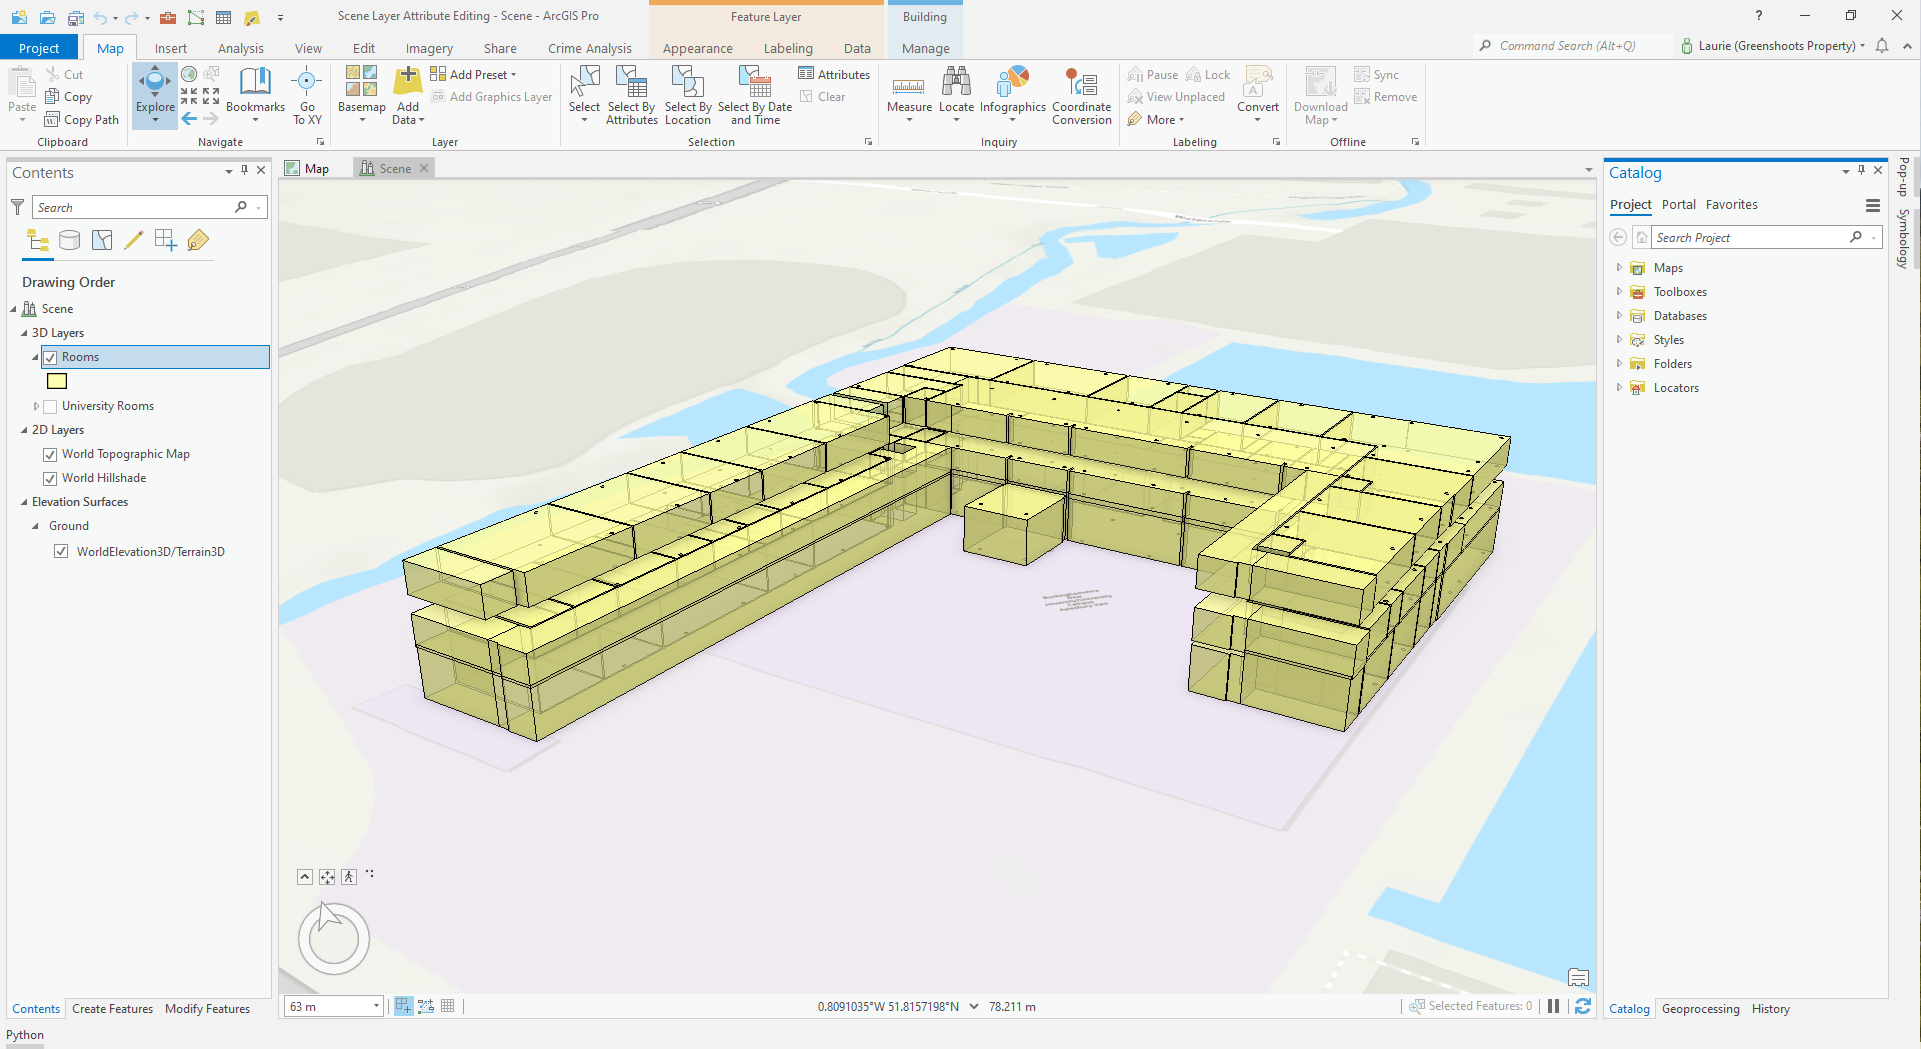
We can achieve this desired workflow using the five steps outlined below:
1) Data Requirements
Only point, building and 3D object Scene Layer types can have an associated Hosted Feature Layer. Your data must therefore be a Point Feature Layer, Building Layer or Multipatch Feature Layer in order for both a Scene Layer and associated Hosted Feature Layer to be created when your data is published to ArcGIS Online.
2) Configure Layer Symbology using ArcGIS Pro
Use ArcGIS Pro to configure the symbology of your data prior to publishing, including which field will be used to define symbol classes/values and the colour scheme.
N.B. If you are working with Multipatch data and you wish to use ArcGIS Online to modify the symbology of your data once it has been published, I would recommend setting your symbol colour to white. Additionally, if you are generating a Multipatch layer by converting an existing Feature Class, try to ensure that your Feature Class symbology is also white or that you check the Disable colour and texture option when running the Layer 3D to Feature Class tool. This helps to ensure that any colour schemes you later define for your layer in ArcGIS Online are correctly displayed. 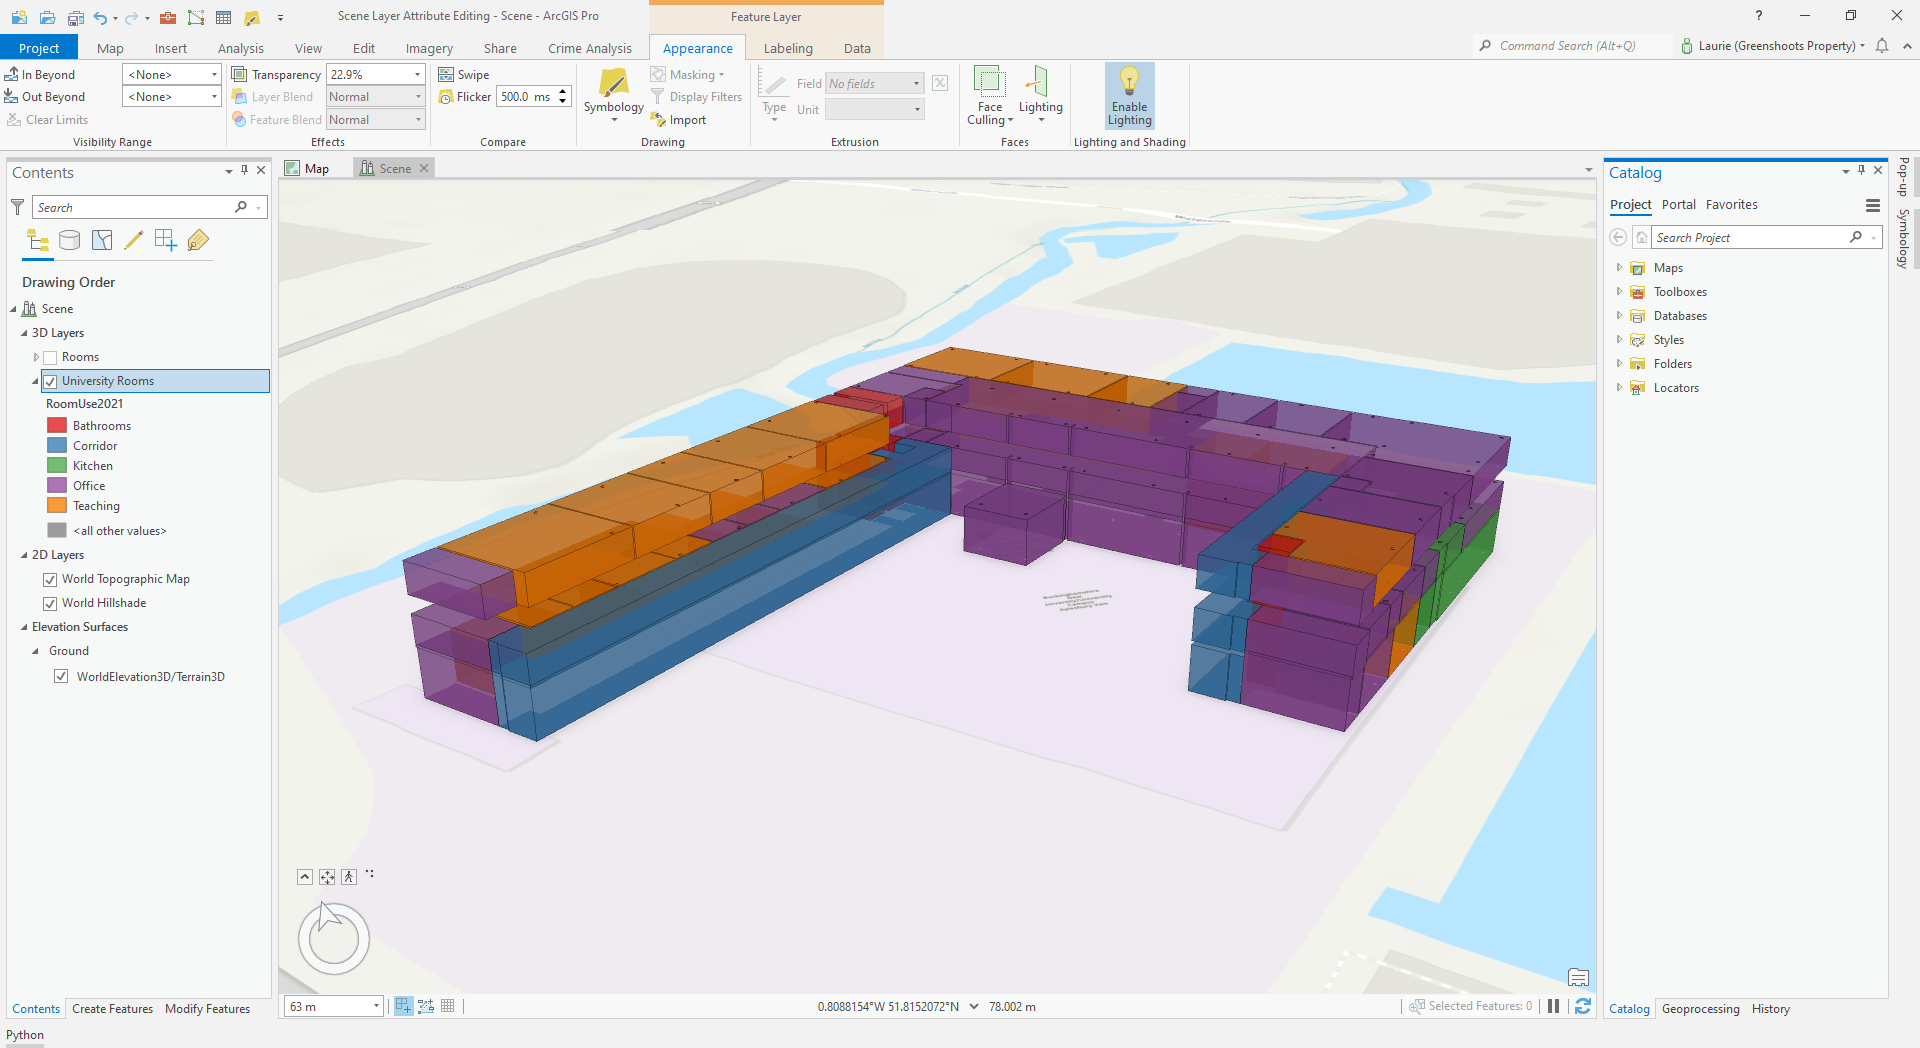
3) Publish to ArcGIS Online
Publish your layer to ArcGIS Online by right-clicking your layer in the Contents pane and selecting Share > Share as Web Layer. In the panel that appears, if you select the Content tab you should see both a Scene Layer and Hosted Feature Layer listed. To ensure that your data is editable once published, from the Configuration tab select Configure Web Layer Properties and check the Enable editing option. 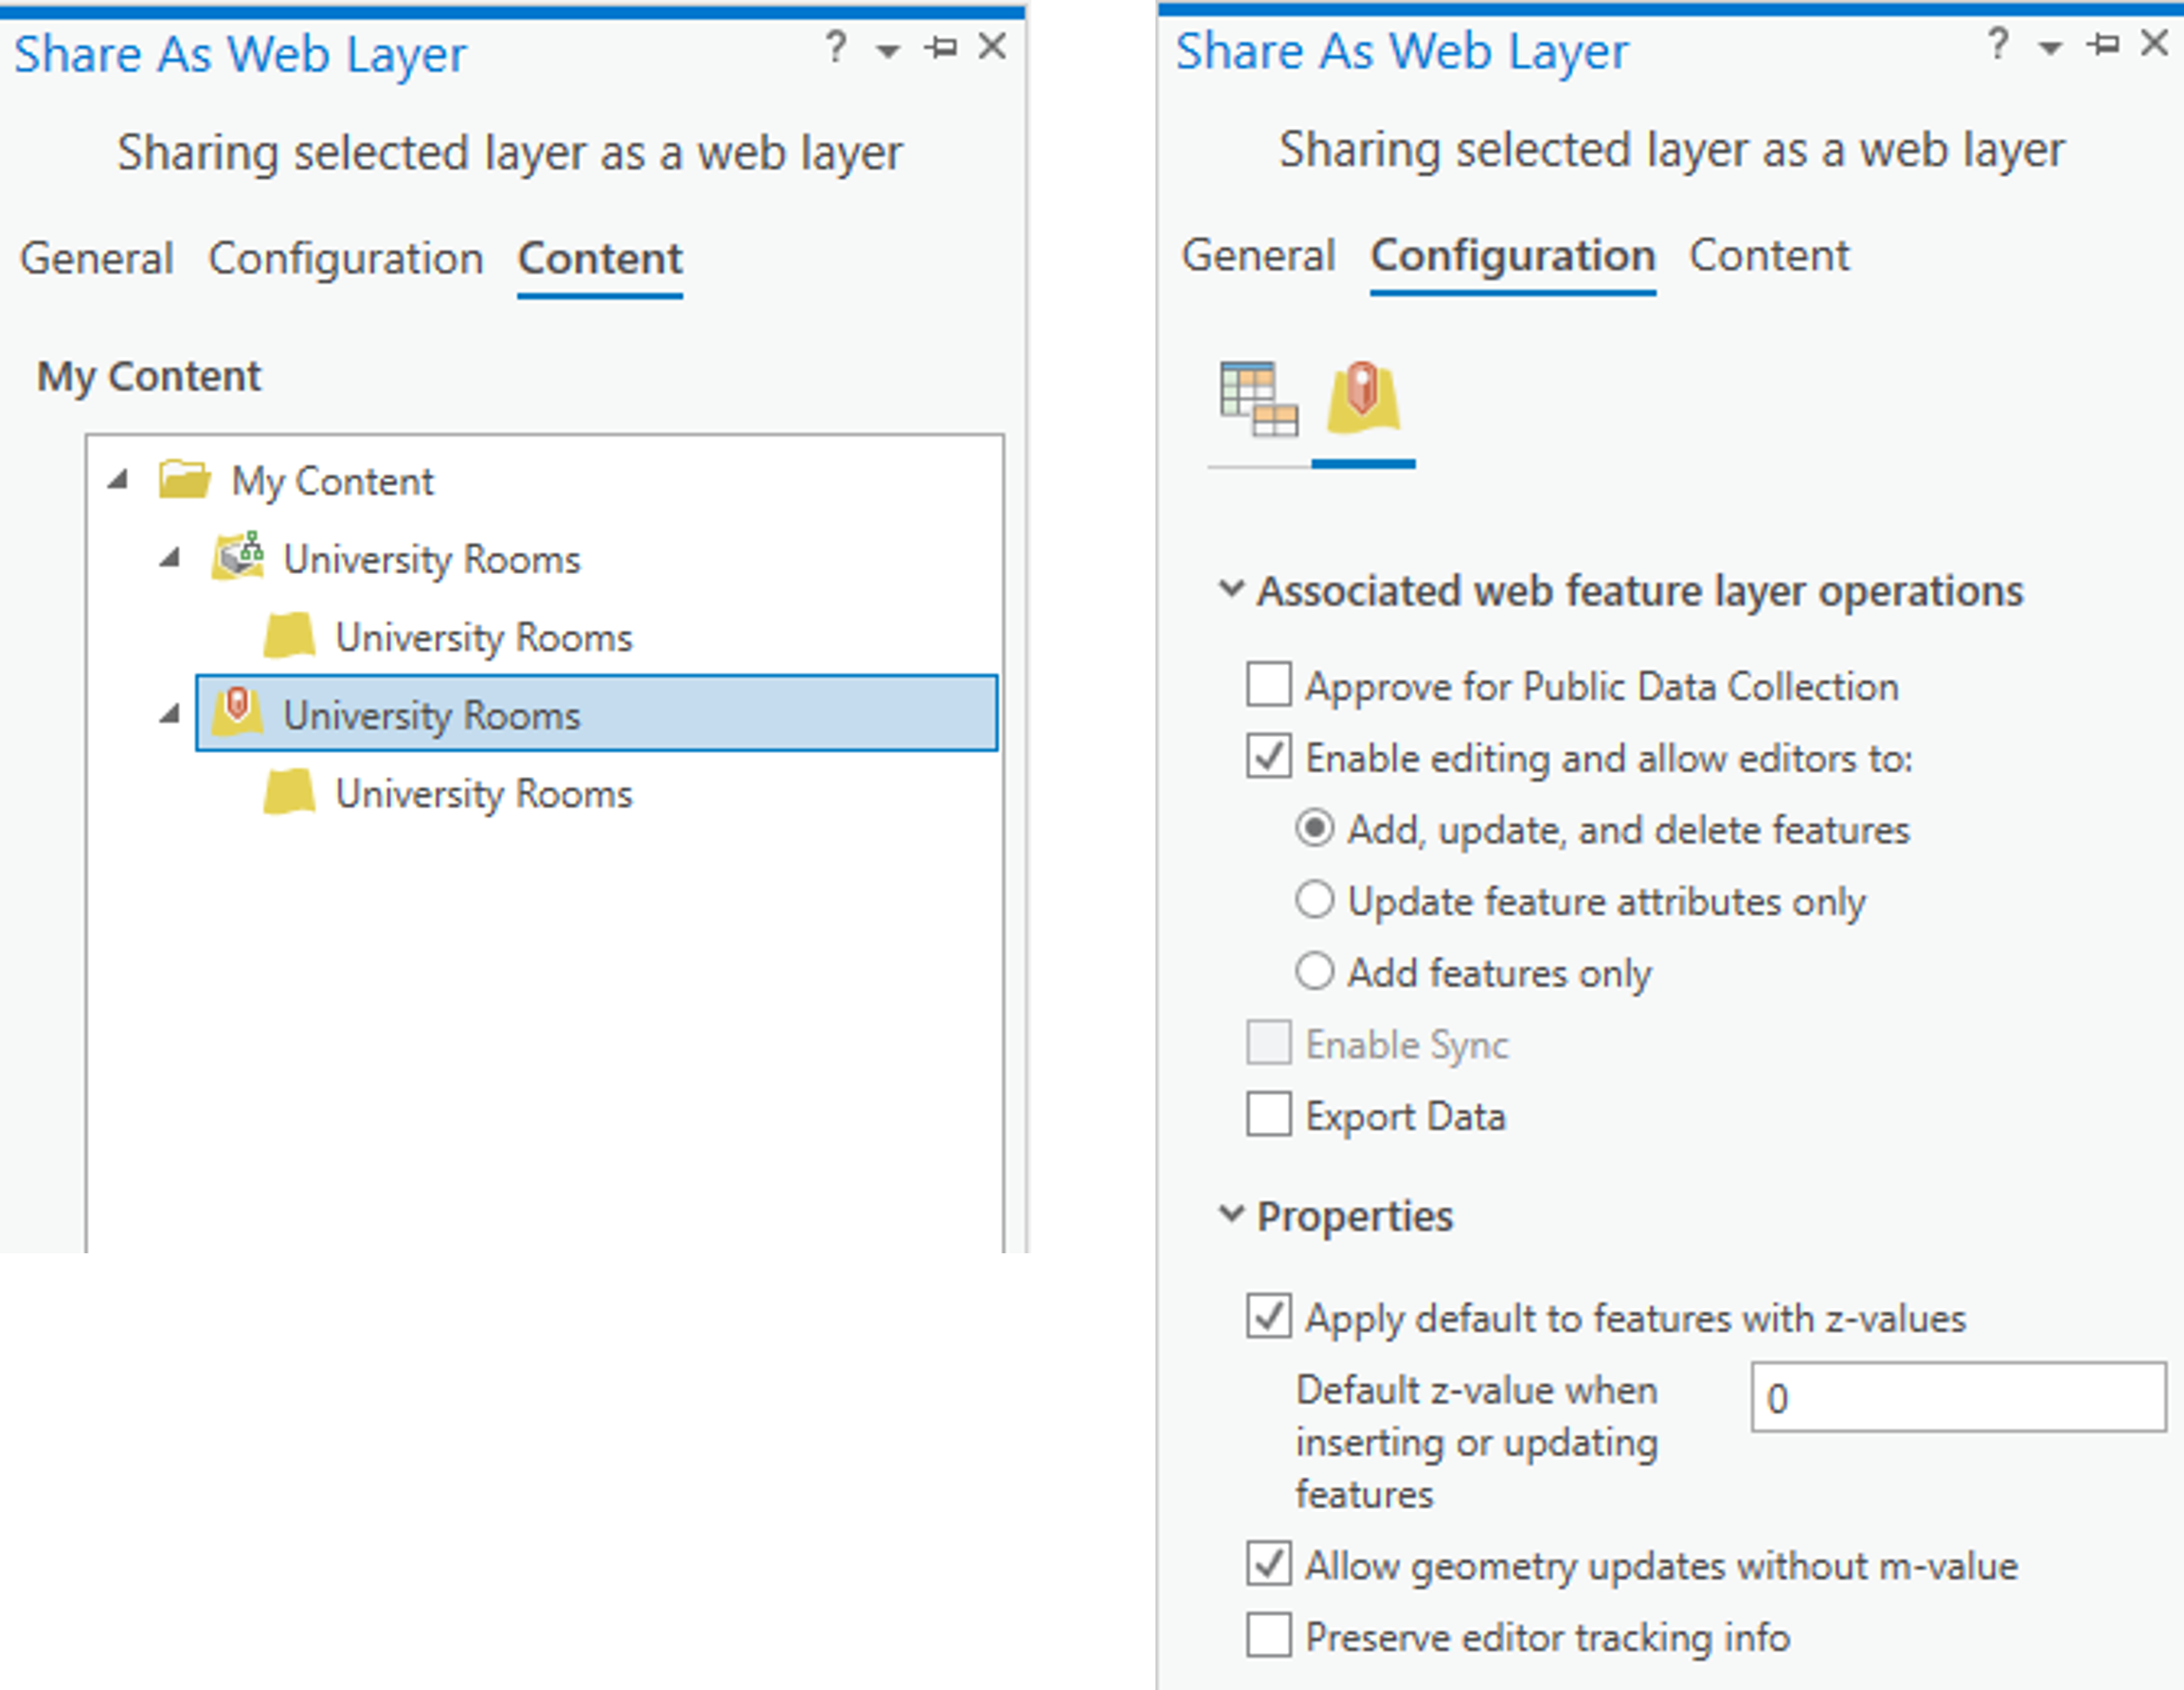
Once all required details have been completed, publish the layer.
4) Configure Layer Symbology using ArcGIS Online
If you used ArcGIS Pro to configure your layer symbology as outlined in step 2, you can skip this step.
If you defined your layer symbology to be white, prior to publishing, you can configure the layer symbology from within ArcGIS Online. To do this, open the item details page of your Hosted Feature Layer and select the Visualisation tab. From here you can edit the symbology of your layer, and once complete you should select Save Layer to ensure that your changes are applied.
Once you have done this, you will need to rebuild the Scene Layer cache so that your changes are reflected in the Scene Layer. To do this, open the item details page for your Scene Layer and from the Settings tab select Manage Cache, then choose to either fully or partially rebuild the cache. 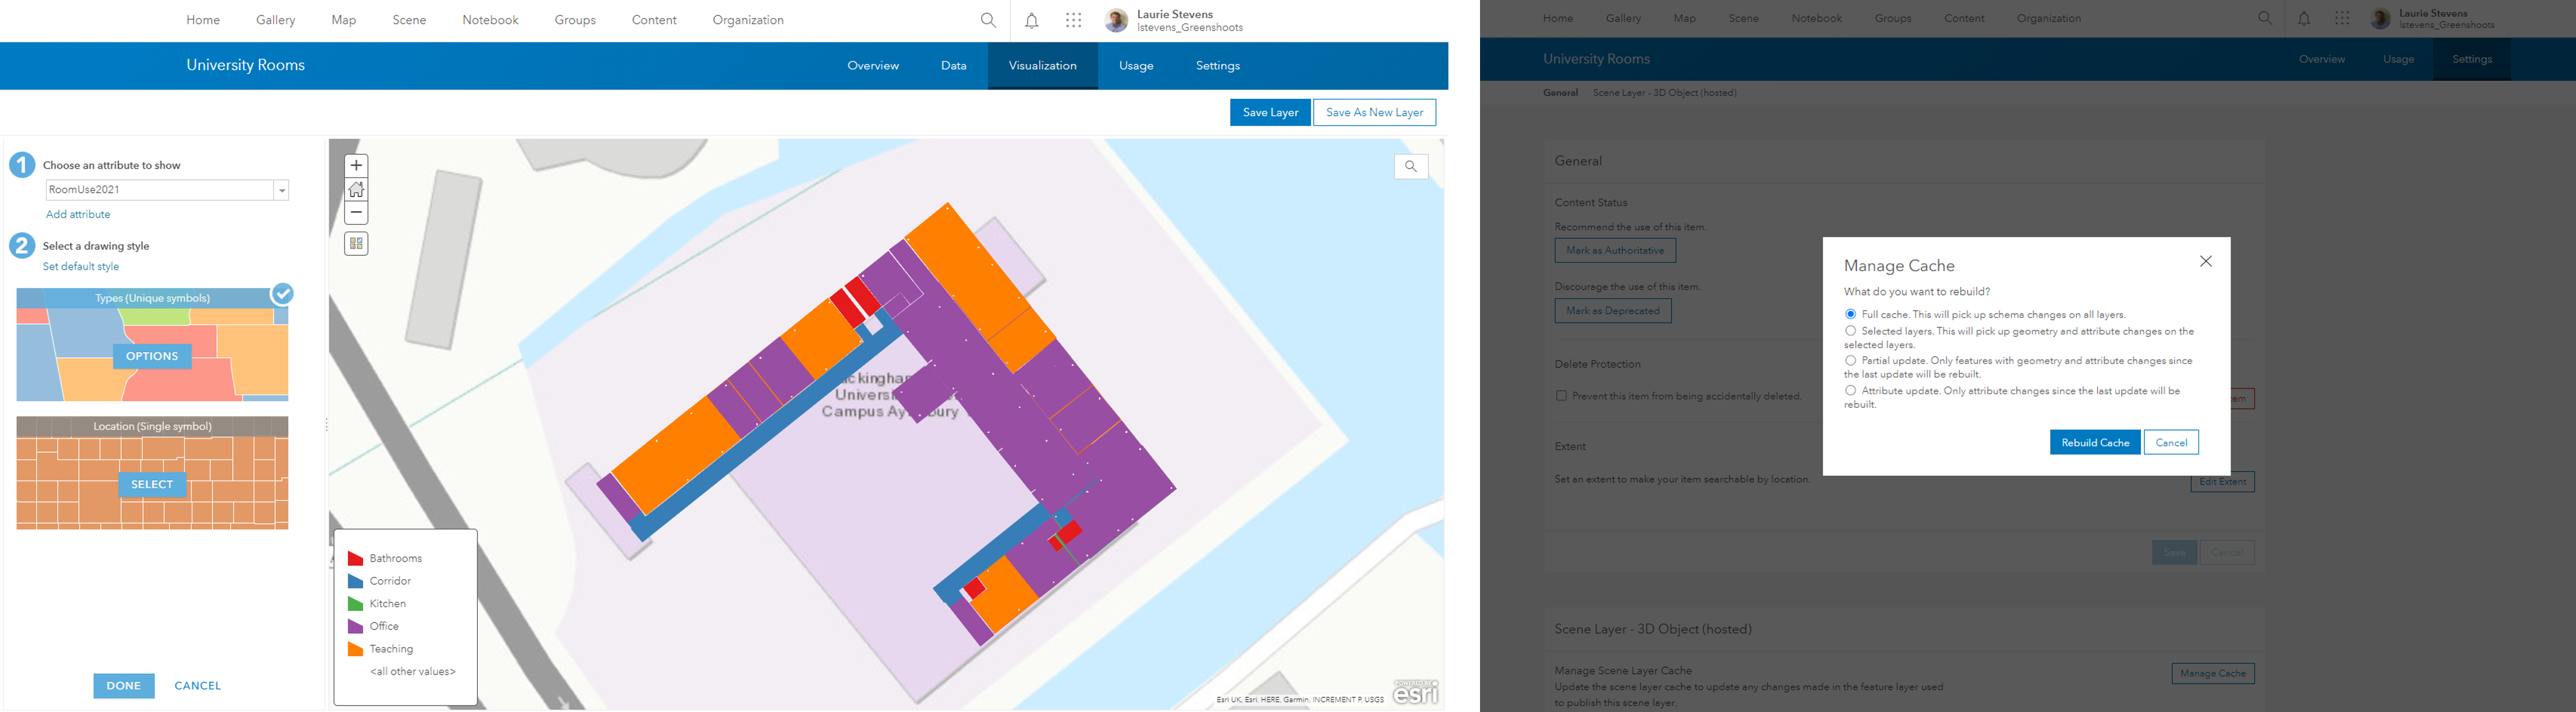
5) Modifying layer symbology
If after using the above steps to configure your layer’s symbology you wish to redefine the layer’s symbology settings (e.g. change the attribute being visualised by the symbology or change the colour ramp), you should repeat the process outlined in Step 4. Once you have done this, these changes will become visible in your Scene Layer.
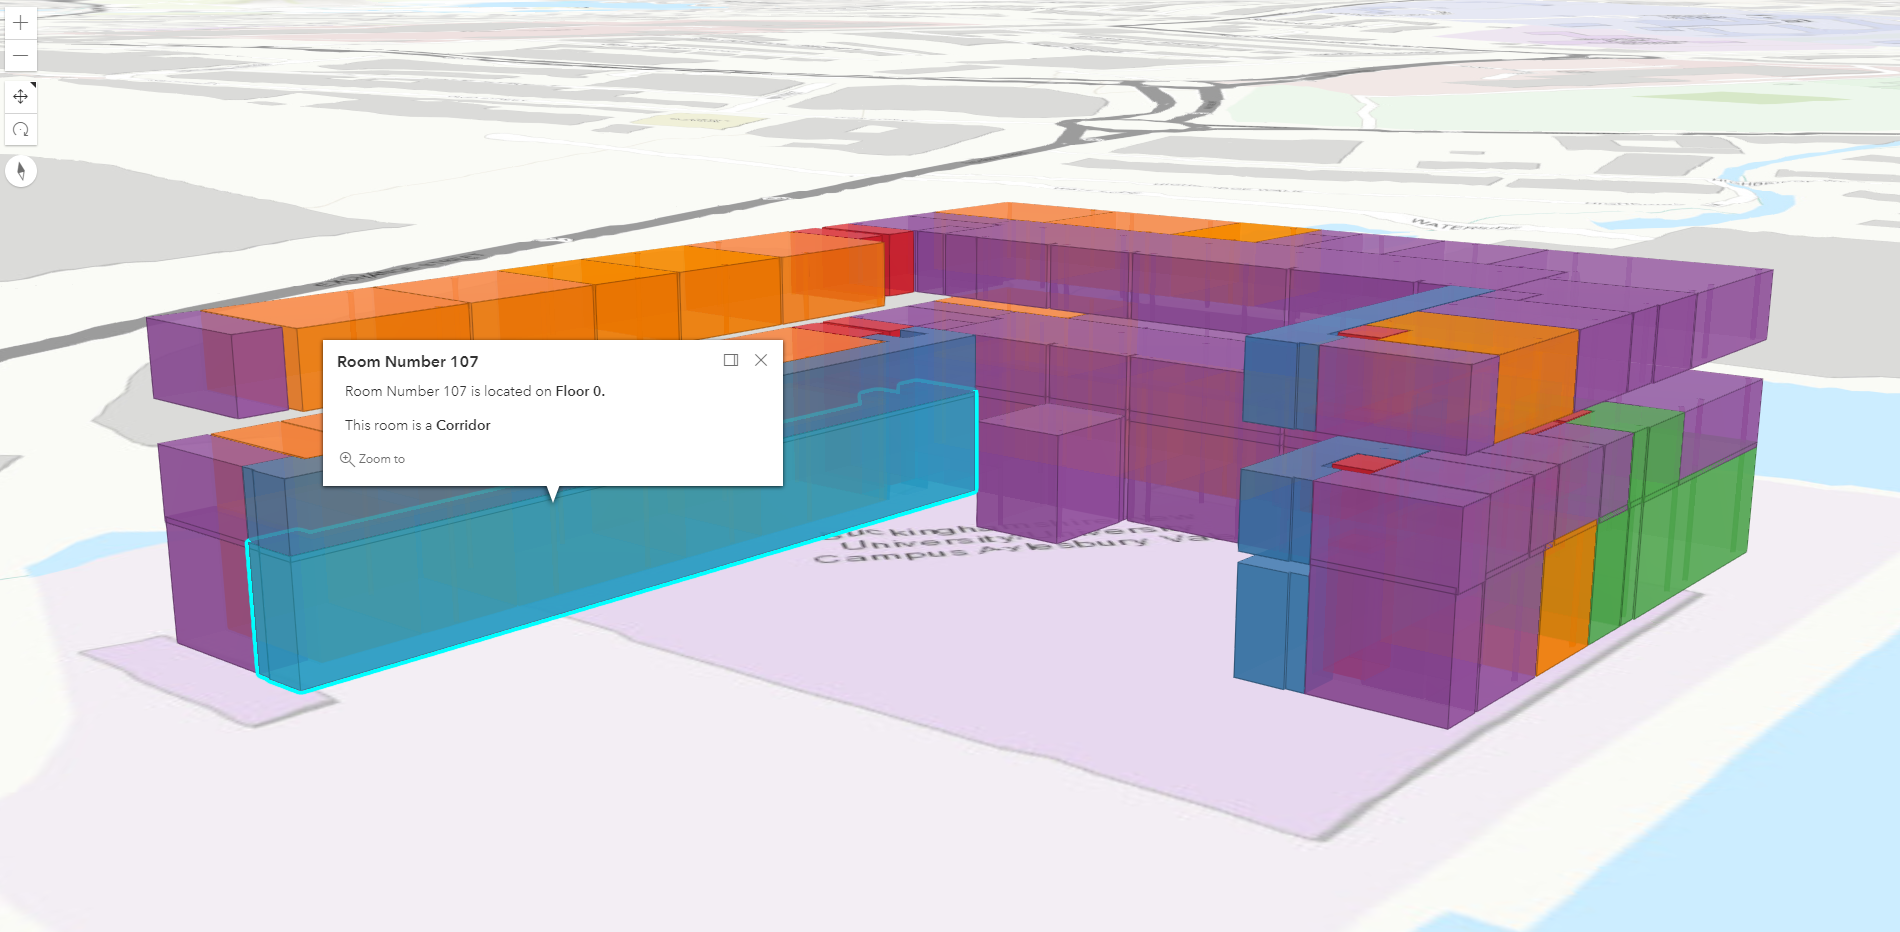
With this configuration in place, any edits made to attributes on the Hosted Feature Layer are immediately reflected in your Scene Layer symbology and pop ups without the need to rebuild the cache. In our example use case, we’ll re-categorising a corridor:
we can use our Hosted Feature layer to update the use type of a room: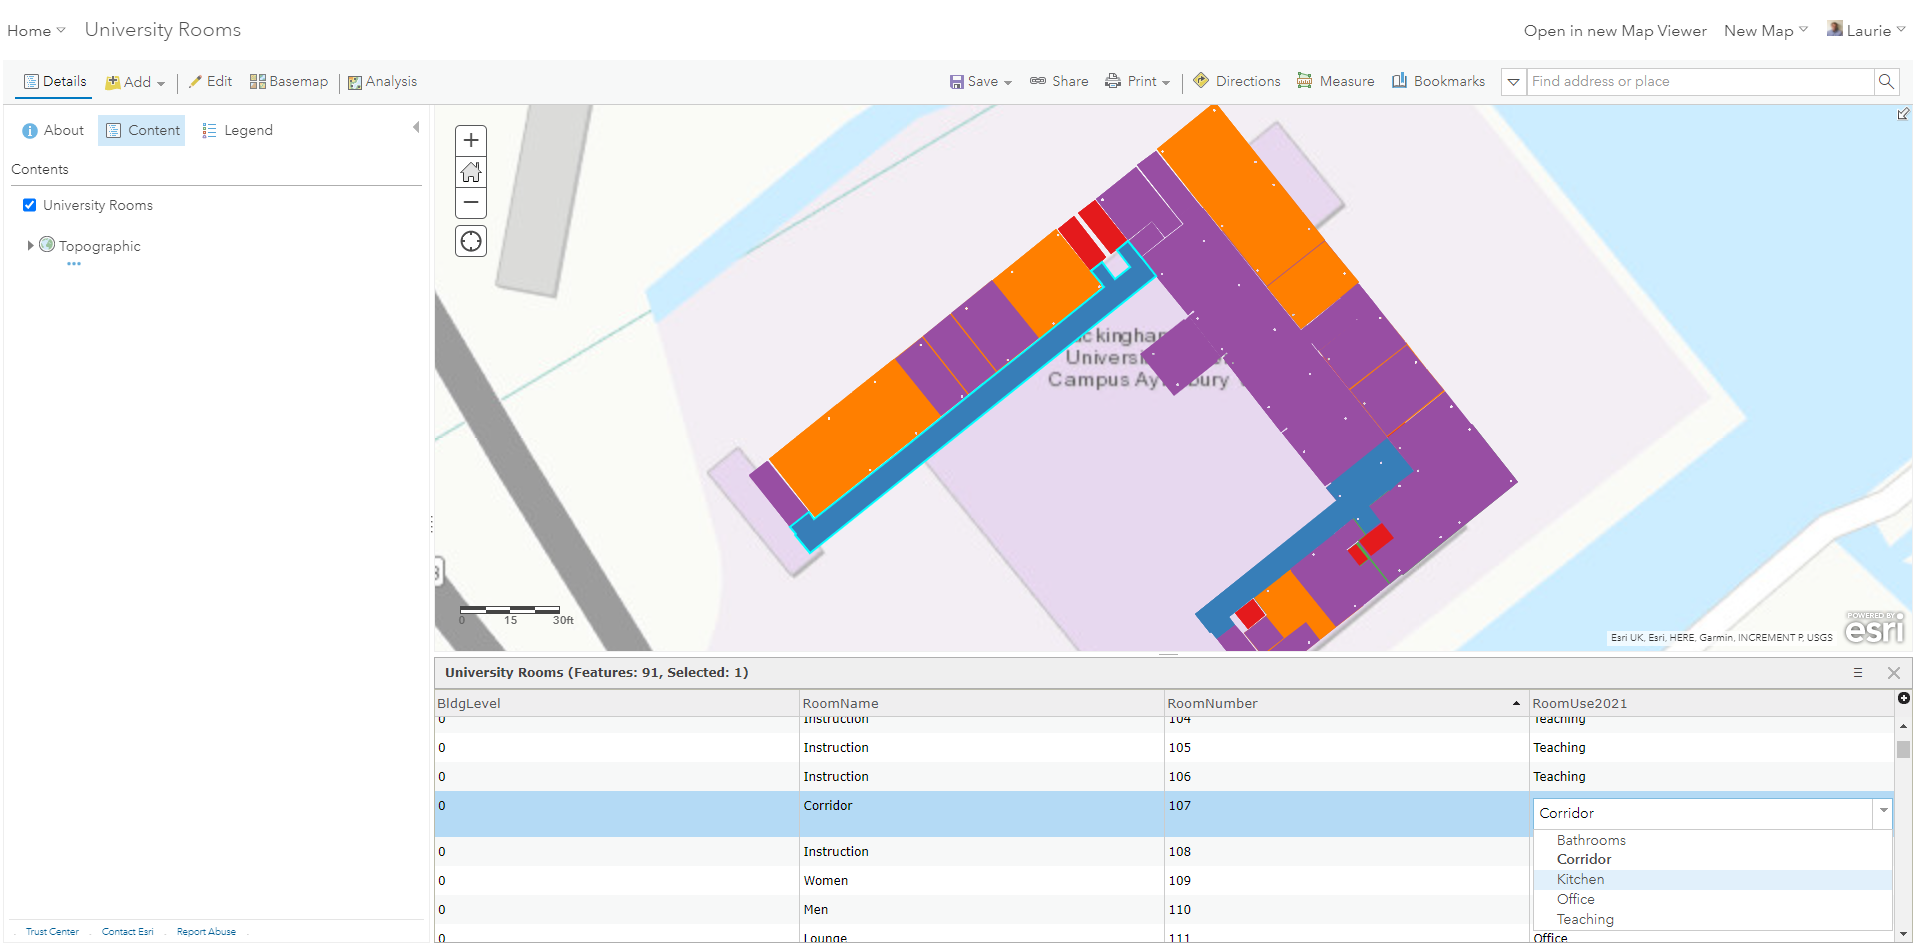
As soon as we make these changes, our Scene Layer displays the correct symbology for the updated room use type and the updated data is also visible through the layer pop ups: 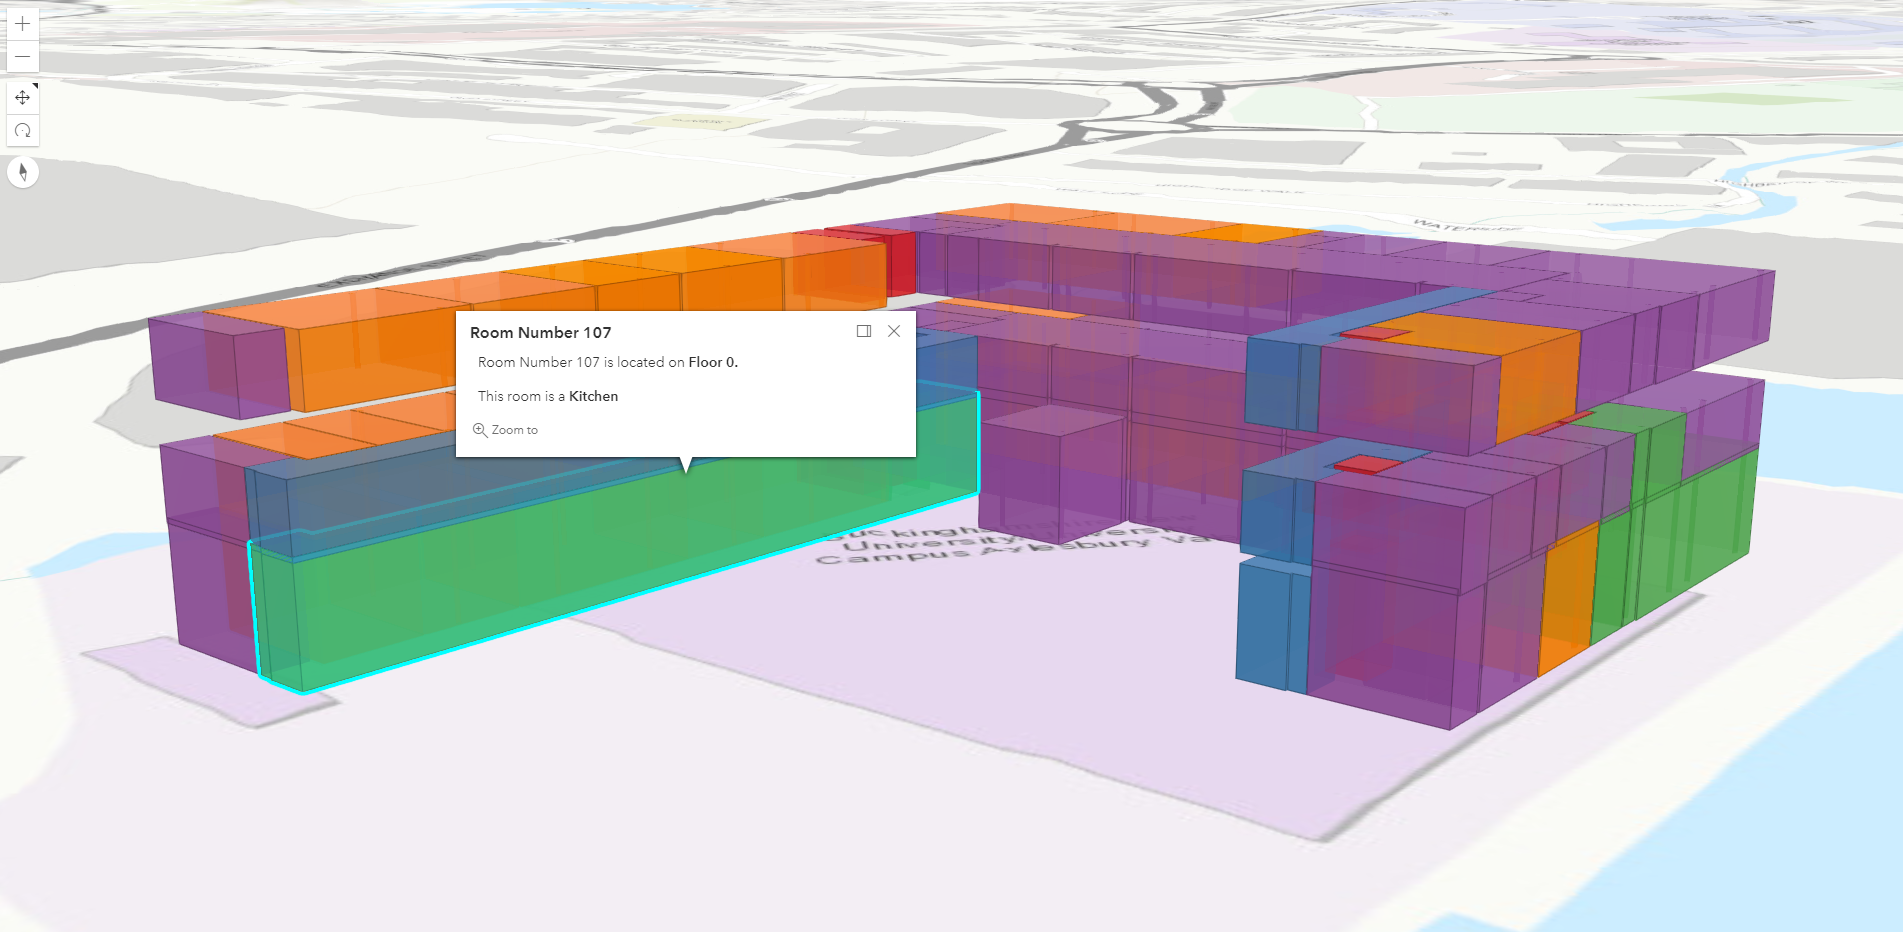
There are many potential use cases for this functionality. For example, real estate companies can quickly update the status of their available properties so that clients can view up to date information in a 3D web application. Thanks to this new capability, users now have the ability to edit attributes of 3D data and have the symbology change on the fly – while retaining the performance benefits offered by Scene Layers.