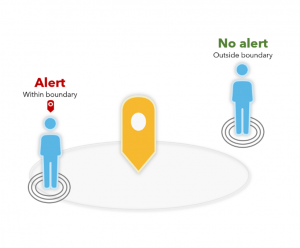
Location is at the heart of everything we do here at Esri UK. So any capability that allows us to get even more from our location data is pretty powerful. And that’s exactly what geofencing is all about. Geo refers to location and fence is exactly the same as the one between you and your friendly (or not so friendly) neighbour, acting as the boundary. Together, we get a geographic boundary or geofence. The geofencing capability is used to detect when a moving object (such as a person or vehicle) has entered a defined area. It is real-time spatial analysis, enhancing situational awareness by providing location-based alerts.
But why would I use it? Well, geofencing is used across many industries such as operations, public safety, advertising and logistics. Typical use cases include:
- Alerting field workers when they enter high risk areas
- Provide notifications of nearby points of interest
- Location-based advertisement
- Location-based tasking
Whether you’re still on the fence about this capability, keen to learn more, or just interested to see if I get anymore puns in… this blog goes further into our geofencing capabilities, which are delivered through two ArcGIS products – our real-time analysis capability ArcGIS Velocity and one of our field apps, ArcGIS Field Maps.
ArcGIS Velocity
ArcGIS Velocity is our cloud-native capability to ingest data from Internet of Things (IoT) platforms, message brokers and third-party APIs. With ArcGIS Velocity, users can process and visualise real-time data feeds and perform analysis. A common use case of this is enabling geofencing for mobile assets. Typically, this involves tracking the location of a live asset (a point) and detecting once it enters a defined area (a polygon). As well as point-inside-polygon geofencing, it can also use other geometries such as polylines, moving polygons and can even handle spatial relationships.
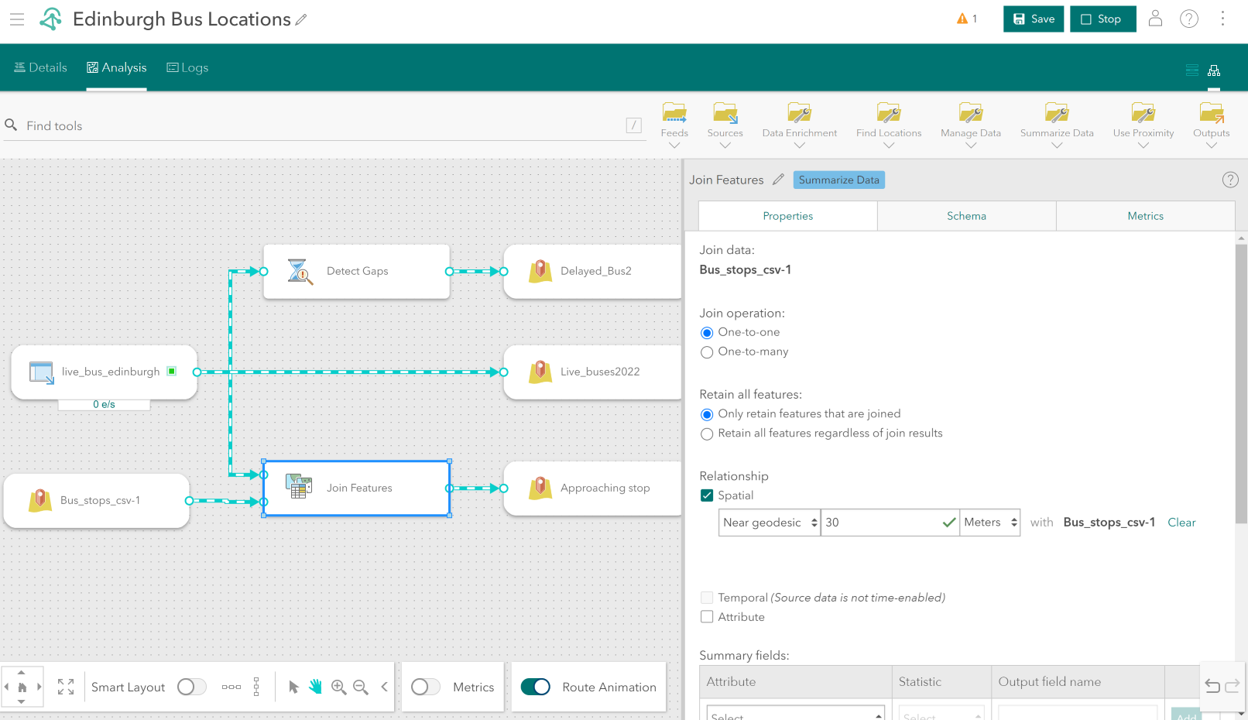
Let’s take a look at an example. Here we will determine when a bus (tracked asset) is in close proximity to a bus stop (geofence). Our geofences are point features, meaning we will need to define a spatial relationship.
There are a variety of tools which support geofencing in Velocity. In this case, we will use the Join Features tool to join the geofence data (bus stops) to the streaming data (live bus locations) based on a spatial relationship of 30 metres.
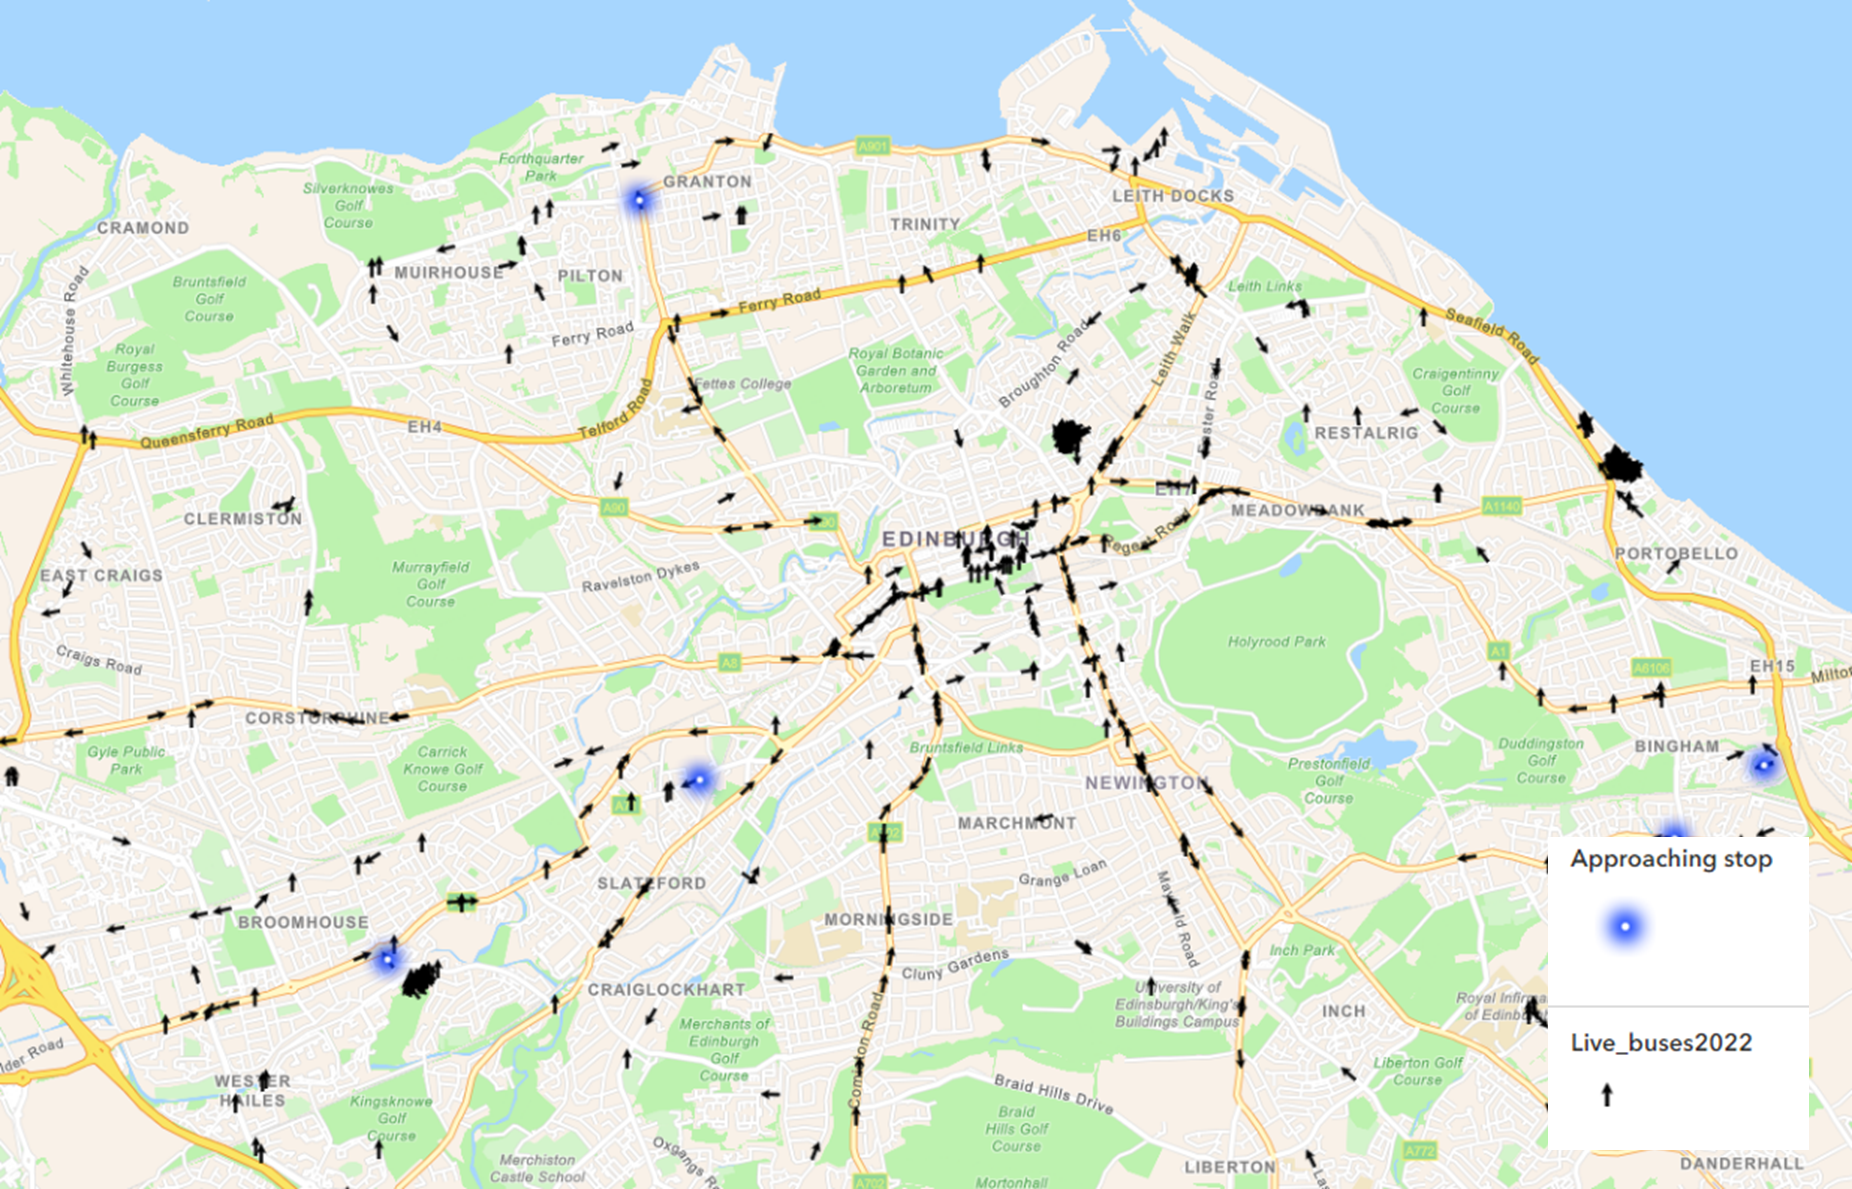
Now we can bring this feature layer into Map Viewer. Below, you can see all buses in Edinburgh have been symbolised using arrows, orientated in the direction of the bus heading and the blue fireflies symbolise when a bus is approaching its stop.
And this is just the beginning, why not bring in external data such as Waze to view local traffic jams or weather events that may impact the bus network. Be sure to show off your geofencing efforts by designing apps such as this dashboard, to visualise and share your geofenced data with stile.

From tracking maintenance teams and understanding proximity to tasks, to tracking delivery drivers and alerting customers once they’re nearby or even tracking valuable assets, ArcGIS Velocity supports many use cases. Whether you have your own data or are wanting to use those available in ArcGIS Living Atlas of the World, it is definitely worth exploring these geofencing capabilities.
ArcGIS Field Maps
Thanks to the July 2022 update, ArcGIS Field Maps now provides two types of native geofencing capabilities – Location Alerts and Controlling Location Sharing.
Please note, to use geofencing in ArcGIS Field Maps, you must enable location sharing for the organisation. For more information, see this documentation.
Sending location alerts
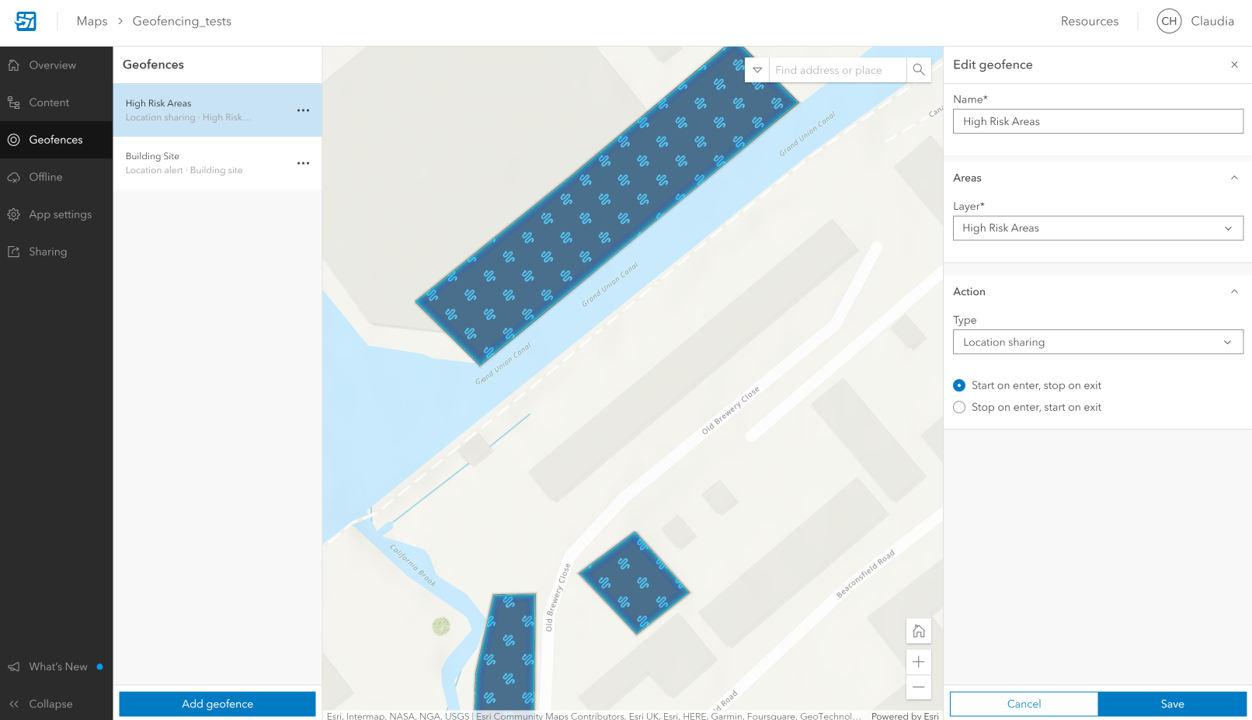
Users can easily define geofences in ArcGIS Field Maps using the Geofences tab. Using the Edit Geofence panel, you can configure the properties and actions for when a worker (with their device) enters a geofence.
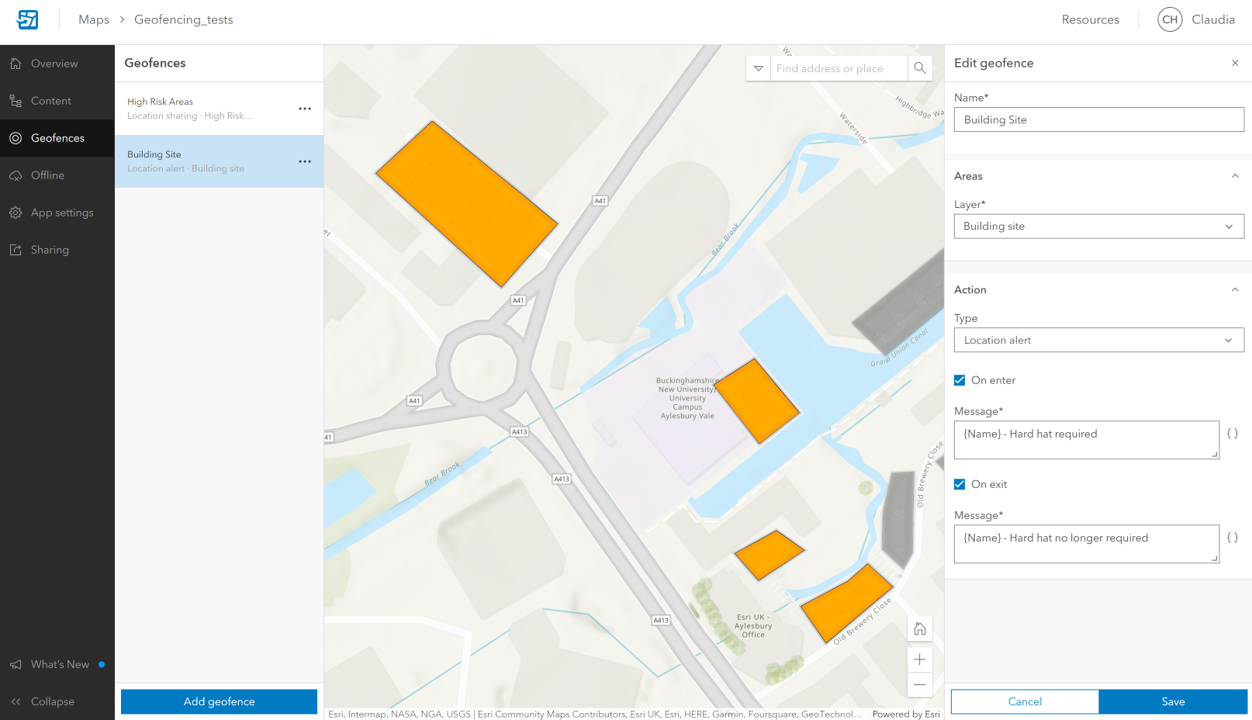
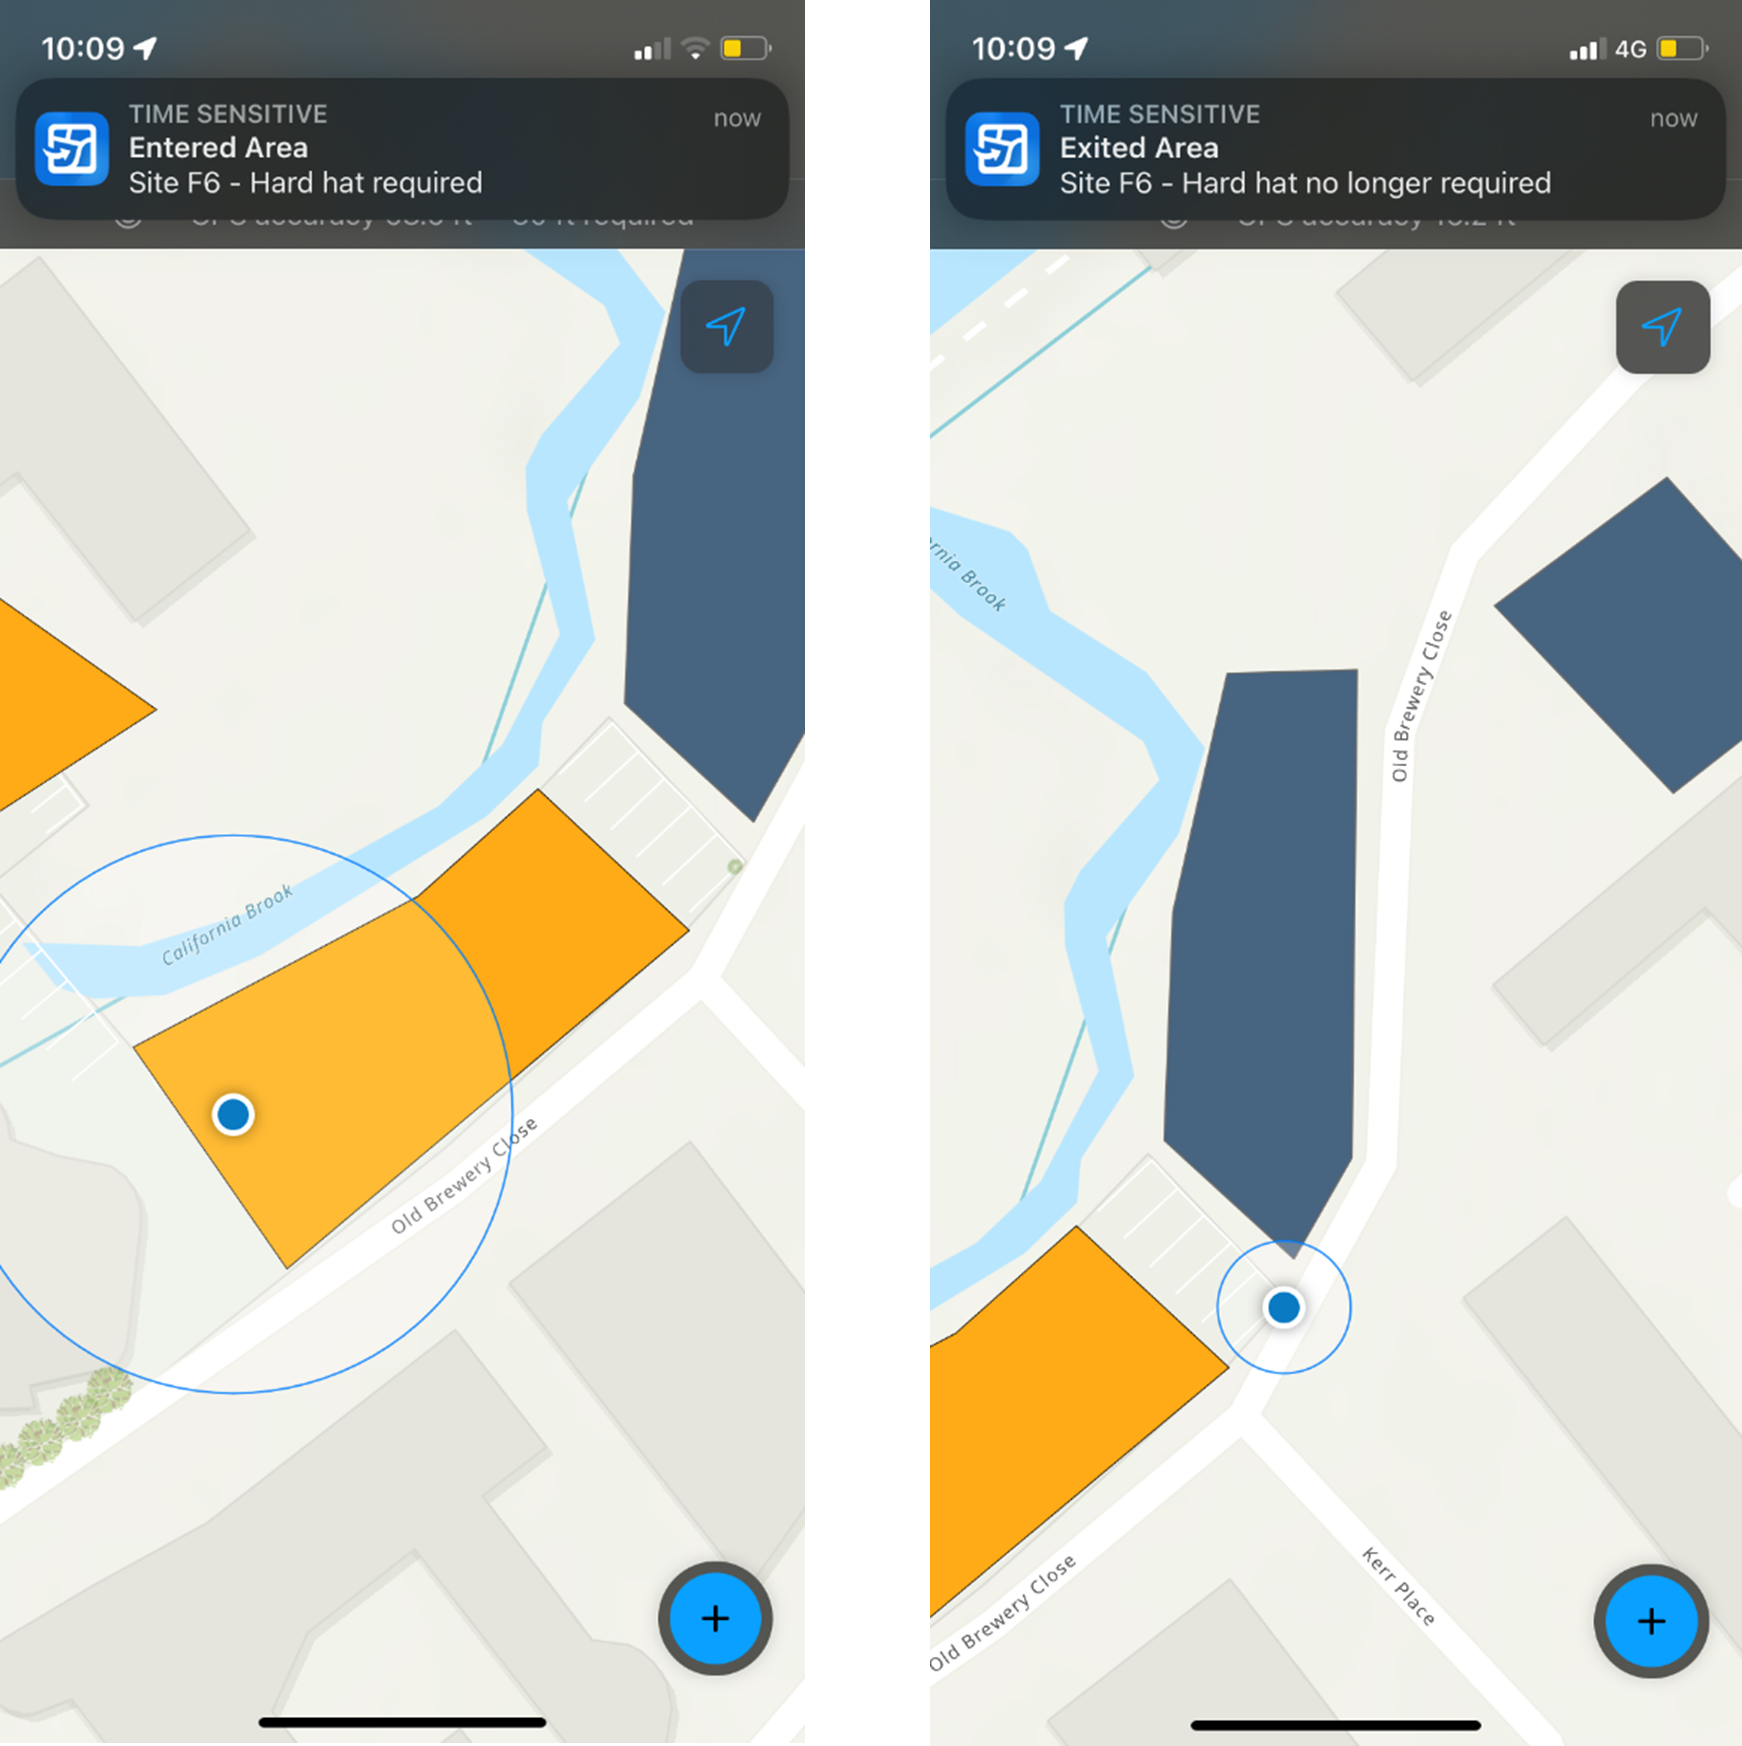
In this case, I want to notify mobile workers that a hard hat is required when entering a building site. Simply Add geofence, provide a name, select the appropriate polygon layer (Building site) and specify the action, Location Alert. You can specify when the alert is sent (on entry, exit, or both) and can even use the Add Field { } button to use field values in the message (Building site name). And voila, you have created a geofence.
When mobile workers open a map containing geofences, they will be asked to share their location and receive notifications. Once both are enabled, the map can be used.

Just as configured in the web application, as soon as a mobile worker enters/exits a building site, they are sent an alert on their device.
Control Location Sharing
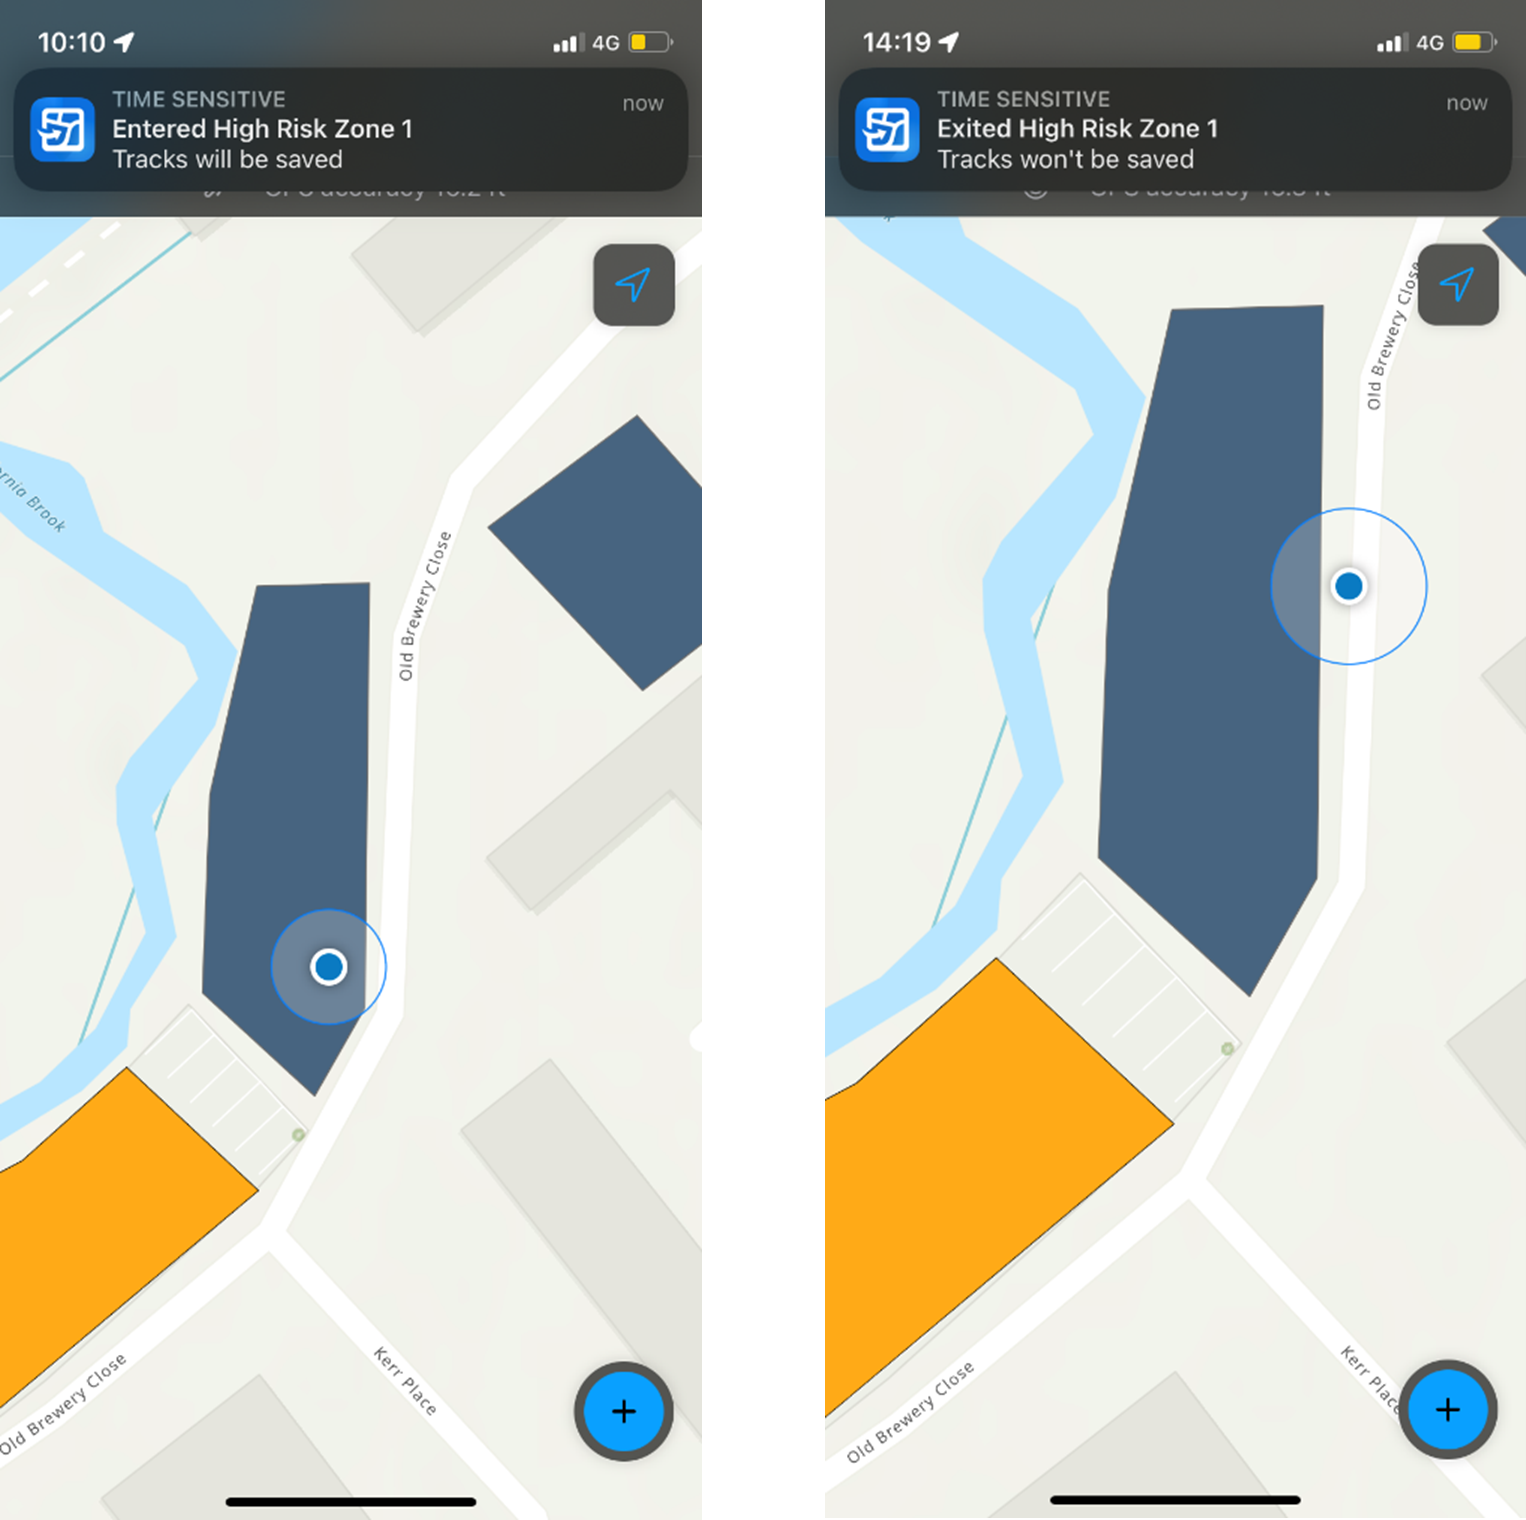
As well as sending alerts, ArcGIS Field Maps can control when to enable location sharing based on the mobile workers location. For example, you may not want to track workers outside of company property, or in confidential zones. In this case, I want to turn on location sharing when mobile workers enter ‘High Risk’ areas. As well as workers safety, this reduces the amount of data collected and could even speed up data syncing.
Creating this geofence follows the same steps as above, except I am using the ‘High Risk Area’ boundary and the action is Location Sharing. You can specify when to enable location sharing – ‘start on enter, stop on exit’ or ‘stop on enter, start on exit’.
And there we have it! Already the geofencing capabilities available with ArcGIS allow you to get much more from your location data, and this is just the beginning. Point and line feature layers to define geofences are already being developed in ArcGIS Field Maps, so watch this space.
I hope you’re no longer feeling pipped at the post with our geofencing capabilities and perhaps you even want to have a go at geofencing yourself.