Esri UK have recently published a dataset focusing on pavement widths across GB. This has given the Local Authorities the opportunity to better prepare for social distancing measures over the coming months. It was also featured in recent article in The Guardian. In this blog, I want to highlight the methodology we used to develop the dataset.
Seven steps to create the data
Step One: We identified the pavements and paved areas for Great Britain from OS MasterMap data, applying a filter to extract man-made ‘Roadside’, ‘Path’ and ‘Roadside, Structure’ features as well as other features such as footbridges.
Step Two: We used the Dissolve tool to combine adjacent features, allowing us to identify the full width of a given pavement.
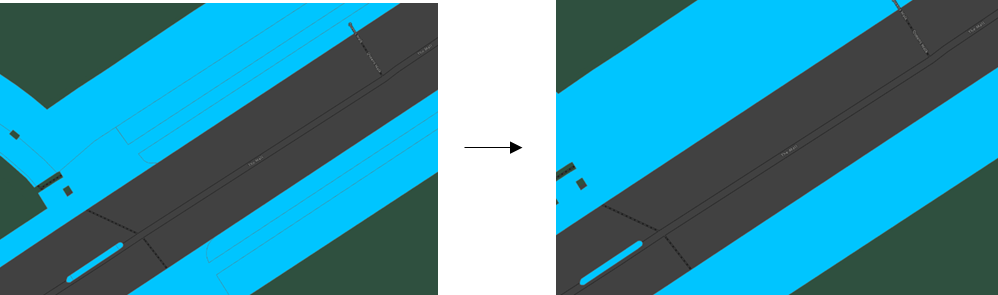
LEFT: RAW OSMM FEATURES WITH PAVEMENTS IN LIGHT BLUE // RIGHT: OSMM FEATURE DISSOLVE OUTPUT
Step Three: Using the Pairwise Buffer tool with a negative value, we were able to identify pavements that were above or below a given width. For example, a buffer of -1 metre will identify any pavements that are wider than 2 metres, by continuing to display a shape area. Any sections of pavements narrower than 2 metres, will not be displayed as a polygon.
We used the Pairwise Buffer rather than Buffer tool, as this uses multiple CPU’s and improved the speed of performance when analysing the entire GB dataset.
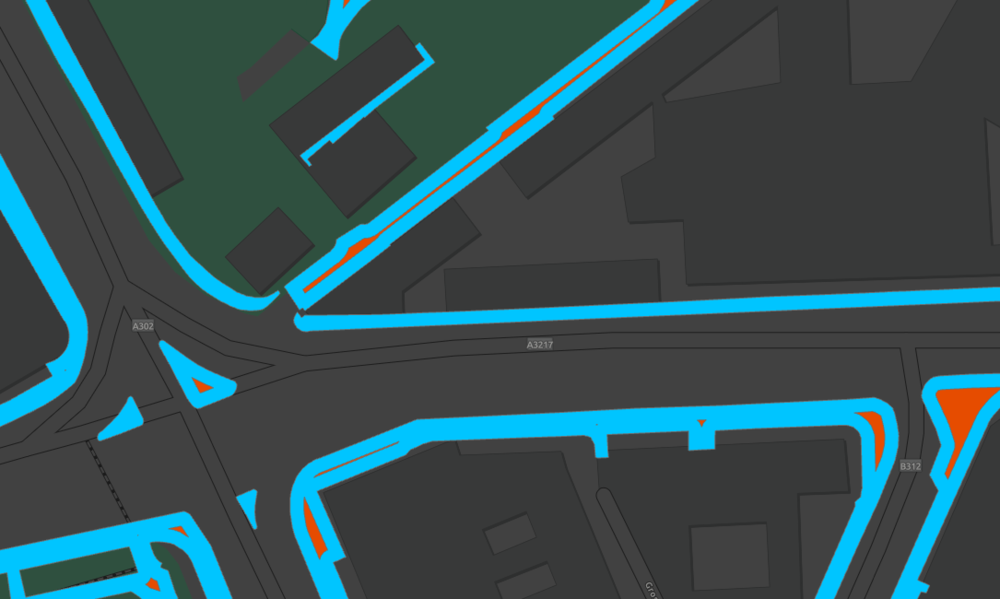
BLUE = DISSOLVE OUTPUT // ORANGE = PAIRWISE BUFFER OUTPUT.
Step Four: Using the Make Feature Layer tool identifies all features that have a shape area > 0 and removes any null features or invalid geometries.
Step Five: Using Pairwise Buffer tool, set with a positive value, reverses the buffer process in step three. The buffer will be applied to all features that are still present and have not been removed in step four. The buffer distance is calculated to ensure it’s area is similar to that of the original shape area, including the corners. It doesn’t matter if the buffer exceeds the original pavement shape, as this is addressed in step six.
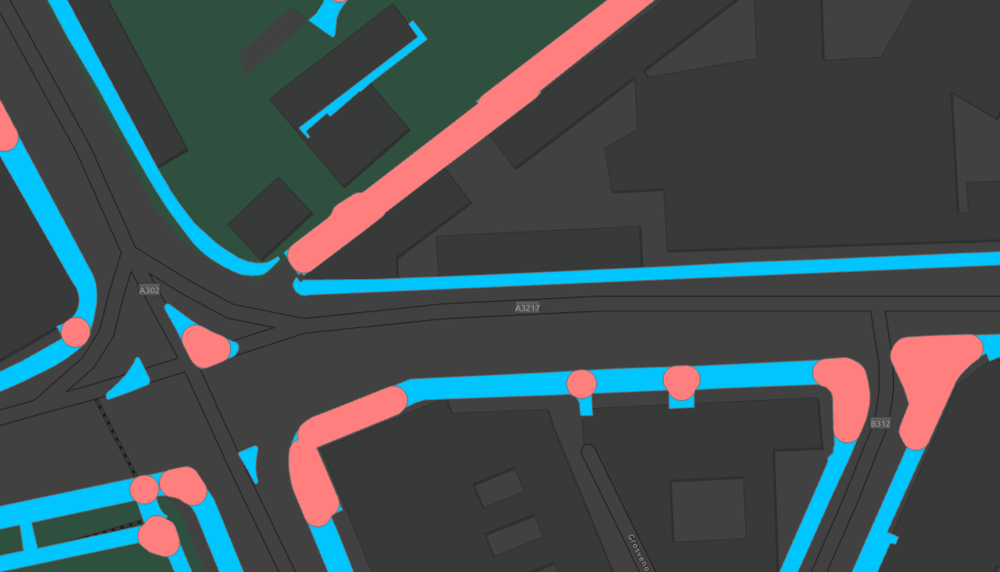
BLUE = DISSOLVE OUTPUT // RED = PAIRWISE BUFFER (2ND USE) OUTPUT
Step Six: The Intersect tool clips the excess area that overlaps the original feature and restores the attributes of the original MasterMap feature such as TOID.
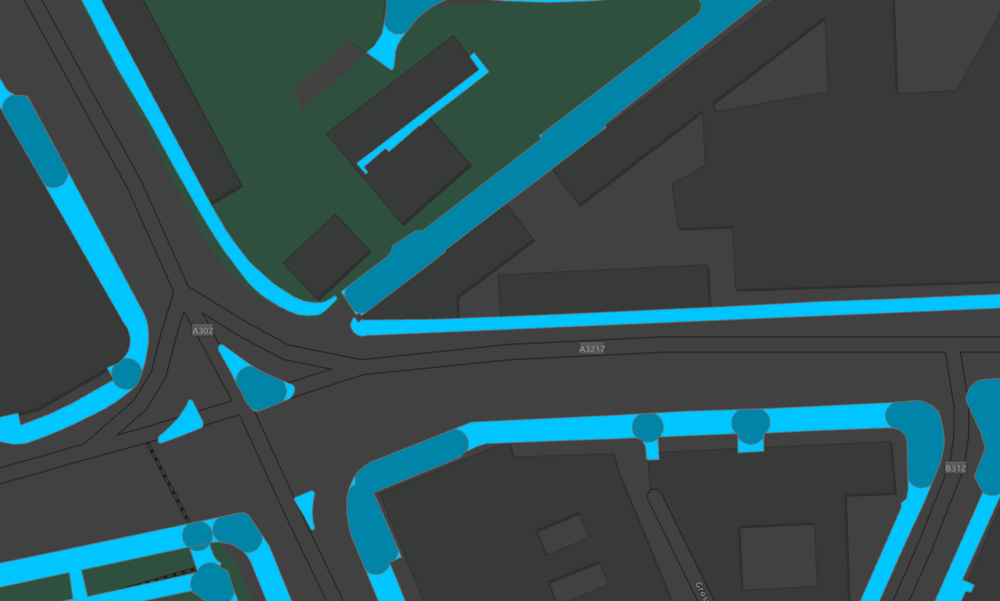
LIGHT BLUE = DISSOLVE OUTPUT // DARK BLUE = INTERSECT OUTPUT
Output: If you run the model twice, you will end up with two outputs (plus the original layer):
-
-
The original OSMM Feature dataset (step one) = 0-2 metres
-
All pavements over 2 metres in width = 2-3 metres
-
All pavements over 3 metres in width = 3+ metres
-
You can now map pavement widths across the three categories:
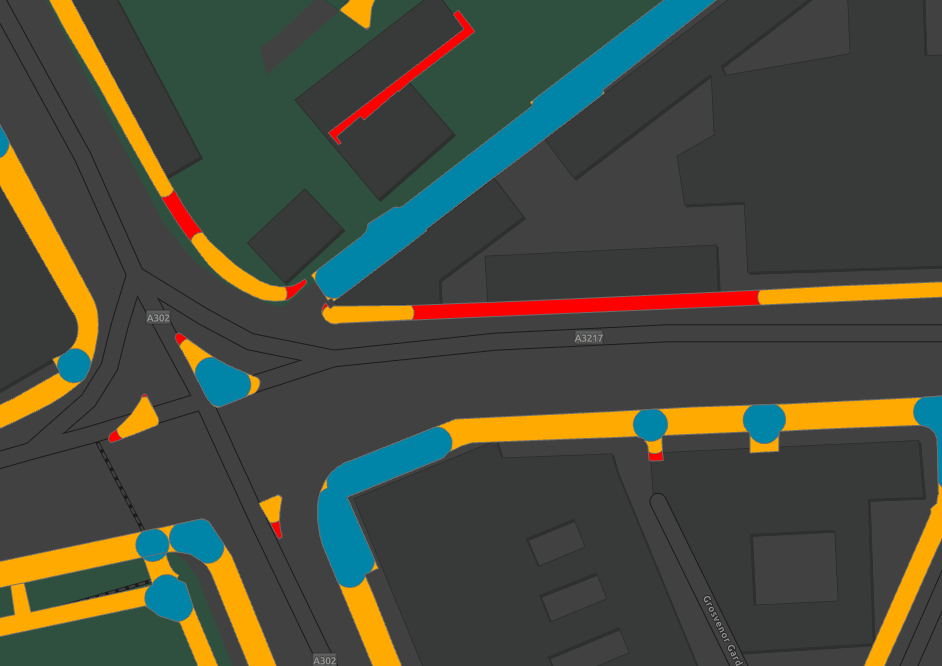
RED = 0-2M // YELLOW = 2-3M // BLUE = 3M+
Step Seven: (optional) For convenience, the three layers were merged into a single dataset. Before creating a single output we used the Erase tool to ensure there was no overlap between the three layers. Visually, this looks the same as the above image but, when working on a large area, it speeds up performance when drawing.
We then applied the Merge tool to create our single output. When using the Merge tool, it’s essential you add source information to output, as this is how you can symbolise your dataset.
Final Output
In the short time period we had to create this dataset, we felt this was the most reliable approach to calculating pavement widths nationally, but are keen to hear feedback about improvements we could make. As alluded to earlier, this comes with some caveats to the data, which can be found in more detail on the product info page.
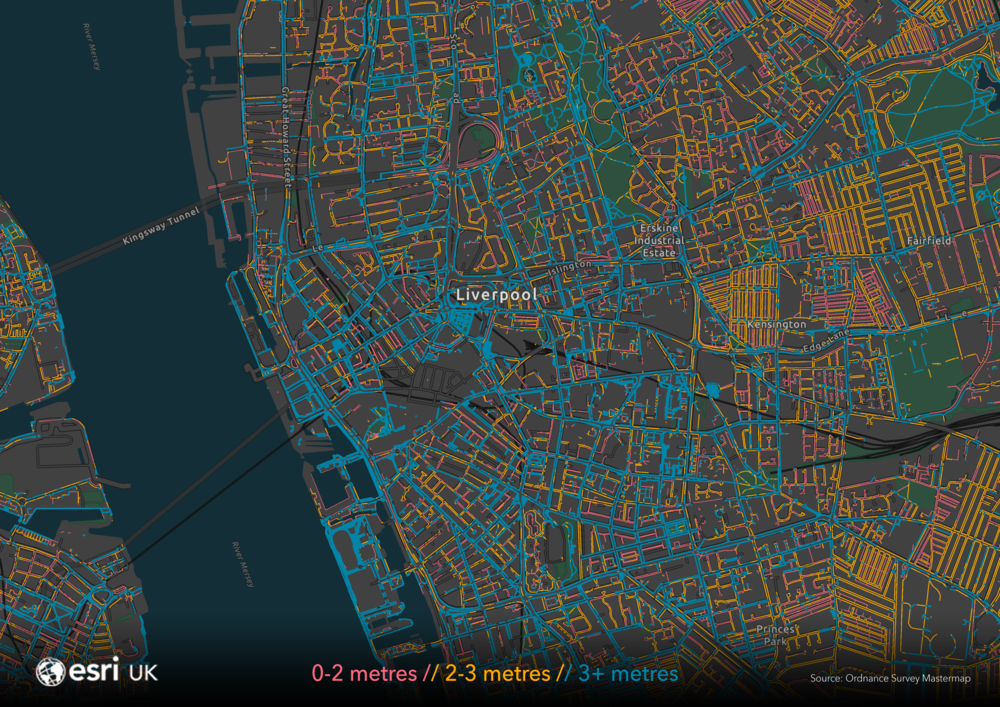
FINAL OUTPUT
Don’t hesitate to comment with any further questions and let us know how you are getting on.
Footnote: For the Pairwise Buffer tool in step’s three and five, we used the following values:
Step Three
To calculate the pavements of 2m-3m, you will need to use a buffer distance of ‘-1m’
To calculate the pavements of 3m+, you will need to use a buffer distance of ‘-1.5m’
Step Five
To calculate the pavements of 2m-3m, you will need to use a buffer distance of ‘1.414m’
To calculate the pavements of 3m, you will need to use a buffer distance of ‘2.121m’