Survey123 for ArcGIS uses simple and intuitive forms that allow you to collect field data easily. It basically lets you create, share, and analyse your surveys. Survey123 is already popular with users in public health, education, public works, resource management, disaster response, and humanitarian agencies.
Getting started with Survey123 is a simple 1-2-3 process: ask questions, get answers, and make better decisions. You can author your surveys with Survey123 and share them in ArcGIS. Teams in the field then capture survey results with their smartphones and tablets using the Survey123 mobile app or by accessing surveys in a web browser. Captured data is immediately available for analysis in ArcGIS, to help you and your organisation make better decisions. If you are not a GIS expert don’t worry, these simple surveys are easy to create. In this blog, I’ll walk you through these three steps in more detail.

Survey123 is a simple 1-2-3 process.
Step 1: Ask Questions
With Survey123, you can design your surveys in 2 ways. For simple surveys, you can use the Survey123 website - a user-friendly, drag-and-drop configuration experience. For more sophisticated surveys, you can leverage the full power of XLSForm specification using Survey123 Connect - a desktop app that lets you author surveys using spreadsheets.

Create surveys using either the web designer or Survey123 Connect.
Smart forms enable advanced logic and validation rules.
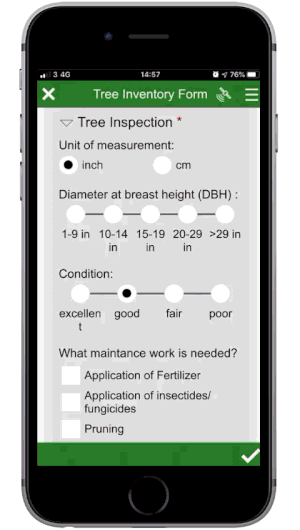
Step 2: Get Answers

Start capturing data in the field with mobile apps.
With the Survey123 field app, you’ll only need to download published surveys shared with you to start capturing data in the field. The mobile app is designed with simplicity in mind, so data collectors can easily complete forms with minimal training. The app works on most devices - including smartphones and tablets - and is available on a range of platforms including iOS, Android, Windows, and Mac OS X.
The app allows you to capture data either online or offline. The mobile app takes advantage of the location-tracking capabilities found on your mobile device so you will know where each survey was submitted. When going offline, be sure to pre-download your survey while online. Surveys collected will be submitted to ArcGIS when a network connection is re-established.
Another way to access your surveys is through a web browser. This works well with simple surveys.
Step 3: Make Better Decisions
Once your survey data is submitted to ArcGIS, it’ll come up immediately on the Survey123 website. The website has great ready-to-use reporting capabilities, allowing you to view a summary of your collected data. You can also look at basic stats - such as how much data is being captured, where, when, and by whom. Summary reports for individual survey questions can also be generated, providing you with deeper insights into your data. You can control which survey questions to include or exclude in the report as well as how results are presented.
The beauty of Survey123 is that it is fully integrated with the ArcGIS platform. When a survey is published to ArcGIS, a form item and a hosted feature service are created in your organisation portal. Collected survey data is stored as points in the hosted feature service so it can be viewed in a web map. Open it in the Map Viewer to use the analysis functions or share the web map in other ArcGIS apps - including Web AppBuilder, Operations Dashboard, StoryMaps, Collector, and Workforce. Last but not the least, a copy of the survey data can be exported to a comma-separated values (CSV) file, a shapefile or a file geodatabase.

Ready-to-use reporting capabilities on Survey123 website.
Fancy knowing more about the new capabilities of Survey123 - including feature reports, line and polygon capture, image-map appearance and more? Head over to the following blog.