Picture this – you have a lovely set of maps, web apps and layers, all ready to go. There’s only one thing standing in your way… sharing your creations.
Well, I’ve got some good news. I’m here to guide you through the sharing process and shed some light on the sharing options at your disposal in ArcGIS. Some more good news – this blog is long enough to warrant grabbing yourself a cuppa before you settle in…
Just before we begin…
… a few things to consider when it comes to sharing.
Understanding user types
Managing data access in ArcGIS begins with identity – knowing who you are and what you should have access to. A named user is the foundation of the ArcGIS security model, and from there, roles and privileges define what each named user can do. To be able to share content yourself you will need a Creator user type and above.
Roles & privileges
As a named user in ArcGIS, the type of work you can do and how you can share that work is determined by your role and the privileges assigned to you. Default roles include set privileges, but Organization administrators can assign and change the privileges associated with custom roles. Take a look at this useful documentation for more.
Your audience
Who needs to access your content? Maybe it’s just you! Or it could be specific people inside or outside of your ArcGIS Organization. Maybe you want to share with the wider ArcGIS community? It could even be a combination of these options.
For the purpose of this blog, let’s imagine you’ve been working on some very exciting content… this could include web maps, apps or layers.

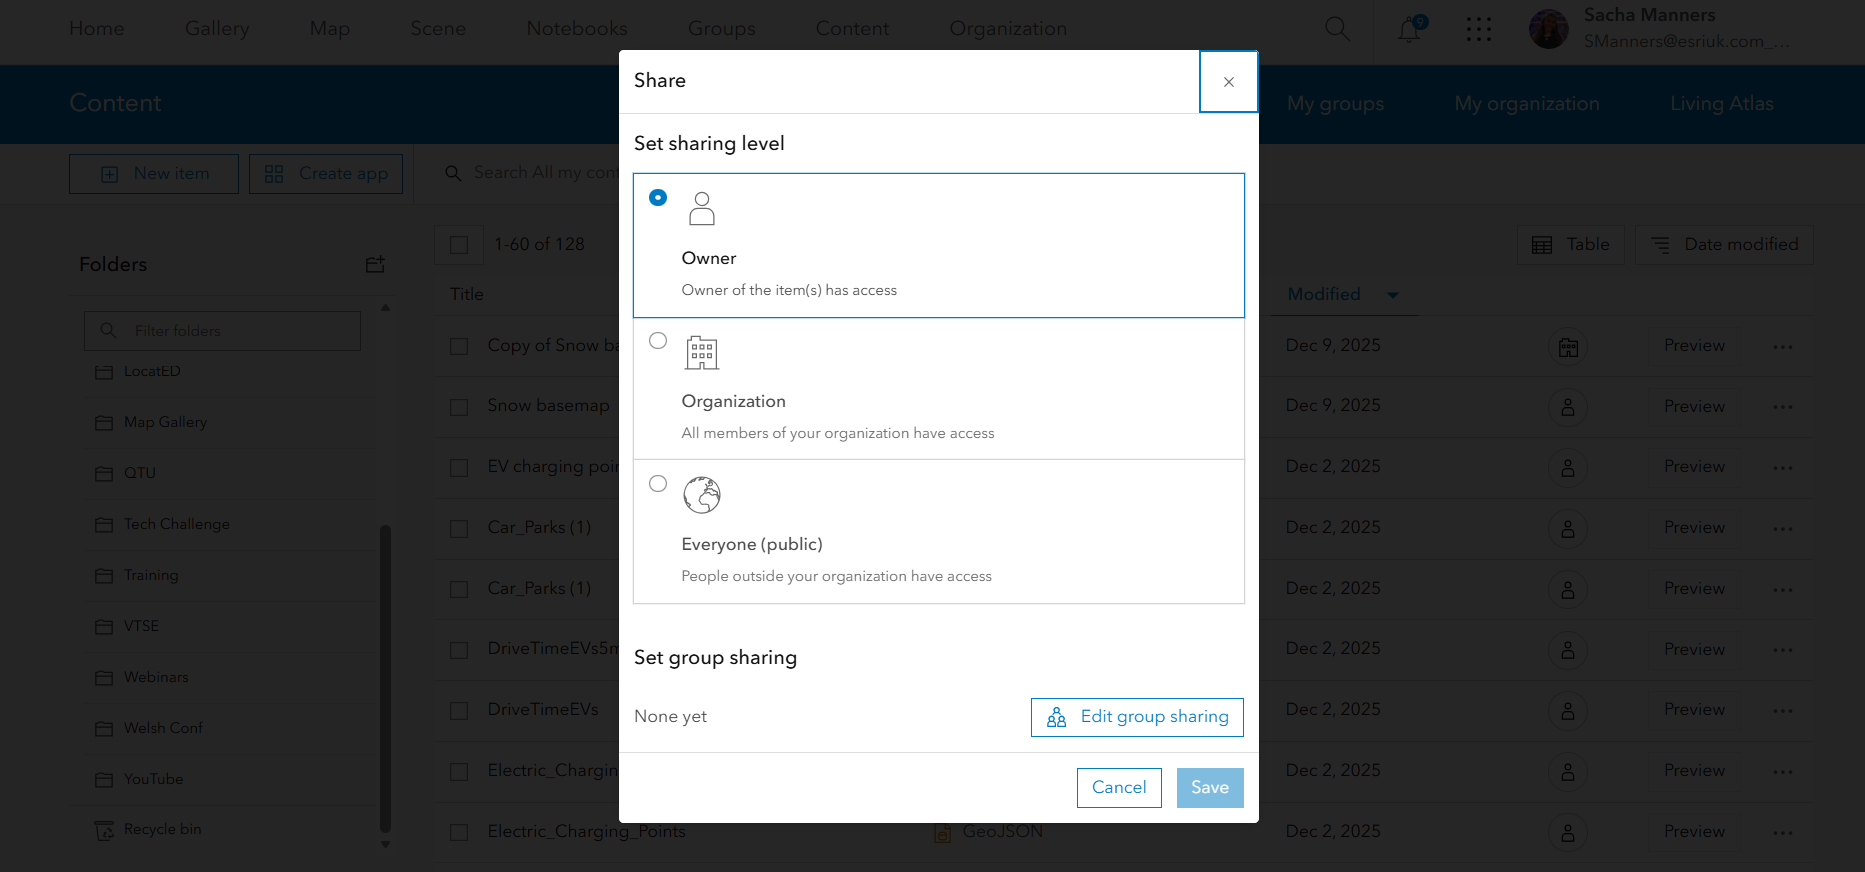
My content is under development
At this stage, you don’t want anyone to be able to access or edit your content. You’re in luck! In ArcGIS, all items you create will default to Owner only, meaning they are only accessible to you and administrators of your ArcGIS Online Organization or ArcGIS Enterprise portal. Access is controlled through user authentication, meaning only individuals with valid credentials can access private items.

My content is ready for review
This is where you can share securely with specific people – through groups that you are a part of, or groups that you make. Members of a group could be just from your ArcGIS Organization or, if your administrator has enabled it, you can also add members from a different Organization if they are named users in the ArcGIS system.
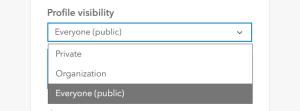
Note: Ensure their user profiles are set to public so that you can find and invite them! Select My Profile, Profile visibility.
When you create a group through the Groups, + Create Group tab in your ArcGIS Online account or Enterprise portal, you have full control of how the group is managed.
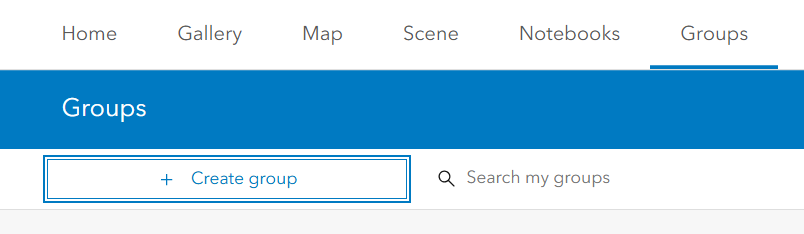
This includes who can view your group, how people join your group, who can contribute content, and who can edit the group content.
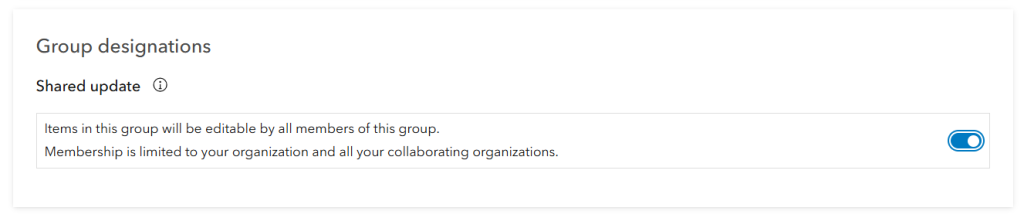
Note: Toggle ‘shared update’ when creating the group if you want others in the group to be able to edit the content. It can’t be changed later and, yep, this one has gotten me before.
![]()
My content is ready for anyone in my ArcGIS organization to use
The sharing to Organization option allows any named users in your ArcGIS Organization to access your content through the Content, My Organization tab in their portal.
Note: You can also share content with your Organization plus a group – useful if you want to highlight your content for a specific group of people.

My public content is ready to roll out!
Go you! You’ve created public content and are ready to share it with everyone. In ArcGIS Online, sharing to Everyone (public) means that anyone can view your content. ArcGIS will no longer check that the person is an ArcGIS named user. In ArcGIS Enterprise, Everyone (public) typically means that the content will be accessible only to people with network access (depending on its configuration).

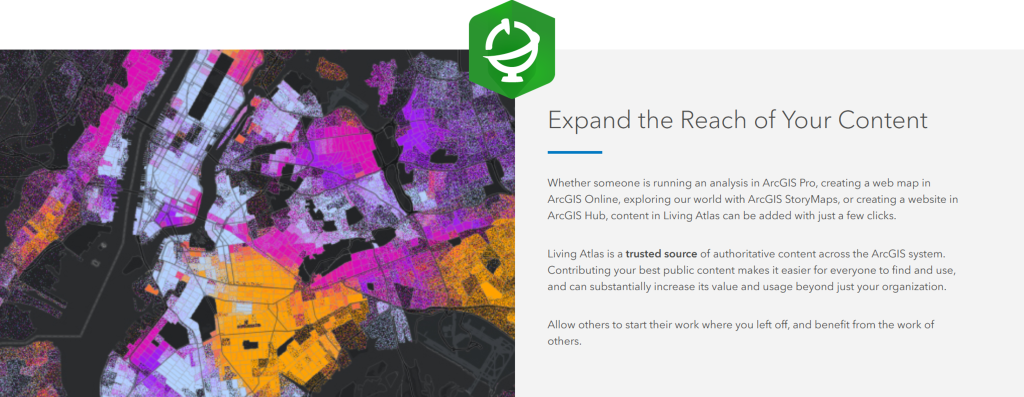
I want to share my content with the wider ArcGIS community…
This content must be cool.
Why not consider contributing to the ArcGIS Living Atlas of the World? So long as your content meets the criteria required and has been published to public level, you can nominate it to be a part of Esri’s rich data repository. Amongst other things, you need to ensure that your data is authoritative, high quality and accurate, with a detailed item page.
Find out more about this process here.
If you’re looking to share your content with a community of GIS users and the public, ArcGIS Hub might be the solution for you. This is a great option if your content has a specific audience – think internal collaboration combined with support for public outreach.
I can safely say that you don’t need website-building experience to create the no-to-low code sites that ArcGIS Hub offers, which is accessible to Creator and above licenses via the waffle menu in ArcGIS Online.
What if you want to build a user community for your content?
Users with a community account can engage with your content through feedback and sign-ups with an ArcGIS Hub premium license. With a community account, community members can sign in to any public site or page that has been shared with them privately. Based on the privileges assigned to them, they can create and share their own content such as maps, join groups, and collaborate with you in designing sites and pages. Find out more about ArcGIS Hub here.

My content is for certain people in certain organisations
If you’re looking to share your content with one or a few users from another organisation, the best way to achieve this is through a group – see the section above on Groups.
However, if you need to share your content at scale with another ArcGIS Online or ArcGIS Enterprise Organization, collaborations between Organizations make this possible.
A deeper dive into collaborations
Still with me? Time for a biscuit?
Collaborations allow you to extend the reach of your GIS content via a trusted relationship between ArcGIS Online and/or ArcGIS Enterprise Organizations. They are typically motivated by common goals and a mutual agreement to share content beyond traditional sharing. The way content is shared depends on the structure of the collaboration itself.
At a high level, there are two options in ArcGIS: partnered and distributed collaborations. And the best part? It doesn’t have to be one or the other. You can make the most of both patterns to further the reach of your content.
Let’s get collaborating…
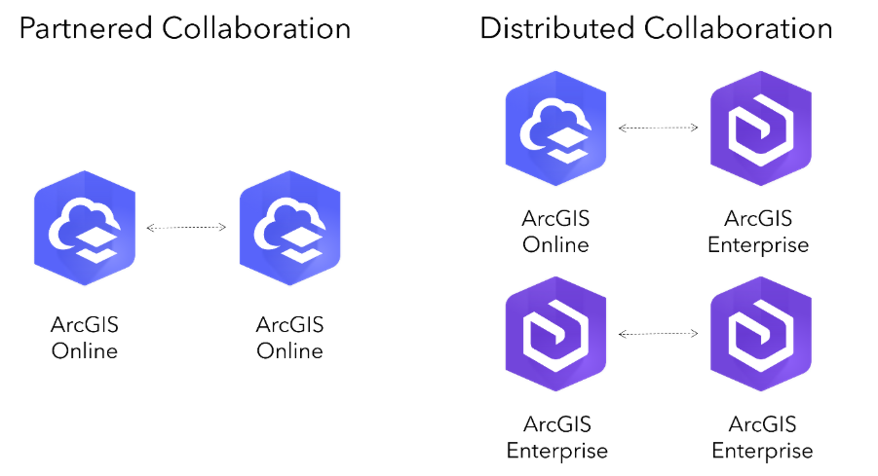
Partnered collaborations
So, when are partnered collaborations useful? Well, they help establish a formal relationship between ArcGIS Online Organizations, enabling them to work together securely with capabilities beyond that of regular group sharing.
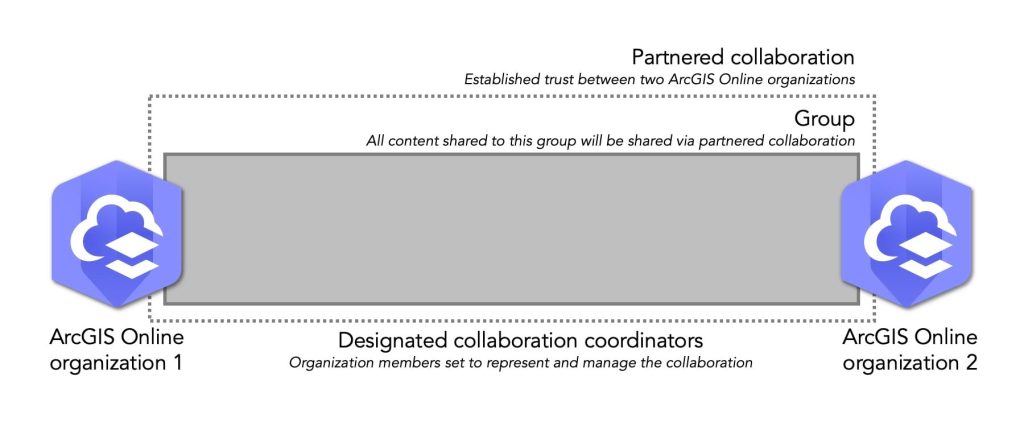
In a partnered collaboration, groups and member management tools allow ArcGIS Online Organizations to share, edit and update content. Each Organization manages and controls their own content as normal – the benefit is that members from participating Organizations can access the content that has been shared with the collaboration group and contribute content of their own. The Organization that owns the content and shares it with the group will incur the credit cost for the storage of that content.
To enable members in the partnered collaboration to update data in a feature layer, you need to ensure that editing access has been correctly configured for that layer. When it comes to analysis (I knew you’d ask), the credit cost will go to the Organization that performs analysis on the layer, regardless of whether they own the original content.
Designated collaboration coordinators are chosen by Organization administrators and help support the process by controlling group membership and streamlining the group invitation process. This means that unlike standard group sharing, the collaboration coordinator can add all relevant users from their Organization to the partnered collaboration directly – no invitation is needed. These members will then be able to access the content that has been shared within the group.
Ready to get started and create a partnered collaboration?
Note: When the collaboration ends, all Organizations will lose access to each other’s content. An Organization can have a maximum of 20 partnered collaborations, but there is no limit on how many members a partnered collaboration group can have.
Distributed collaborations
The main benefit of distributed collaborations is that they enable trusted content sharing between ArcGIS Online and ArcGIS Enterprise Organizations, or between multiple ArcGIS Enterprise Organizations.
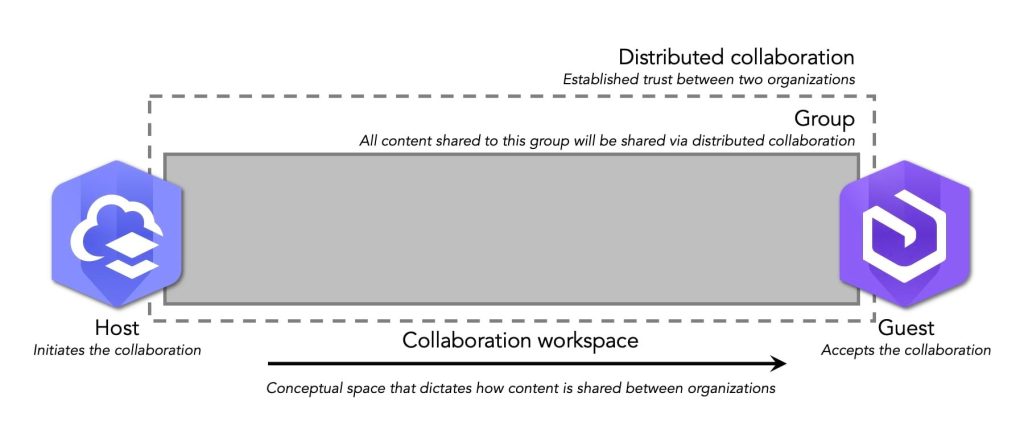
The process begins with the creation of a collaboration and a collaboration workspace. Next, a group is linked to the workspace, and participants are invited to join the collaboration. In a distributed collaboration, the Organization where the collaboration is created is the host, and the Organization that is invited to join the collaboration is the guest.
The collaboration host defines how content is shared into the groups that are designated as part of the workspace for each guest. See this detailed blog for more.
Note: When the distributed collaboration is between an ArcGIS Online Organization and an ArcGIS Enterprise Organization, ArcGIS Online must be the host. An ArcGIS Enterprise Organization can only collaborate with one ArcGIS Online Organization. When the collaboration is between ArcGIS Enterprise Organizations, the one that creates the collaboration is the host.
Okay, I’m ready to learn more about how to… create a distributed collaboration.
Phew. If you’ve made it this far, go get yourself another cuppa. There we have it, hopefully no more sharing-the-night-before nightmares! It feels like we’ve been through a lot together.
Read more about how to take advantage of sharing capabilities in ArcGIS:
- A guide to sharing in ArcGIS Online
- some useful documentation on understanding collaborations
- key takeaways for getting to grips with a partnered collaboration
- check out some frequently asked Partnered Collaboration questions
- I’d like to know more about how a distributed collaboration works