Now that ArcGIS Web AppBuilder’s retiral has been announced, it is a good time for dedicated Web AppBuilder users to get their heads around ArcGIS Experience Builder.
As someone who has made this transition, I understand that the prospect of replacing Web AppBuilder applications using Experience Builder can be daunting. Experience Builder provides a high level of customisation, but this can make the process appear challenging, time-consuming and a little overwhelming. I want to prove that perception wrong by smoothly guiding you through this transition. Together, we’ll build your confidence in recreating existing web apps in Experience Builder. By the end of the blog, you may even be tempted to explore the extra level of functionality that Experience Builder offers!
First things first…how is Experience Builder different to Web AppBuilder?
If you have ever visited the Experience Builder Gallery of sample experiences, you may have thought they don’t all look like traditional Web AppBuilder apps. The mixture of scrolling pages and non-map centric layouts highlight the capabilities that JavaScript 4.x provides in addition to the map-centric apps you are familiar with. Experience Builder builds on the best features from across the ArcGIS system, offering them within one app for users to exercise complete design control. Despite the complexity embedded within it, creating an effective Experience Builder app is just as quick and easy as Web AppBuilder.
Templates
Let’s start at the beginning… choose a template. Each template offers a partially configured structure to provide you with a starting point to edit your experience from. Ranging from a blank canvas to scrolling websites, there are templates for every use and audience. If you would like to stick with something more familiar, you will be pleased to know that you can filter the templates to Web AppBuilder classic ones. Find out more about templates here.
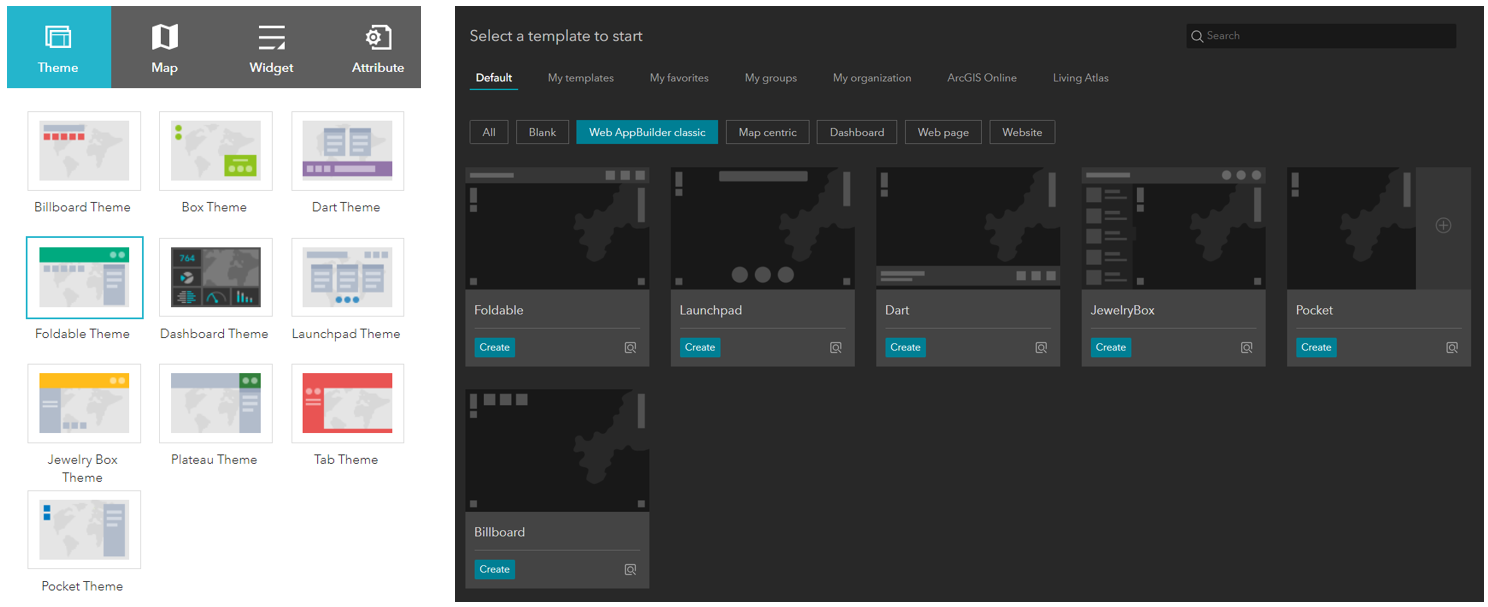
A selection of ArcGIS Web AppBuilder templates (left) and ArcGIS Experience Builder templates (right).
Once you have selected your template, you will be presented with the editing view of Experience Builder. To help you familiarise yourself with the user interface, I have summarised the key parts.

The different sections of Experience Builder’s editing interface.
- Builder Toolbar – contains tools to lock the layout, preview your experience, save, undo/redo, publish and more.
- Side Bar and Left Panel – allows you to open the widget, page, data, utility and theme panels to add new elements and edit the overall design.
- Canvas – where you can build and design the layout of your app by moving and resizing widgets.
- Configuration Panel – displays the settings for each widget or page, including the content, style and actions.
Designing a Layout
If you have chosen a classic Web AppBuilder template, Experience Builder will have automatically added a widget controller or sidebar. These widgets are used to provide a clear layout by housing other widgets.
Top Tip: if you are creating an app from a blank template, I recommend using the widgets in the Menu and Toolbars, Page elements and Layout sections to structure your application, especially if your application will be viewed on different screen sizes.
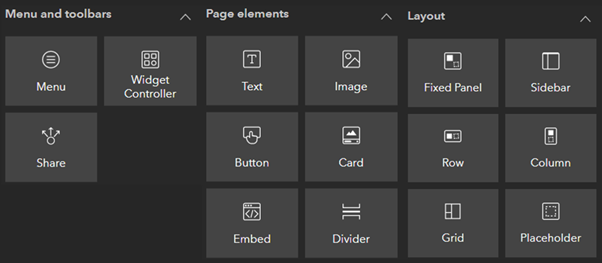
Widget container options.
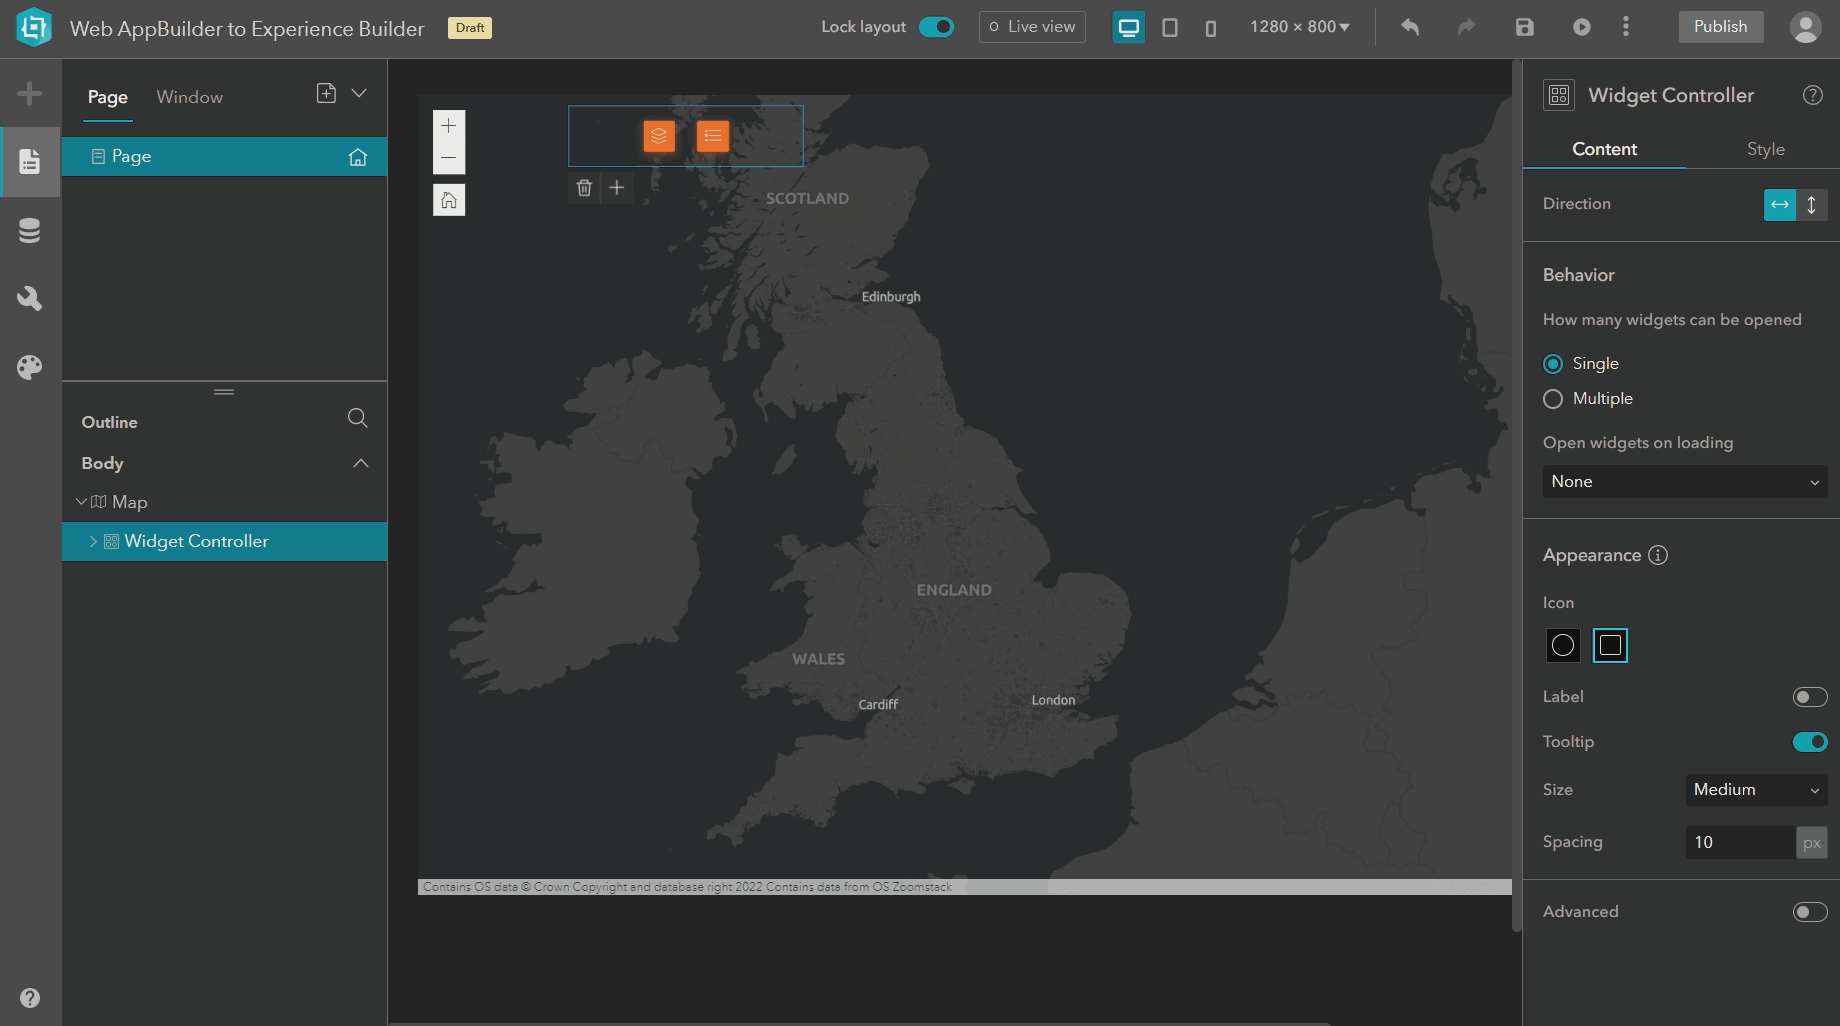
After selecting a widget container (e.g. Widget Controller), the configuration panel appears. If you are happy with the default, feel free to leave the original settings – but why not explore the different options?
Unlike Web AppBuilder, Experience Builder gives us the ability to ‘unlock’ the template layout. This gives you freedom to configure the layout from the existing template without any coding. You have full creative control to add additional widgets and reorganise existing ones to meet your audience’s needs.
Adding Data Sources
Before you begin editing, a data source must be connected to the application for all widgets to be linked to and referenced from. You will be glad to know this is quick and easy to do. By selecting Add data in the left sidebar, you can select one or more web maps from your Content to use in the application.
This is similar to choosing your web map in Web AppBuilder. The key difference is that Experience Builder allows you to add multiple web maps. But why add more than one? Adding multiple data sources means that you can have a map that displays one dataset, whilst having another widget referencing a different, complimentary one.
Adding Individual Widgets
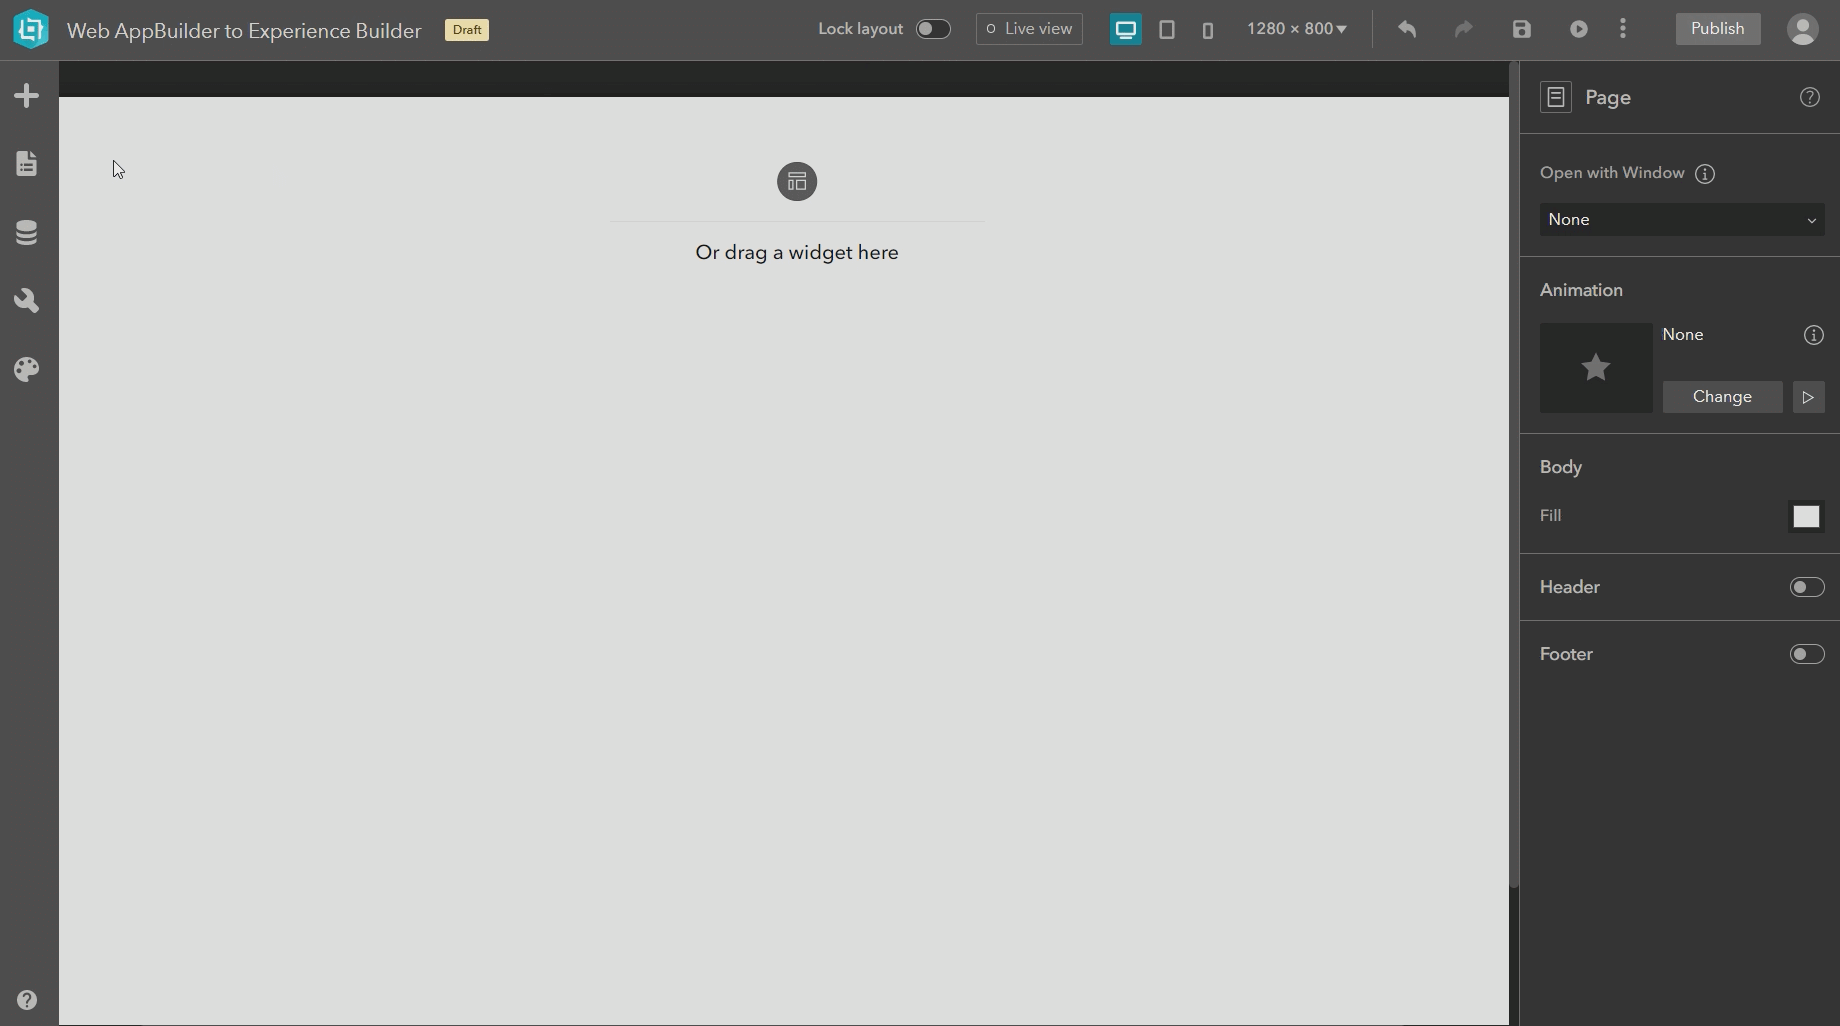
Within the widget containers, you can configure existing widgets or add new ones by simply dragging and dropping from the sidebar and left-hand panel.
Top Tip: if you are unable to add new widgets, ensure that you have unlocked the layout using the toggle on the Builder Toolbar.
Unlock the layout to drag and drop additional widgets into your experience.
Selecting a widget in the Canvas view causes the configuration settings to appear on the right-hand sidebar structured by Content, Style and Actions.
- Content – the data (web map) that your widget will interact with.
- Style – the overall design of the widget.
- Action – the interactions that you would like the widget to have with the other parts of your experience. In other builders these are often automatically included.
There are more customisation options for each widget than in Web AppBuilder, allowing you to make as many or as few design decisions as you wish. I would encourage you to explore all the options available to you!
Are all widgets in Web AppBuilder available in Experience Builder? Not all, but new widgets are regularly added and don’t forget there are new widgets to try. You can check the updated functionality matrix for Web AppBuilder and Experience Builder and the more detailed document attached to the post.
Choosing a Theme
Once you have selected your template, you can select your theme from an existing list or design your own by customising the colour palette, font and font size. This extra level of customisation is not available in Web AppBuilder and is a great addition to allow you to create apps that perfectly match your organisation’s branding.
Apply and customise your own theme.
Viewing the End Result
As you are editing your app you can test out the functionality by enabling Live View. This allows you to interact with the app the same way the end user would, ensuring each widget is working as you would like.
Top Tip: don’t forget to turn off Live View when you want to go back and make edits!
Experience Builder is also mobile-adaptive giving you the ability to preview how your app looks and functions on different screen sizes. This is like Web AppBuilder (under Previews) however, Experience Builder allows you to customise the layout for different screen sizes. This gives you the flexibility to resize widgets, reorganise the layout or even exclude certain widgets altogether on smaller screens.
Finally
All the edits and design choices you have made are saved as a draft in Experience Builder. Once you are happy with your application, select Publish to share it with your audience. Unlike Web AppBuilder, if you would like to make changes to your live application, you can save and test the new functionality or layout in a draft version before republishing. This ensures there is no down time or mistakes when you make changes to your live application.
You did it! You made the hop from Web AppBuilder to Experience Builder.
Once you have designed your first experience, you have a solid foundation to start exploring (with confidence) the extra functionality of Experience Builder.