Whether you are a seasoned GIS user or new to ArcGIS Pro, your operating of ArcGIS Pro will be improved by considering the configuration of it.
Whenever I create an ArcGIS Pro project, or teach others how to, I always remember to note that – whilst you can accept the workspace defaults that Pro offers you, you do not have to! You are the operator, and you should spend a few moments considering the options you have so that Pro works better for you.

ArcGIS Pro Start page including settings, templates and learning resources
When you create a project, ArcGIS Pro generates a folder structure containing default project elements such as a home folder, a default geodatabase and toolbox, along with a few other elements. So to customise this workspace, you can control project-level and application-level settings.
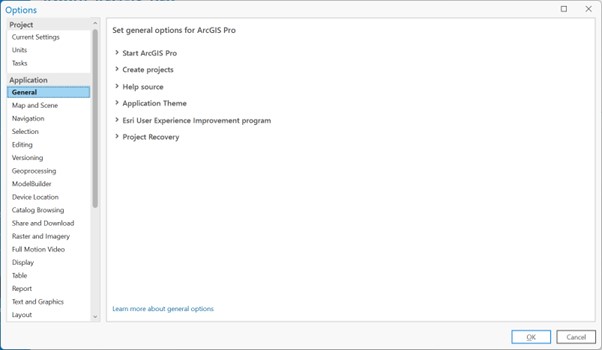
Options
To explain these project and application-level settings, we can break them down as General (options for setting up a project) and Advanced (options for customising a project).
General options include:
When starting ArcGIS Pro: would you like to show the Start page to explore learning resources and templates, or start without a template, or use a default project as you only require the one to complete your spatial needs.
To manage the portal connections: set the active portal to share or access content using Pro. To find out more check this link for further guidance – Manage portal connections from ArcGIS Pro—ArcGIS Pro | Documentation
If you do need guidance, then set how you access the help system. Choose whether to use local or online documentation to learn more about ArcGIS Pro (remember when accessing online help, make sure you specify the correct version of Pro you have installed).
Quickly open specific combinations of panes for mapping, editing or analysis workflows; accessed via the View tab > Windows > Reset panes.
Advanced options include:
Favourites: to save a collection of frequently used folders, databases, toolboxes, servers, custom styles, and other items in a project. So you don’t have to remember where all of these resources are referenced every time a project is made – Use project favorites—ArcGIS Pro | Documentation
Quick Access Toolbar: to add commands to or remove commands from the toolbar above the ribbon for fast access.
Customise the ribbon: to add new groups with many commands to existing tabs or create new tabs.
Options dialog in ArcGIS Pro
Project level
Project-level options apply only to the currently open project. If you don’t have a saved project, the options are not enabled. Some project-level configuration options include the following:
Default project settings: include the home folder, default geodatabase, default toolbox used for storing resources to help you successfully complete your projects aim. These can be changed. For example, change the default toolbox to a central toolbox which your colleagues also have access to.
Unit options. When working with projected data, set the Location units to use metres with 2 decimal places and a thousandths separator – Set unit options—ArcGIS Pro | Documentation.
Application level
There are a lot of application-level configuration options, so it is worth spending time exploring these. But once applied, all projects will adopt your choices as these are saved against your machine’s user profile.
Here are some application-level configuration options that I have configured due to my aging eyesight and the types of workflows that I employ ArcGIS Pro for.
General
Create Projects: to set my projects to use the same geodatabase and toolbox every time a new project is created. This may be suitable for those of you that don’t require a new location for storing data or its processes.
Application Theme: set to Dark mode so the interface has better contrast.
Map and scene
Spatial reference system > Transformation warning on. Have ArcGIS Pro inform you if your layers are applying different coordinate systems to a Map/Scene view – Transformation warning: What does it mean and what should I do? (esri.com)
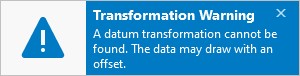
Pop-up Transformation message
Also, ensure the default label engine is Maplex. It is superior to the standard label engine as it gives you many more placement and formatting options when labelling – Label with the Maplex Label Engine—ArcGIS Pro | Documentation
Navigation
Mouse wheel scrolling set to enable the zooming in/out of a Map/Scene view
Geoprocessing:
Allow geoprocessing tools to overwrite existing datasets. Be sure that you want this, as you could overwrite an important dataset. I use this as I do a lot of work involving workflow development, having to re-run tools with different parameters.
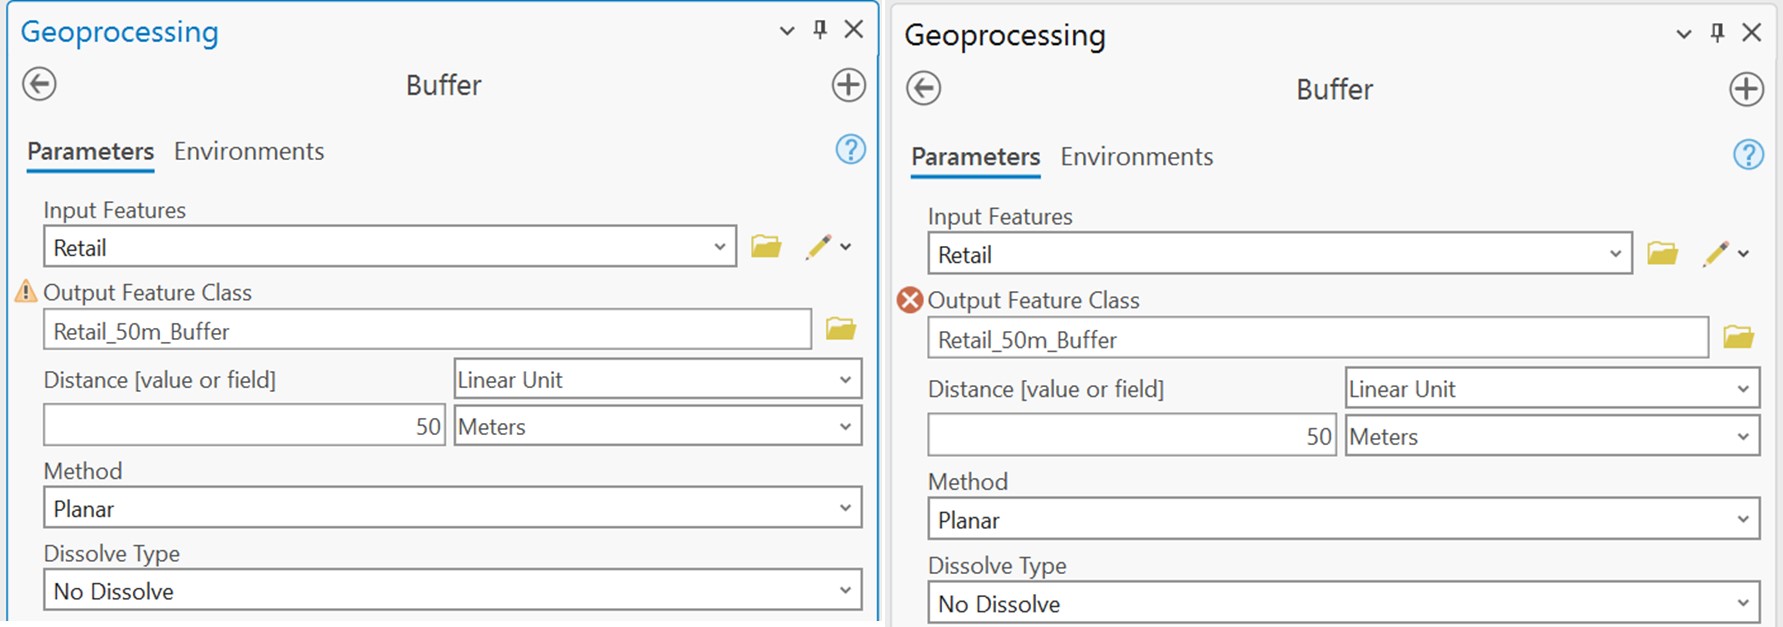
When enabled to overwrite existing datasets see Left – Yellow triangle warning: You will overwrite existing data & when not enabled see Right – Red circle error: You cannot overwrite existing data.
Analyze tools for ArcGIS Pro. When enabled, this will automatically analyse any custom tool that is run and ensure there are no errors or use of unsupported tools or functions. Handy for migrating ArcMap scripts and models.
Raster and Imagery
Appearance: because I work with Imagery, I have set default colour schemes and RGB compositions to save me initially having to manually change symbology. I have also reversed the order of the RGB render for Multispectral data (suitable for Landsat display).
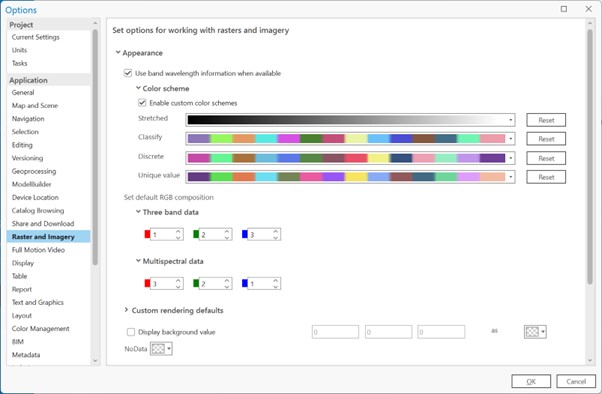
Raster & Imagery appearance options
User interface
User interface scaling set to 120%. This so handy if you find the icons on the ribbon are too small.
Customise the interface, ribbon and the Quick access toolbar
If you have a list of commands that you use frequently then create your own ribbon tab with suitable groups of commands.
I have added a few useful commands to the Quick Access toolbar. The Explore tool so I can explore results from a geoprocessing tool quickly, and the Label weights command to improve my cartography when working on a Layout.
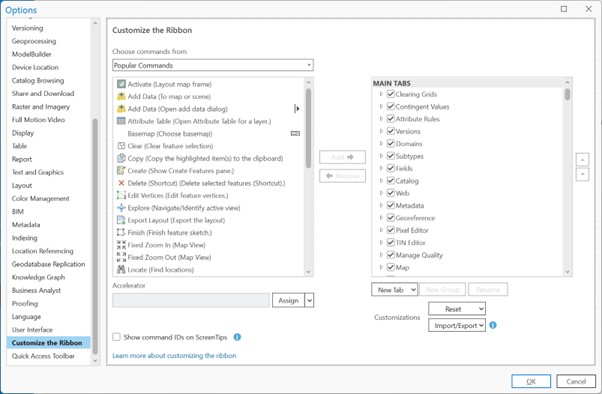
Customise the Ribbon dialog. Create and add/remove commands into a new tab or group.
There are many more options so please explore and keep an eye out for the handy tool tips and the blue hyperlinks found at the bottom of each option to take you off to the help documentation.![]()
Configuring the deployment
If you are the system administrator, the project-level and application-level settings can be controlled through the system administrator configuration settings. ArcGIS Pro allows system administrators to set the default values for certain settings across a team or organization.
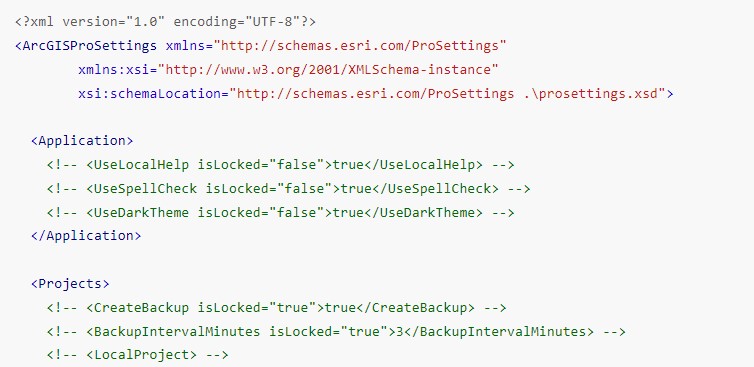
These settings can be locked to prevent users from changing them.
To learn more about this, check out this web page – Settings available for administrator control—ArcGIS Pro | Documentation
Beyond options & configuration
If you wish to extend your project configuration further, you may want to look at:
- Creating your own Project metadata – really useful when sharing your projects as an aprx or a project package (ppkx).
- Preserving connections and layouts with a Project Template to kick-start your projects.
- Use Esri Tasks to document steps with embedded tools to successfully complete project workflows.
Learning Services instructor led courses
Your organisation may be new to ArcGIS Pro or in the process of migrating from ArcMap to ArcGIS Pro. Learning a new application requires adjustments and whilst its functionality is like ArcMap, ArcGIS Pro streamlines ArcMap workflows and offers more capabilities for all facets of desktop mapping.
New users, or users who have limited experience with ArcGIS Desktop, should consider An Introduction to ArcGIS Pro for GIS newcomers to get up to speed using ArcGIS Pro.
Or if you are a user who has several years of experience with ArcMap then look at Migrating from ArcMap to ArcGIS Pro. This is a two-day course aimed at customers who are transitioning from ArcMap to ArcGIS Pro, including migration of fundamental workflows and data resources (maps, scenes, data, toolboxes, models, and scripts).
And beyond both courses you may want to consider attending Essential workflows to learn project setup and templates, and workflow documentation.