In this three-part blog series, I will provide examples and best practices on how the UNE for ArcGIS can be configured to suit the needs of a Quality Assurance (QA) team, Engineer team, and Customer Services team. If you’re someone who may be configuring UNE for ArcGIS for the first time, I highly recommend watching this video to help you get up and running even quicker.
Who can use UNE for ArcGIS?
UNE for ArcGIS can be configured to ensure all users in an organisation can interact with high-quality network data, regardless of their experience. This may be a QA manager in the office, maintaining high-quality GIS data for their network. It could be engineers out in the field who need to change the live status of assets, like valves, to inform the rest of the utility of the real-time network configuration. Or it could be a Customer Services team, wanting to understand how unplanned incidents are impacting customers.
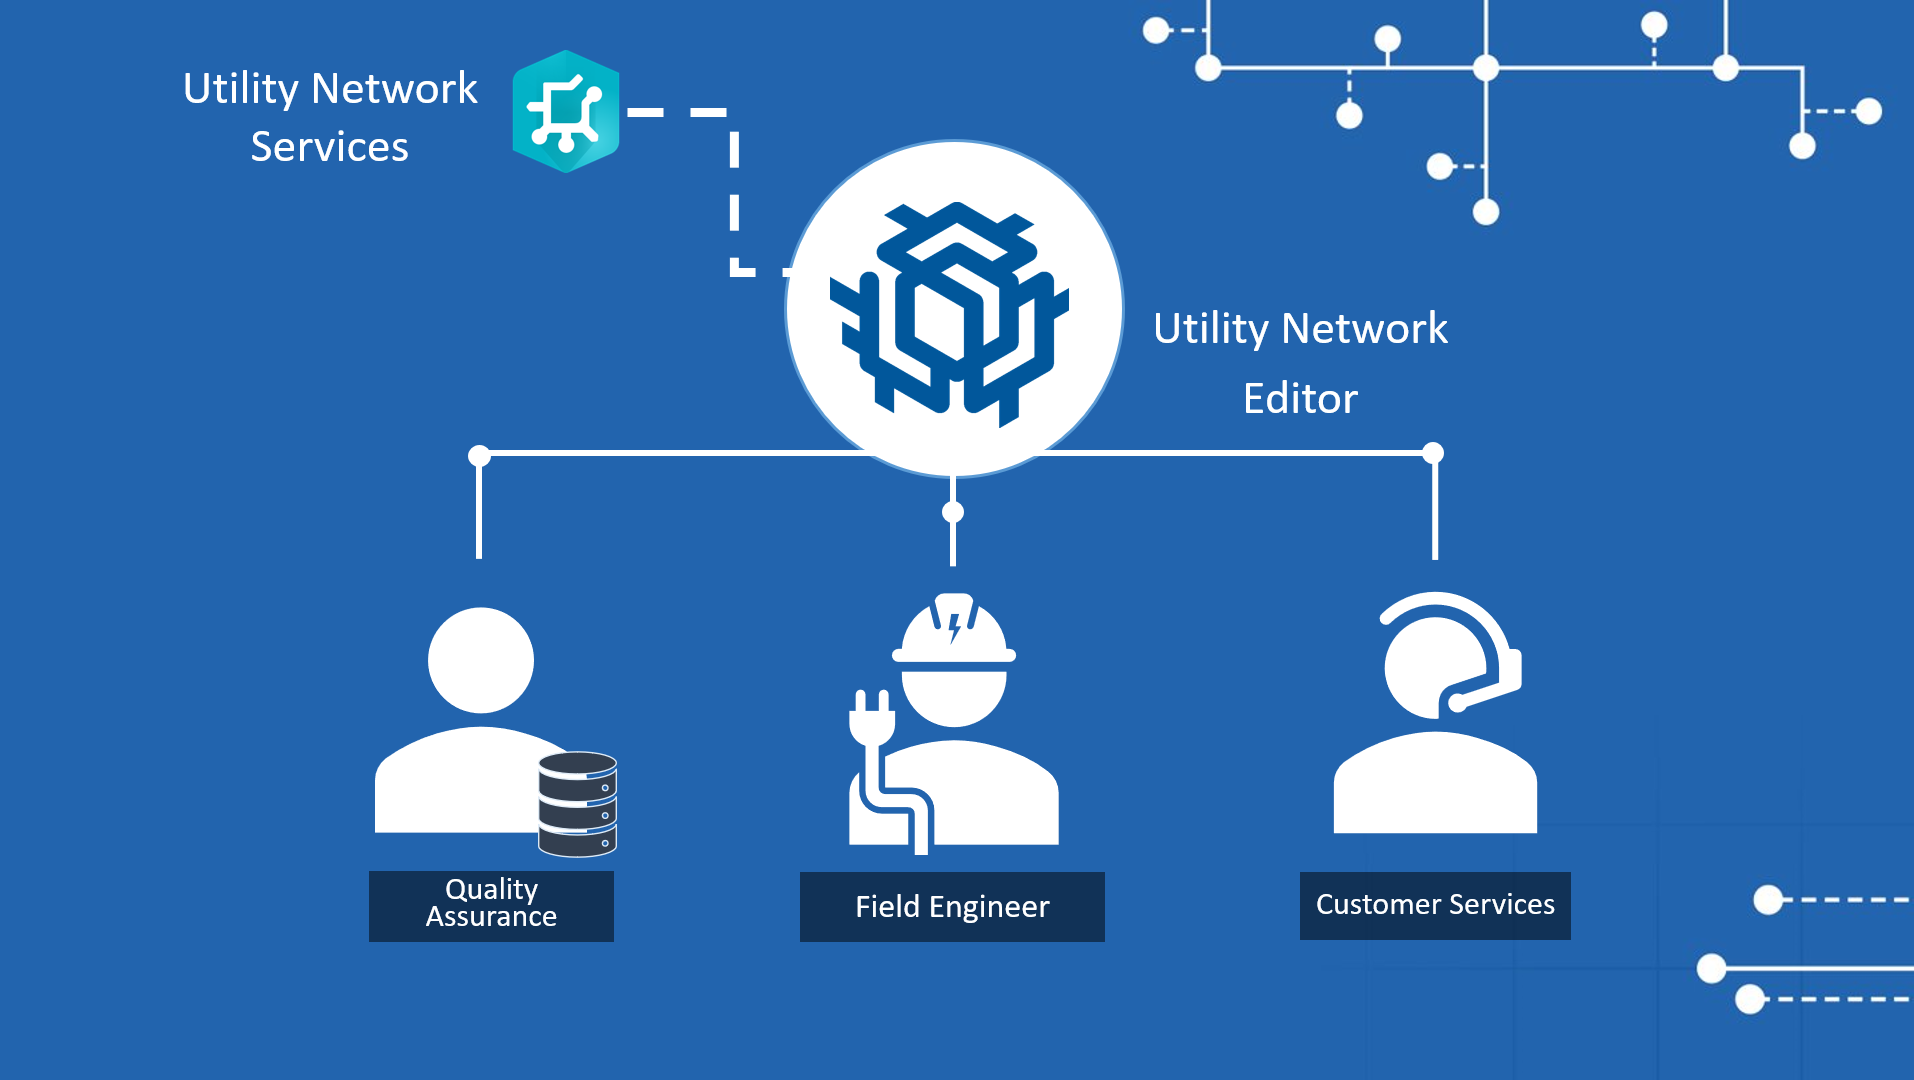
Typical users in a utility who access GIS data representing a network
Whoever it may be accessing your Utility Network services, each individual or team needs a solution that’s designed for them, and that’s where UNE for ArcGIS can play a significant role. Before diving straight into the configuration, it’s important you understand how UNE for ArcGIS works.
How does UNE for ArcGIS work with my Utility Network feature services?
A key advantage of UNE for ArcGIS is how easy it is to configure. It has been carefully designed to ensure the network rules stored within your Utility Network feature services are automatically understood. Creating a new UNE for ArcGIS application creates a Web Map and an app in your ArcGIS Portal. This also means it behaves like any other web application item in your ArcGIS content; integrating seamlessly as an item that can be shared with groups, teams, or individuals.
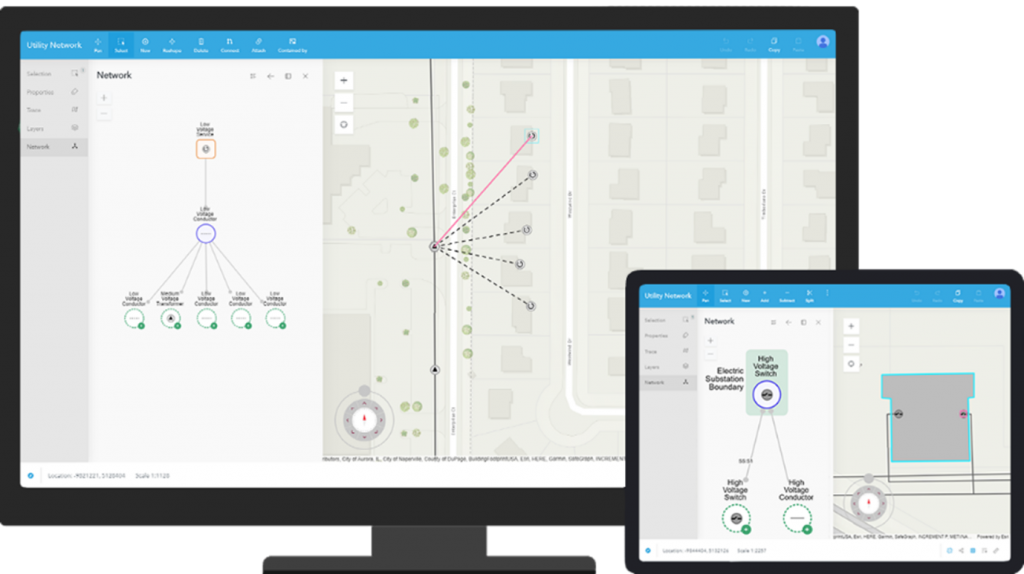
Viewing network graphs in UNE for ArcGIS for an electrical network
Once you create a new UNE for ArcGIS application, you can then use the application builder to configure additional tools, rules, traces, and more. This marks a huge step-change from traditional web GIS editing applications, that are often custom-built. Changes requested from user feedback were therefore notoriously difficult to implement quickly. With UNE for ArcGIS, changes can be made on the go as new insight is made from users testing and seeing what works, and what doesn’t. This is where I will focus for the rest of this blog series so you can understand how easy it is to tailor UNE for ArcGIS for your team’s needs.
Let’s start with the QA team.
Creating a powerful editing tool for your Quality Assurance Team
For somebody in a QA team, managing data quality is a fundamental part of their role. New edits must be accurate and model the behaviour of the network as it is on the ground, so a utility can be confident in making the right decisions. As mentioned before, UNE for ArcGIS automatically reads the rules of your Utility Network services to ensure edits are correct at the point of entry. However, these types of users may need additional functionality to support their specific edit workflows. This might include additional versioning control, the ability to undo and redo edits and the ability to validate the network. So, what does this configuration look like in the builder?
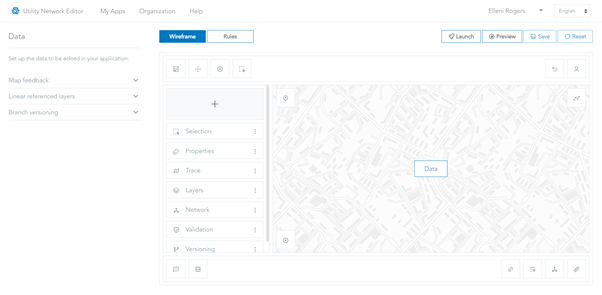
UNE for ArcGIS configuration builder
By default, when you create a new application, the builder has already set up the vital tools your QA team might need, including Validation, Versioning, and Network tool panels. By selecting a tool in the builder Wireframe, you can configure how it works for their specific needs. In this example, I have configured the Versioning tool to hide the option to delete versions and specified that Last edit wins in the case of edit merge conflicts.
Configuring Versioning capabilities in UNE for ArcGIS
I also want to configure a tool that will allow the QA team to search for existing assets or locations. To do this, I can add additional tool panels in the builder, choose the Find tool and choose the Locators that will drive the search functionality. This might be a custom Locator set up in your ArcGIS Portal, or even a layer already in your map. For this example, I want to configure a Locator to search for existing assets using a unique Asset ID stored in the feature service.
Configuring the Find tool in UNE for ArcGIS
Once I have successfully configured my UNE for ArcGIS application for my QA users, I can choose to Preview the application. I can also test the tools are running smoothly using the Preview logs. If I’ve noticed I have forgotten to include a tool or configuration, I can simply return to the builder and make the changes.

Using the Preview function when configuring UNE for ArcGIS
UNE for ArcGIS not only provides a lightweight web app for editing but also consistently applies the same business rules stored in your Utility Network Services for all users. The power of UNE for ArcGIS shines through when you configure tools specific to a need. So what about Engineers who might need to interact with Utility Network out in the field? In part 2 of this blog series, I will explore this topic including how to configure a trace.
Don’t forget to register for this year’s Esri User Conference, where you’ll have the chance to see a special customer presentation of UNE for ArcGIS in action.