Have you ever wanted to create a 3D representation of a multi-floor building and share it as a web scene? I was recently looking into how this could be achieved and was surprised at how easy it is once you know both the process and tools to use.
The process is broadly as follows:
- Import and georeference CAD data / scanned images
- Create the ground floor plans in ArcGIS Pro
- Add additional floor plans above/below the ground floor by ensuring they are at the correct z value
- Add additional room attributes (optional)
- Configure the floor plans for 3D display in ArcGIS Pro
- Publish to ArcGIS Online
- Configure the layer in Scene Viewer
Note – whilst ArcGIS Online Map Viewer allows you to view data with different projections, Scene Viewer is unable to do this. It is therefore a good idea at this stage to make sure all your layers, including basemaps and elevation sources, use the same coordinate system so that you can display your results in scene viewer.
Creating the Ground Floor Plan in ArcGIS Pro
If you have detailed Revit plans for your building, you might be able to short cut this process, however for this workflow we will assume that the starting point is either a CAD drawing for each floor or a scanned image.
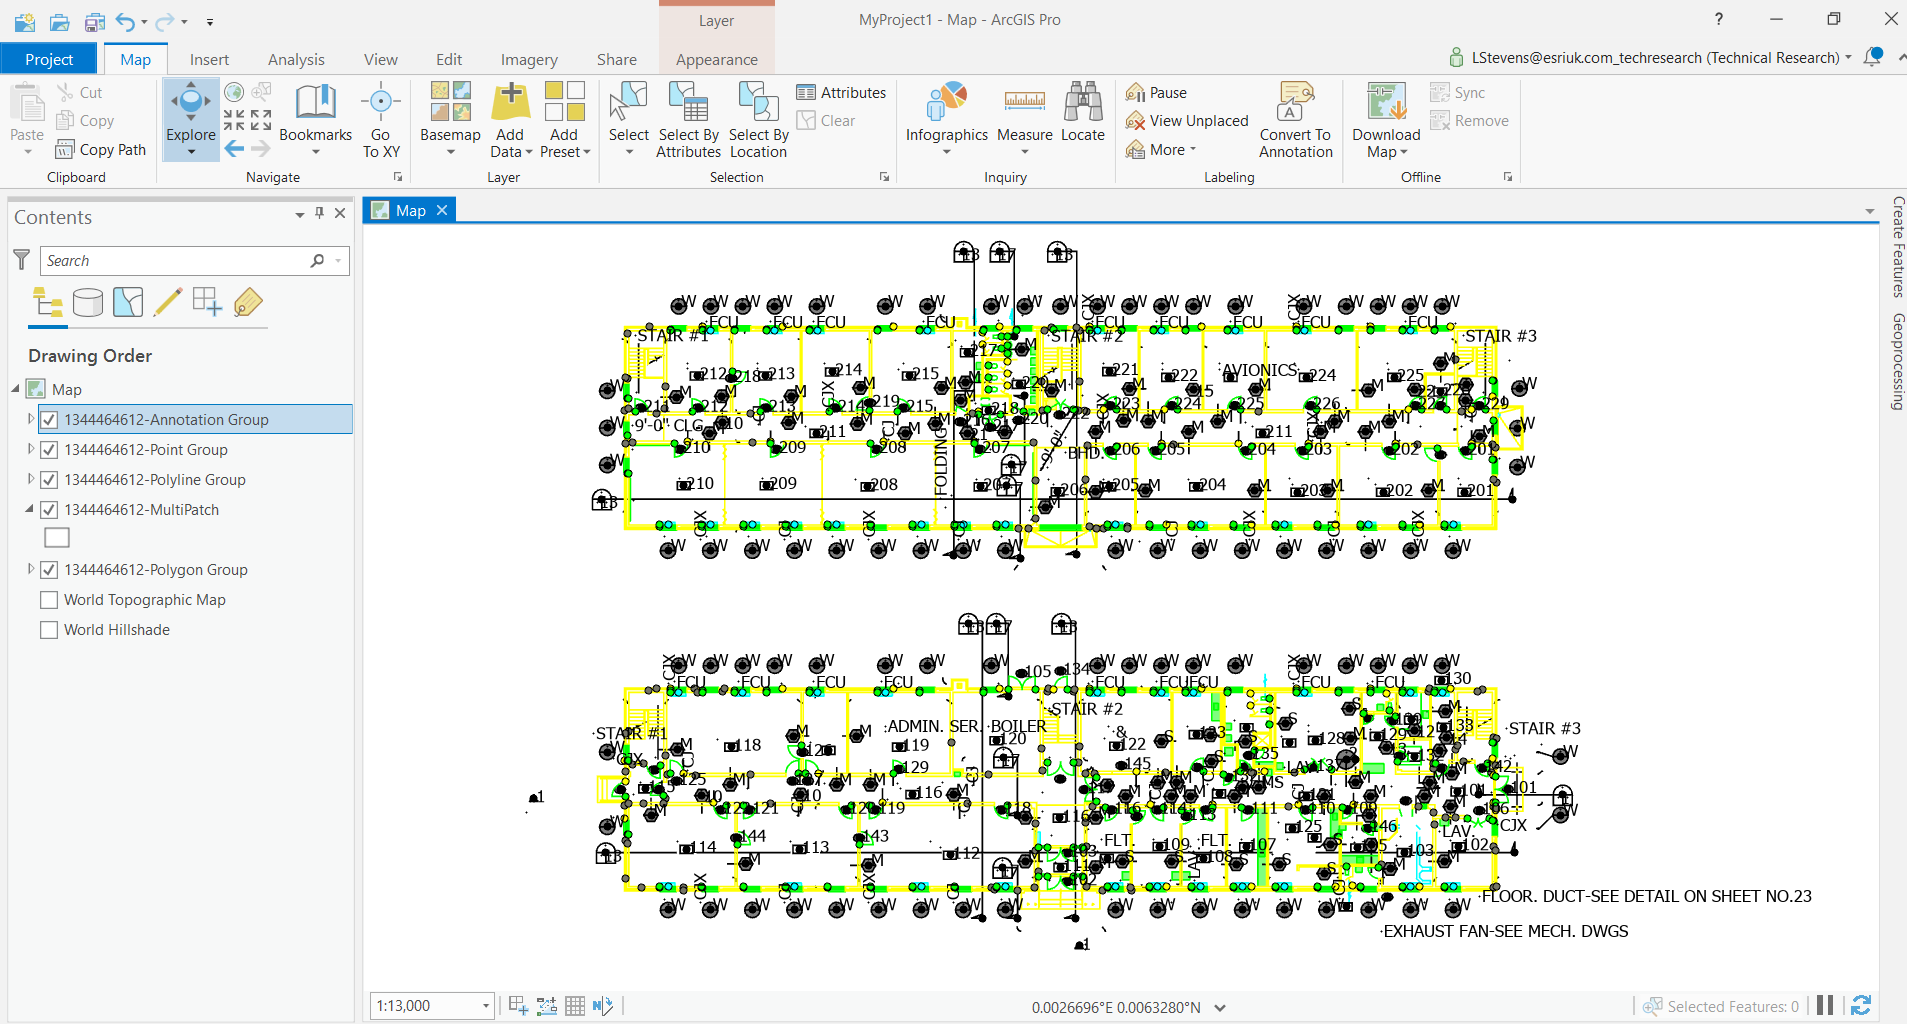
Import your CAD data or scanned image into ArcGIS Pro – ArcGIS Pro is able to directly read a wide range of CAD formats.
Note – The imported data is often stored across a large number of layers, so at this stage it can be useful to reduce the number of layers that are visible.
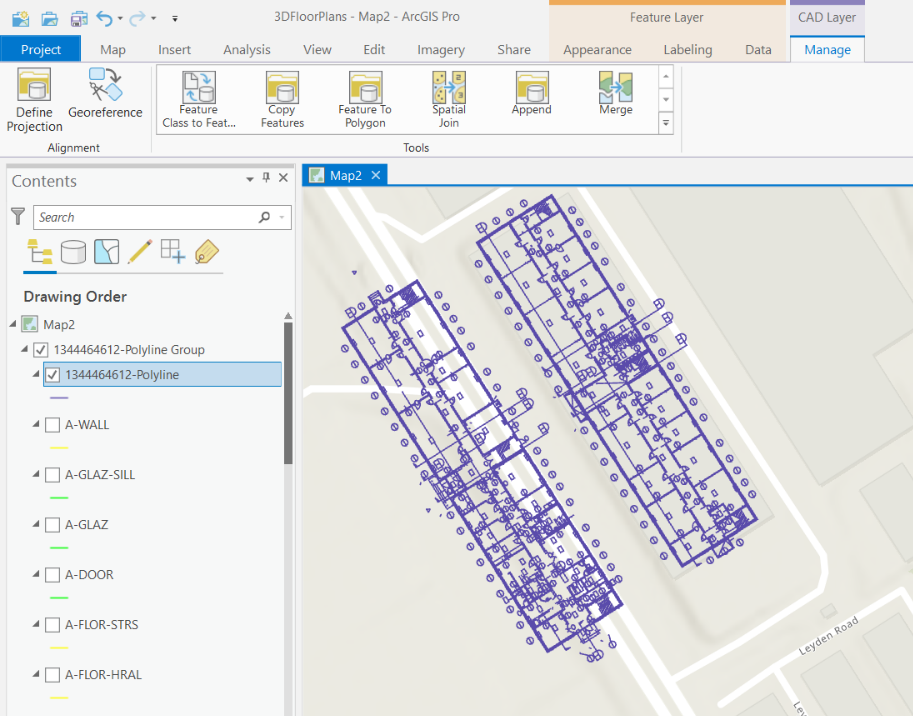
Georeference your CAD data / scanned images – if your data isn’t correctly geolocated, ArcGIS Pro provides the tools required to georeference images and CAD data. These tools include defining the projection and creating control points and can be found in the CAD Layer ribbon.
Note – The CAD layer ribbon only appears when a child layer is selected from within a group layer. It won’t, therefore, appear if only a group layer is highlighted in the contents pane.
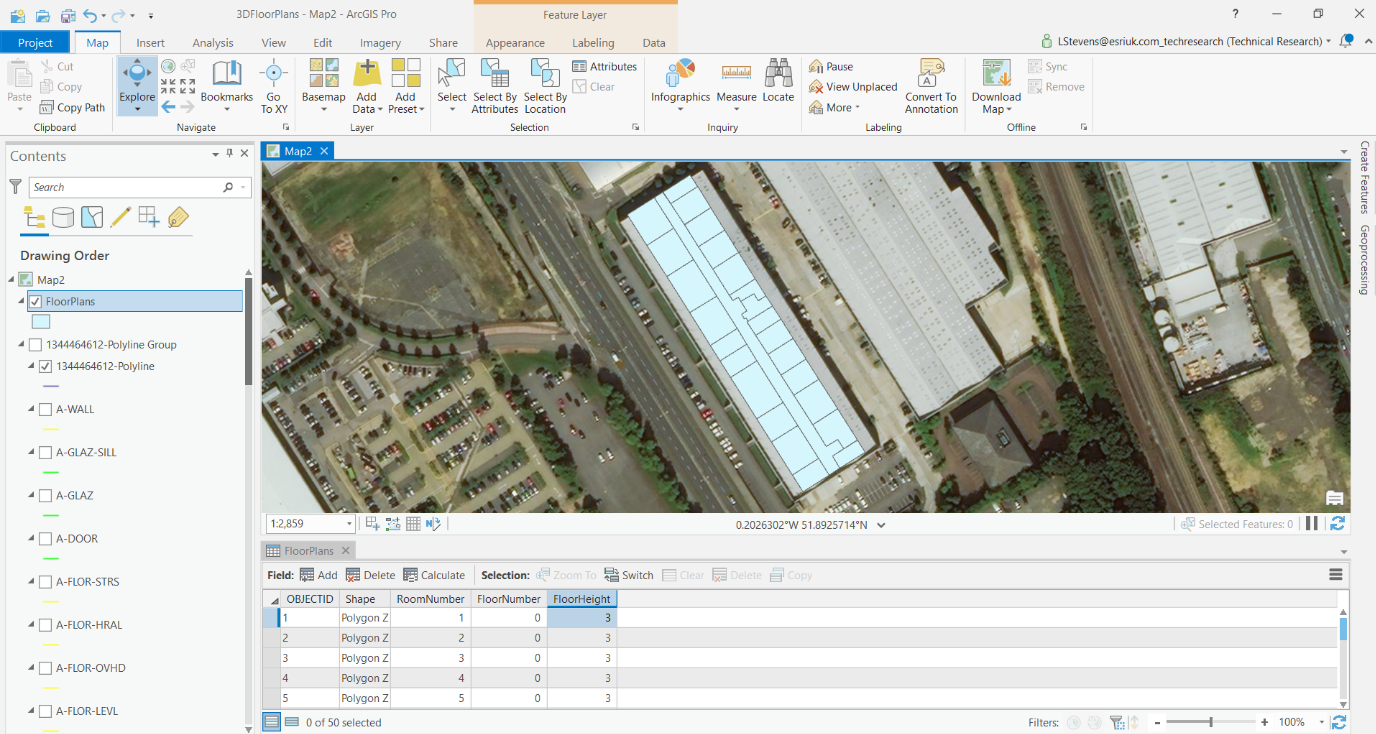
Create a blank z-aware polygon feature class that contains a ‘Room Name’ field – this will be the layer that contains the floor plans and will be published to ArcGIS Online. If your CAD data already has a Room Name/Number attribute, ensure you name the field exactly the same to speed up data capture. You may also wish to add additional attributes to the feature class such as Floor Number and Floor Height (if your floors are different heights this may prove useful).
For the Ground Floor – if your CAD data contains polygon features for the rooms, use Copy and Paste Special (found in the Clipboard section of the Map Ribbon) to transfer the ground floor polygon features into your new layer. If the Room Name/Number field has been correctly named, this field should be automatically populated. Once the entire floor has been copied across, use Field Calculator to set the Floor Number field to 0 and the Floor Height to a suitable value (e.g. 3m).
If your rooms need to be manually digitised as polygons, manually edit the layer. You can add the Floor Number and Floor Height attributes either as you go along or using Field Calculator once the entire floor has been digitised.
Add additional Floor Plans that are at the correct z value
You have now created a series of rooms which are all sitting at a z-value of 0. As you add additional floors (above or below ground), you will need to ensure that these are set at the correct height.
Note – For this workflow we will set all heights based on the ground floor being at 0; you may however wish to use the correct height above sea level instead (we will work around this later in the process).
For each additional floor you wish to create, repeat Step 4 above – ensure that you set the Floor Number and Floor Height accordingly.
If all floors in your building have the same layout, you can use the Duplicate Vertical editing tool to shortcut this process.
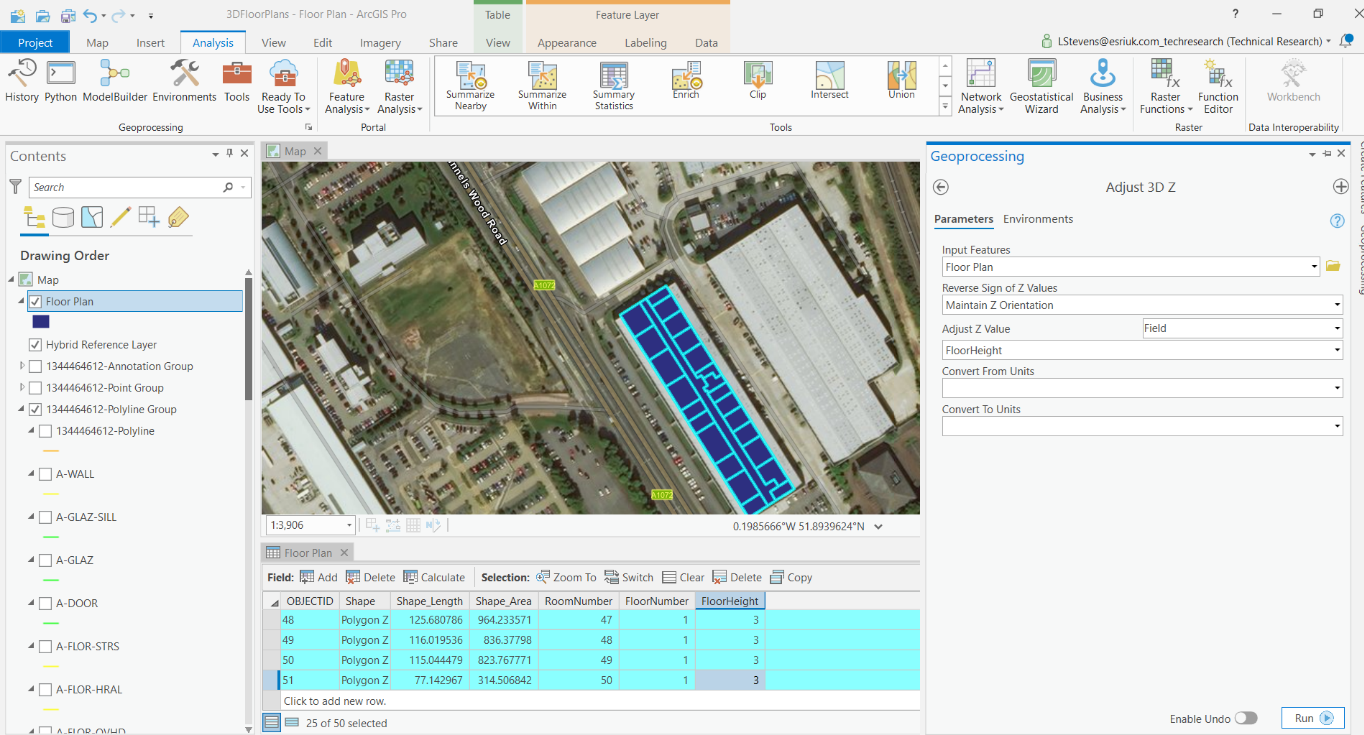
Once you have created all of the floors required, you can use the Adjust 3D Z tool to set the base height of features on each level – first, set the Adjust Z Value field within the tool to use the Floor Height field stored as part of your polygon floor plans. Then, run this tool again, but this time manually set the Adjust Z Value field to subtract the value of your ground floor room heights.
An alternative to this method is the Feature to 3D by Attribute tool, which is available with Standard and Advanced licenses or a Basic license with a 3D Analyst extension.
Add additional room attributes (optional)
Now that your floor plans have been successfully digitised, you may wish to add additional attributes from other sources such as Room Type, Use, Occupancy Rate etc. Assuming this information can be joined using the Room Name/Number field:
Create a Table Join between your floor plan feature class and any additional data sources – this allows additional attributes to be joined to your floor plan data.
Export this complete layer as a new feature class – you are unable to publish data with table joins. Any data containing joins must be exported as a new feature class for it to be published to ArcGIS Online.
Configure the Floor Plans for 3D display in ArcGIS Pro
Before you publish the data to ArcGIS Online, it’s a good idea to check that you have created all of your data correctly by visualizing it in a scene in ArcGIS Pro.
Open your layer in a Local Scene, right-click the layer and open Properties, then open the Elevation tab. Here, set features to be At an Absolute Height and then check using Geometry Z values. If your Z values are not relative to sea level, you’ll need to set the elevation of your features Relative to the ground, set additional feature elevation to use A field, open the expression box and simply type the approximate elevation of your site before selecting OK. Then, set additional feature elevation to use Geometry z-values. This should ensure that your features are located at the correct z value.
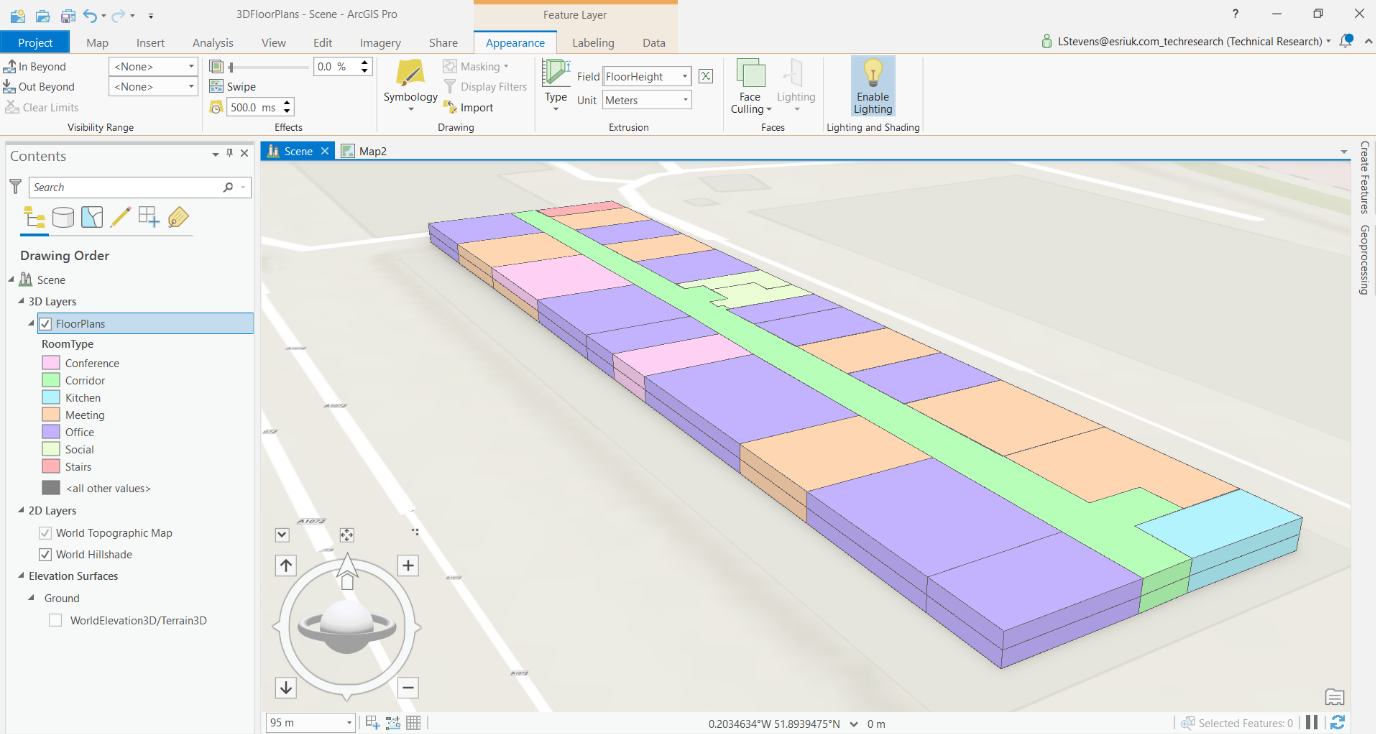
Find the Feature Layer ribbon and under Appearance go to Extrusion Properties > Max Height and then set the field as FloorHeight.
Publish layer to ArcGIS Online and configure in Scene Viewer
Once you are happy that your layer is correctly digitised and has the correct z values, return to your 2D map and publish your layer to ArcGIS Online.

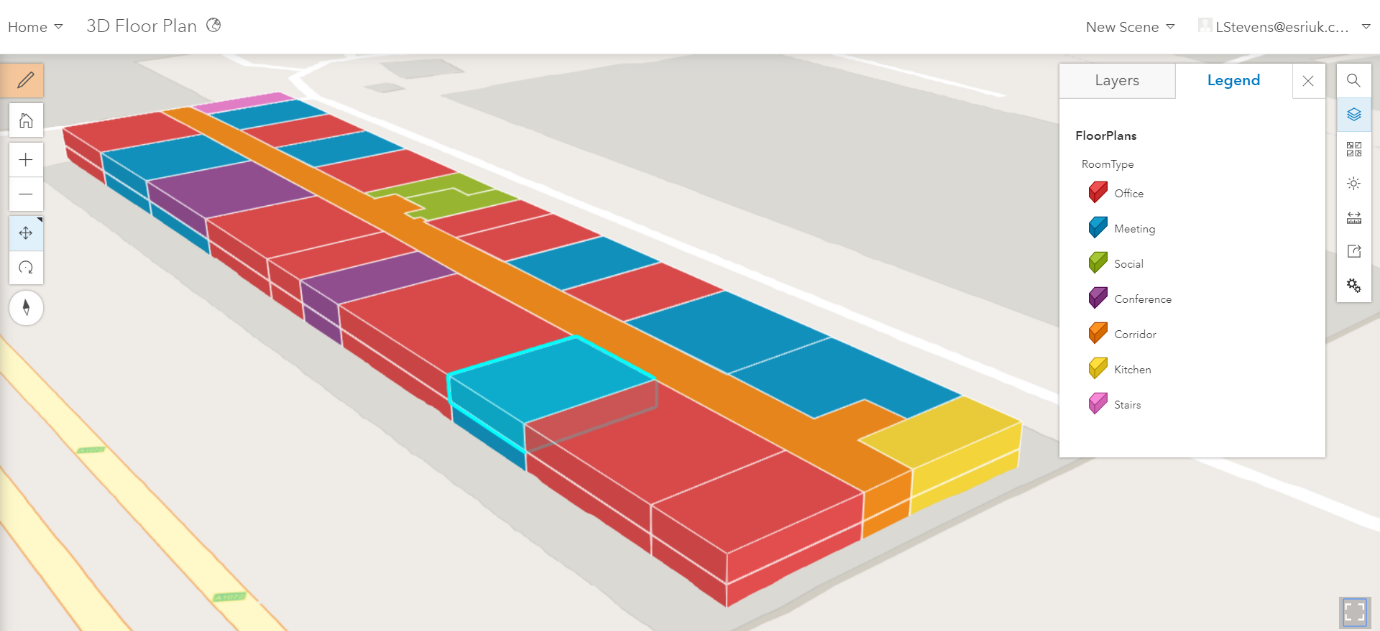
Log into ArcGIS Online and add your uploaded layer to a new scene
Navigate to Layer Style > Visualise by RoomType > select 3D Types as drawing style. Having done this, click on the 3D Types option button and under All Polygons select the Height drop-down to be FloorHeight in m.
Note – if you wanted to display a different height to that stated in the FloorHeight column of your layer, simply input the required value into ‘Height’ box.
Set Elevation Mode to Absolute Height – if buildings float or sink into the ground, you can adjust the Offset Value as required. If you would like the room edges to be more clearly displayed, slide the Edges toggle and choose a line style as you wish.
Further Considerations
This workflow assumes the ground is fairly level around the site. However, where the ground is uneven, some buildings may slightly float or sink into the ground. It is possible using the Create Constant Raster tool within ArcGIS Pro (Spatial Analyst license required) to modify the local terrain by creating a raster of constant value for a defined area. Using this generated raster as your local elevation source ensures that features sit evenly on the ground in your ArcGIS Pro Scene.
Throughout the workflow in this blog we have been using elevation data from the Terrain 3D dataset included as part of ArcGIS Online. This dataset, which includes Environment Agency and Natural Resources Wales LiDAR data, covers around 70% of England and Wales at a 2m resolution. In some areas higher resolution survey data might be available. If this is the case, you can use this data as an elevation source in the same way as explained above for using modified local terrain.
Want to give this a go for yourself?
Why not see how you can use Scene Viewer in ArcGIS Online to easily turn a 2D map into a 3D scene to help visualise development proposals and find out how you can #mapthis.