ArcGIS Experience Builder allows you to build dynamic and interactive web applications that can meet any need and be tailored to any audience. You may have read my previous blog which walks through some of the key steps to create a basic web app in Experience Builder. But what can make Experience Builder apps so responsive and engaging? The answer is widget actions. This feature offers a wide range of capabilities; from automating workflows and customising behaviour, to integrating your experience with other systems. All this without having to write a single line of code.
Inter-app communication within a web app is often automated or at the click of a button in other ArcGIS app builders. Experience Builder offers you the flexibility to specify your own triggers and actions. Activating widget actions in Experience Builder is a straightforward process. In this blog, I’ll explore how they work and how we can use them to enhance our web apps’ functionality, using a handful of common scenarios.
Let’s start at the beginning… what are widget actions?
Put simply, it is the communication between widgets within an experience. There are two different types of widget actions: data actions and message actions. Both types of actions are configured on the Action tab of the source widget (the original widget that the trigger occurs in).
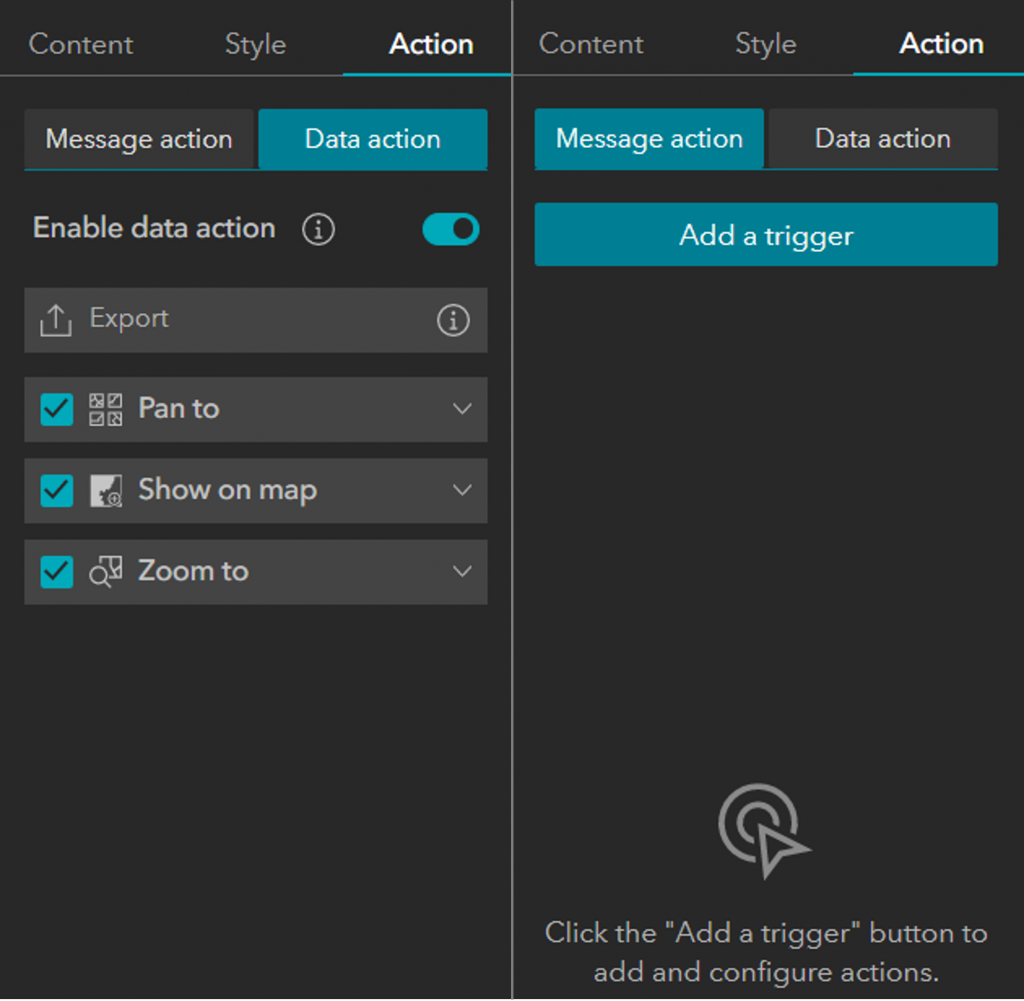
Action tab in Experience Builder. Here you can choose between message or data actions.
Data actions provide the user with an in-widget button to enable them to manually select and perform specific actions such as selecting specific records to export, viewing records in a table or showing data on a map. Whereas a message action automatically performs a desired action as a response from a trigger. This could include filtering a list to match the current map extent or clicking on a pie chart segment to highlight the values on a map. Let’s focus on how to define interactions between widgets and the underlying data by configuring message actions in response to triggers.
To configure a message action, you must specify the following in the source widget:
- Trigger: the change occurring in or to the source widget that will prompt a reaction
- Target: the widget or data that will respond, performing the action
- Action: the response from the target
There are 5 types of triggers you will come across: data filtering changes, data added, records created, extent changes and record selection changes. Let’s explore some simple examples for a couple of these triggers.
Top Tip: always apply the trigger and action settings to the source widget. For example, if you would like the map extent to filter the items in a list, the map is the source widget because the trigger will be the map extent changing.
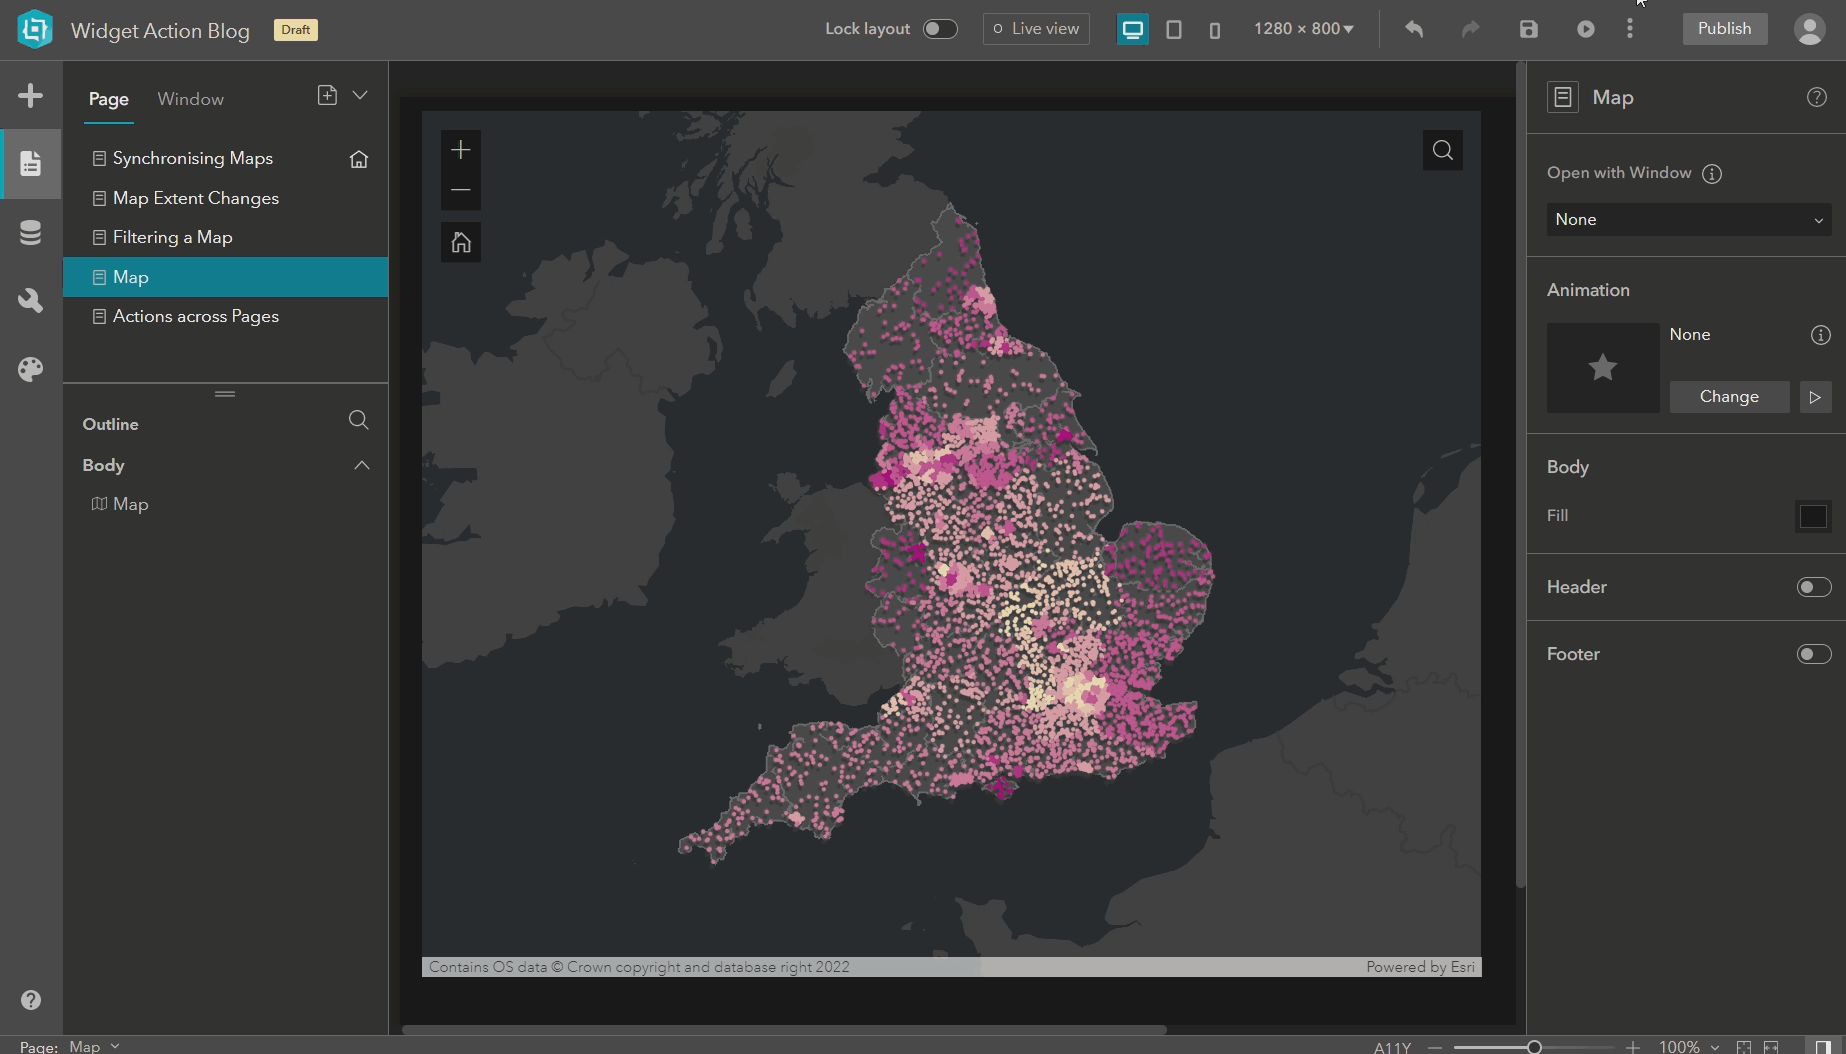
Synchronising multiple maps
A commonly configured widget action is synchronising multiple maps; as one map extent changes, the other pans and zooms to reflect it. To allow the user to interact with any map and experience a response, you must apply the trigger and actions to all the maps that you wish to be synchronised. Follow the steps I have outlined to set this up:
- Trigger: extent changes
- Target: the map you want to link with the source map
- Action: pan to
Top Tip: you can have more than one action linked to a trigger to allow multiple responses to occur.
- Click Add Action
- Target: the map you want to link with the source map
- Action: zoom to
Experience Builder allows you to synchronise more than two maps together. To achieve this simply click Add action (as this is responding to the same trigger) and select the additional target map(s) and their desired reactions.
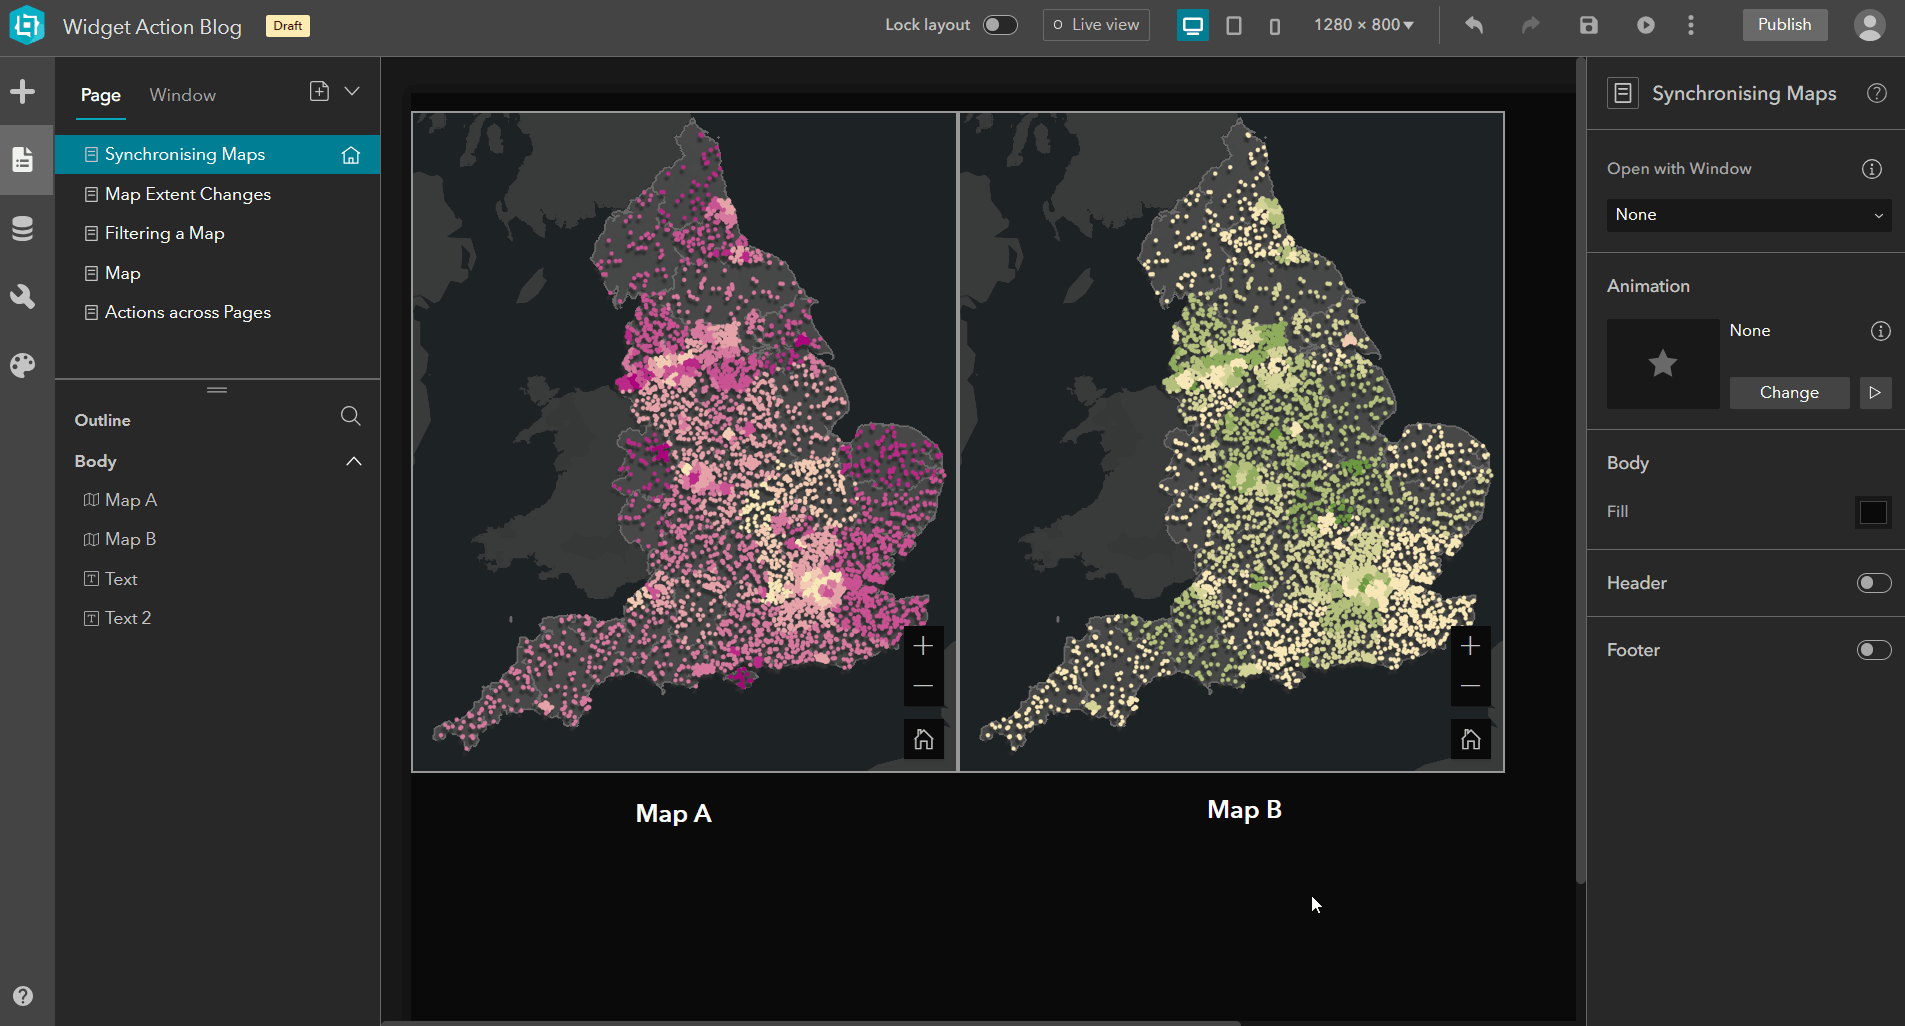
Synchronise multiple maps by adding an extent change trigger.
Map extent changes causing dynamic widget updates
In other ArcGIS app builders, filtering a widget to only display features in the current map extent is often at the click of a button. Give it a go by specifying the settings below:
- Trigger: extent changes
- Target: framework
- Action: filter data records
Some actions including filtering require additional configuration to specify how the target should handle the message from the trigger. This occurs in the Action settings pane:
- Select Action data: the data that you would like to filter in your target widget
- Conditions: feel free to specify SQL expressions to filter based on an attribute or spatial relationship
All the widgets underpinned by the action data (framework) will have the filter action applied automatically as the map extent changes. This action would target any data-centric widgets that you have added to your experience including lists, charts, and tables.
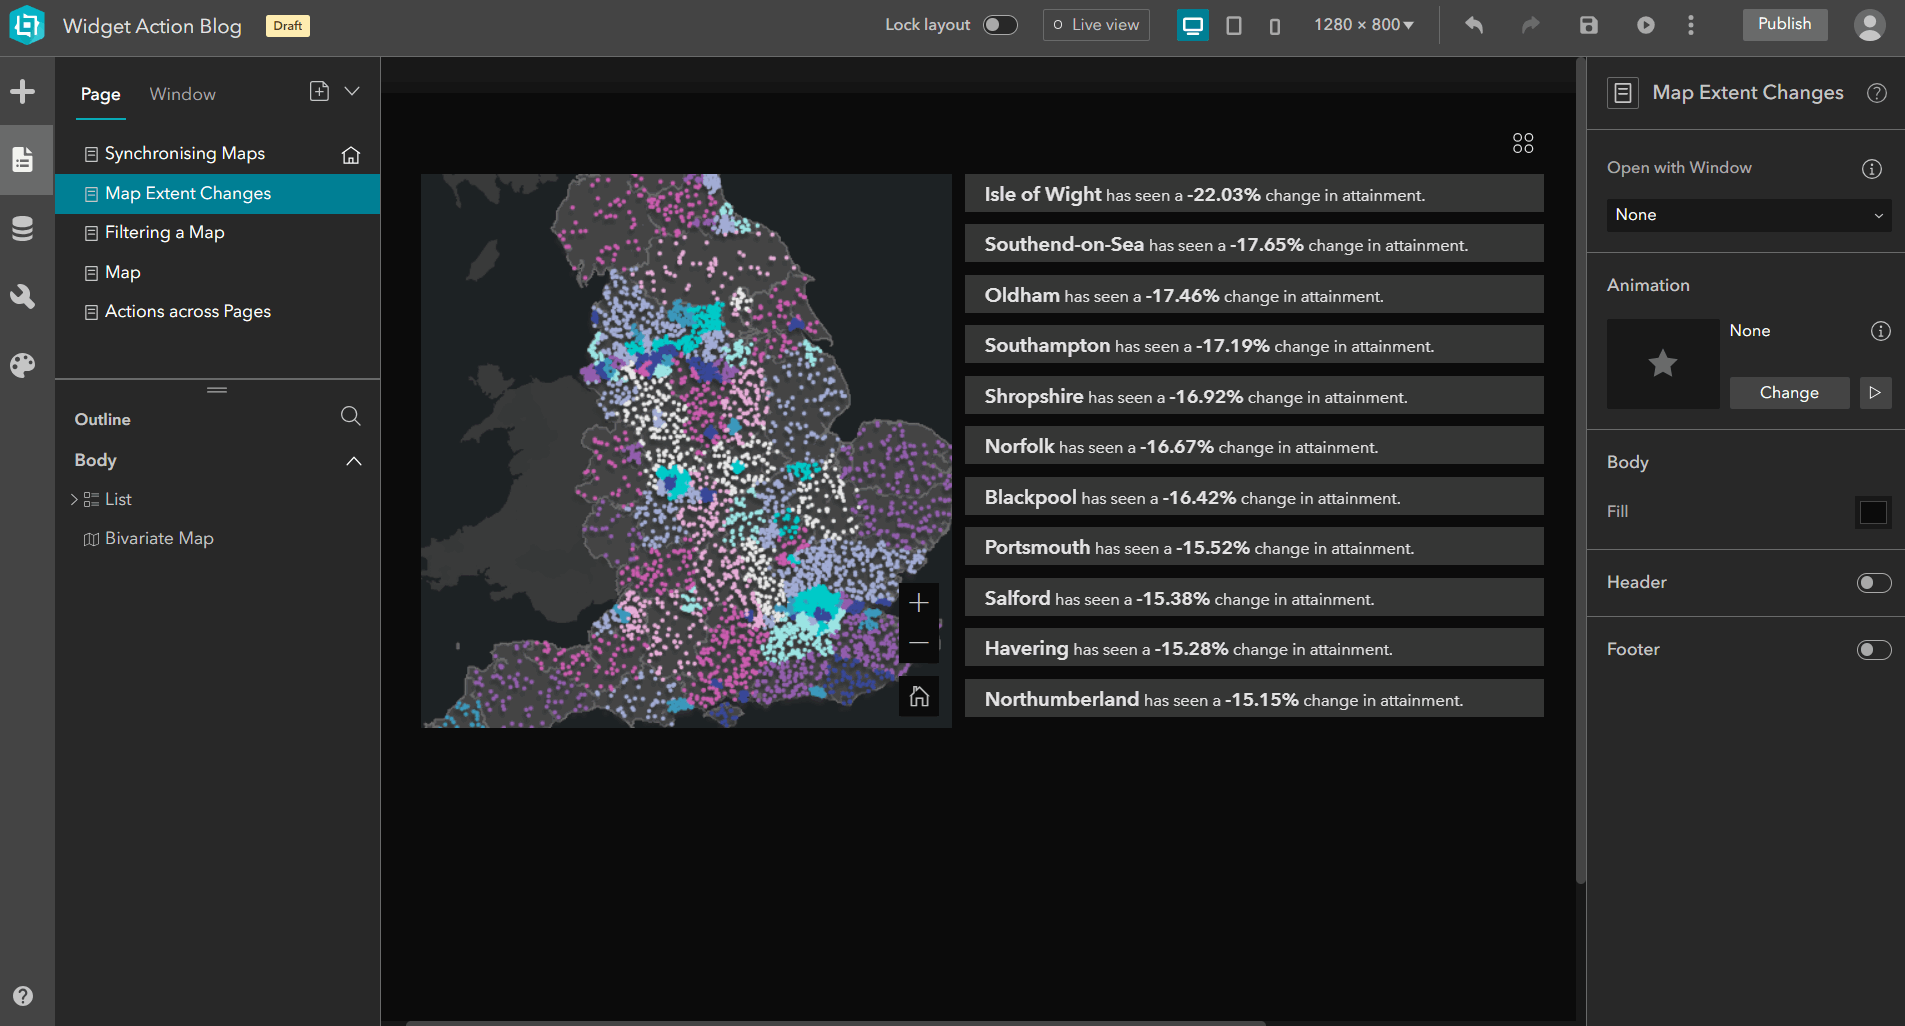
Action settings to set up the map extent changes to filter list widget.
Interact with data-centric widgets to update on a map
If you would like a map to react when the user selects a specific section of a list or table, then follow the guide below when configuring the action tab of the data-centric widget:
- Trigger: record selection changes
- Target: map name
- Action: zoom to
This process is slightly different for a chart, as you will select a section of a chart to highlight on a map:
- Trigger: record selection changes
- Target: map name
- Action: filter
As this is a filter action, there are further conditions for you to define. In the action settings pane, the trigger data should already be specified as chart statistics output view:
- Action data: the data layer that you would like to filter in the map. This can be different to the data that is driving the chart
- Trigger/action connection: toggle on and specify the field that the user will filter in the chart and the field that the action will occur against
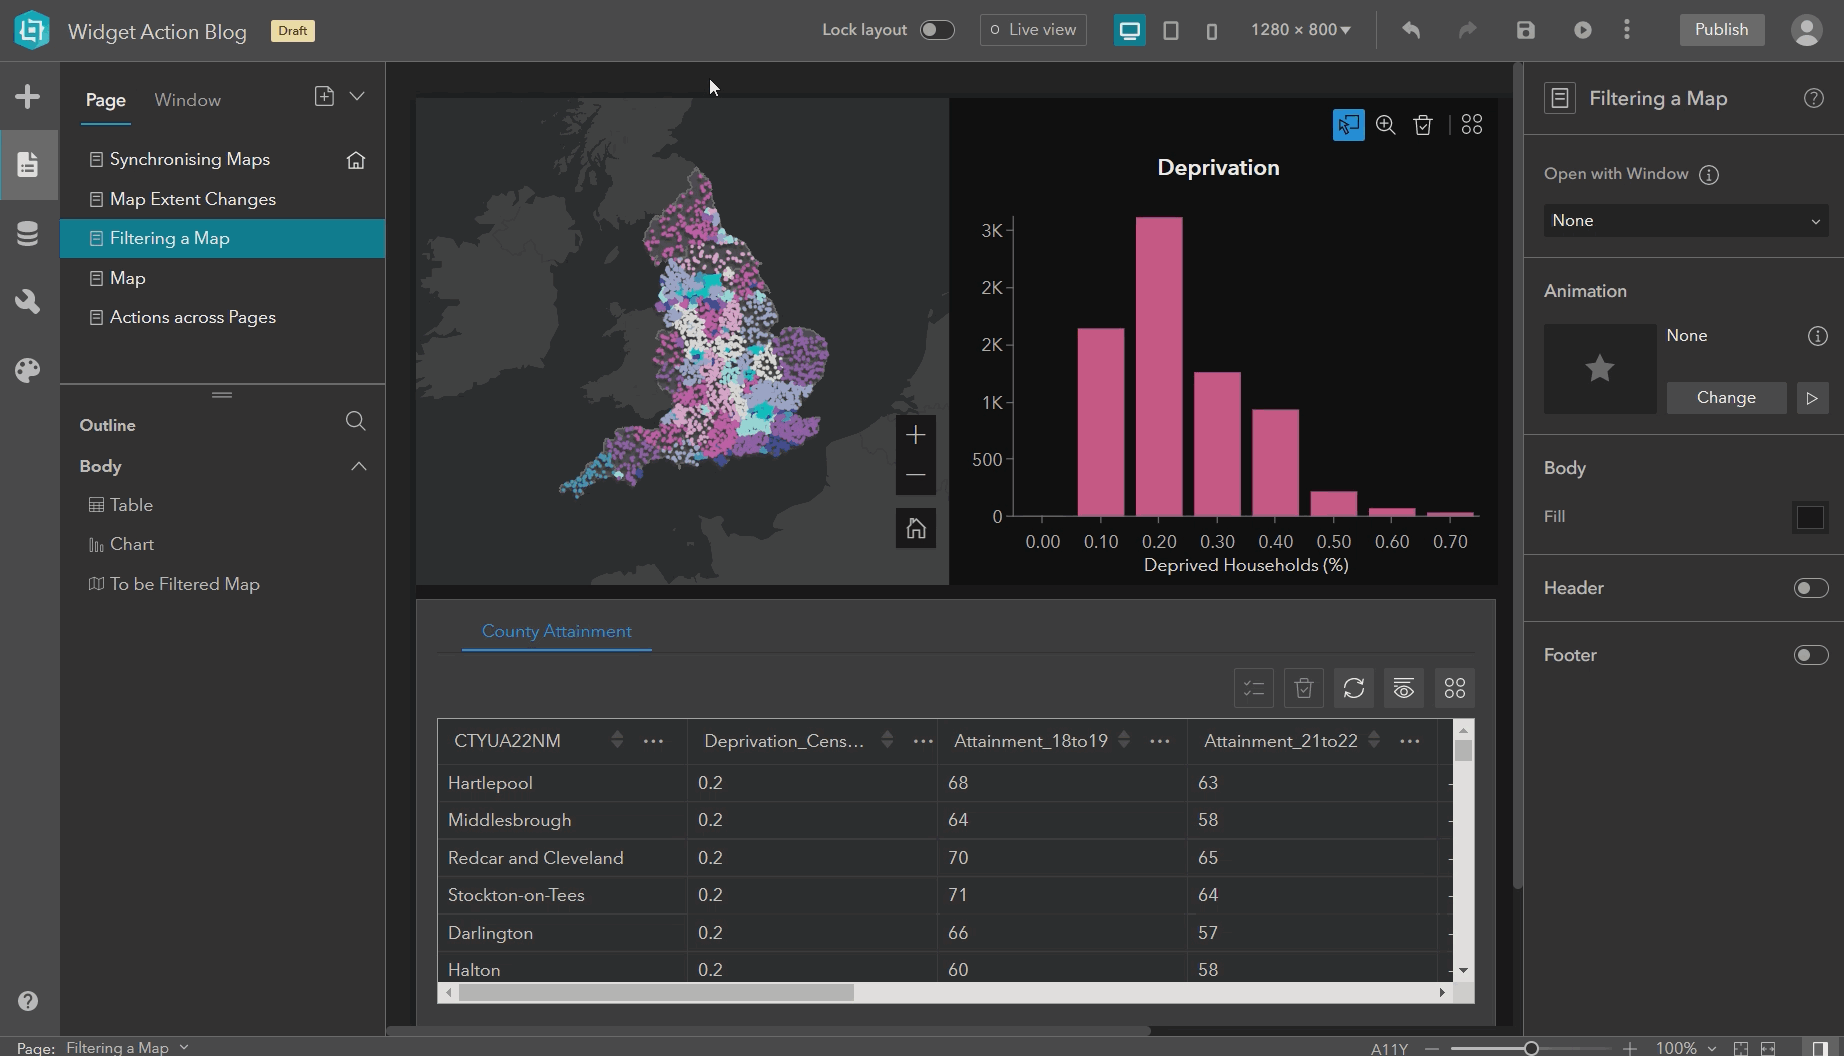
Setting up the trigger for table selection to filter the map to the features of interest.
Filtering and selecting data across multiple pages
Did you know that you can configure trigger and action connections across different pages or windows within your experience? If the underlying data is the same, you can select features in a map on one page and those selected records will be displayed on another. For the source widget, in this case a map, configure the following:
- Trigger: record selection changes
- Target: framework
- Action: select data records
- Trigger Data: data that will be selected on the map
- Action Data: data that will be displayed in the data-centric widgets
Setting up trigger that supports filtering and selecting data across a multiple page application.
Final words
By implementing these widget actions, you have enriched your web applications by creating a more engaging and interactive user experience. The examples above are just few of the countless possibilities available to you within Experience Builder. I encourage you to discover and experiment with all the possible widget actions offered. Enjoy exploring!