Have you ever thought about the most effective way to not only collect, but edit and update spatial data? ArcGIS Field Maps is one of our mobile offerings designed to help mobile workers perform data collection and editing, find assets and information, as well as report their real-time locations.
In this blog, I will reference my first foray into the world of Field Maps Designer and specifically creating a smart form for collecting data using an example of a geological field exercise. As well as introducing what Field Maps can do, this blog will also highlight how you can personalise your data collection methods to best suit your mobile workflows.
Why is ArcGIS Field Maps a useful product?
ArcGIS Field Maps is increasingly becoming the go-to field app and brings together a variety of mobile capabilities to allow you to:
- Digitally transform your workflows
- Share data and collaborate with those needed
- Update, edit, and collect data
- Drive transparency in field-based activities
- Share location and receive location-based alerts
But don’t just take my word for it. Use cases of Field Maps range from analysing ecological data as exampled by UK Centre for Ecology and Hydrology to verifying data in Field Maps app by NHS Fife.
Creating a basic form
Let’s start with the basics. How can I move standard fieldwork practices from pen and paper to a more digitized system? Based on the assumption that every mobile worker will have a smartphone, one could simply direct them to make notes on their phones. However, it would be cumbersome to create a standardised output and it can be difficult to capture the geography of your data. Instead, we can create a digital form using Field Maps Designer.
Field Maps Designer can be accessed from the ArcGIS portal, listed alongside our other web apps. Let’s get started!
Create a layer
Before data is collected, a feature layer needs to be created. This layer will hold the form you create, as well as any data you collect. It is important that this layer is given a meaningful name and saved to an appropriate location in your ArcGIS account. Adding metadata; titles, tags, and a summary, can be useful for the organisation of your new layer, especially as your project grows in complexity.
Configure fields
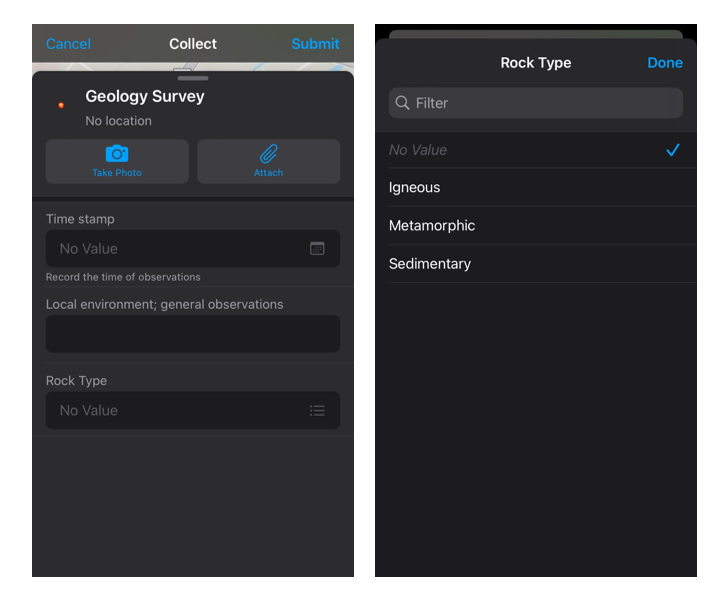
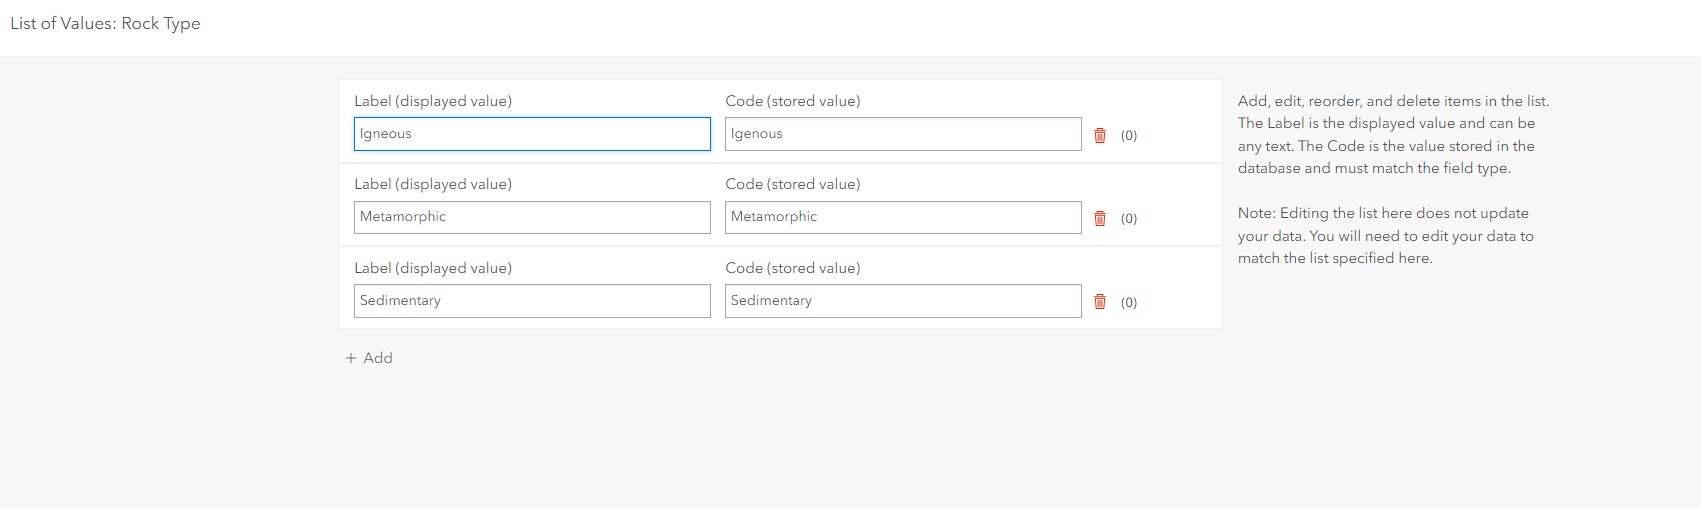
By default, any forms you create in the Field Maps Designer will pull in any fields or lists you create in your layer to simplify the form creation process. So, let’s add a list to the layer we have just created. In this case, there are only a limited number of rock types in my area. Instead of the mobile workers typing in each feature observed in the field, I will add a list of pre-defined rock types which will pull through as a drop-down list on my Field Maps form. This also cuts out the risk of human entry error, ensuring data accuracy and efficiency.
Fields have a Field Name and a Display name. Just like when naming the feature layer, it is best practice to make both of these names meaningful, this will come in handy if you would like to do any conditional formatting of these inputs, which we will go on to with smart forms in the following section.
Building your form
Now that we have a layer, the fun starts – we can create a form.
Once you’ve selected the map with your specified layer in Field Maps Designer, you will see the smart form tab. This consists of a central configuration drop box, where you can drag and drop form elements.
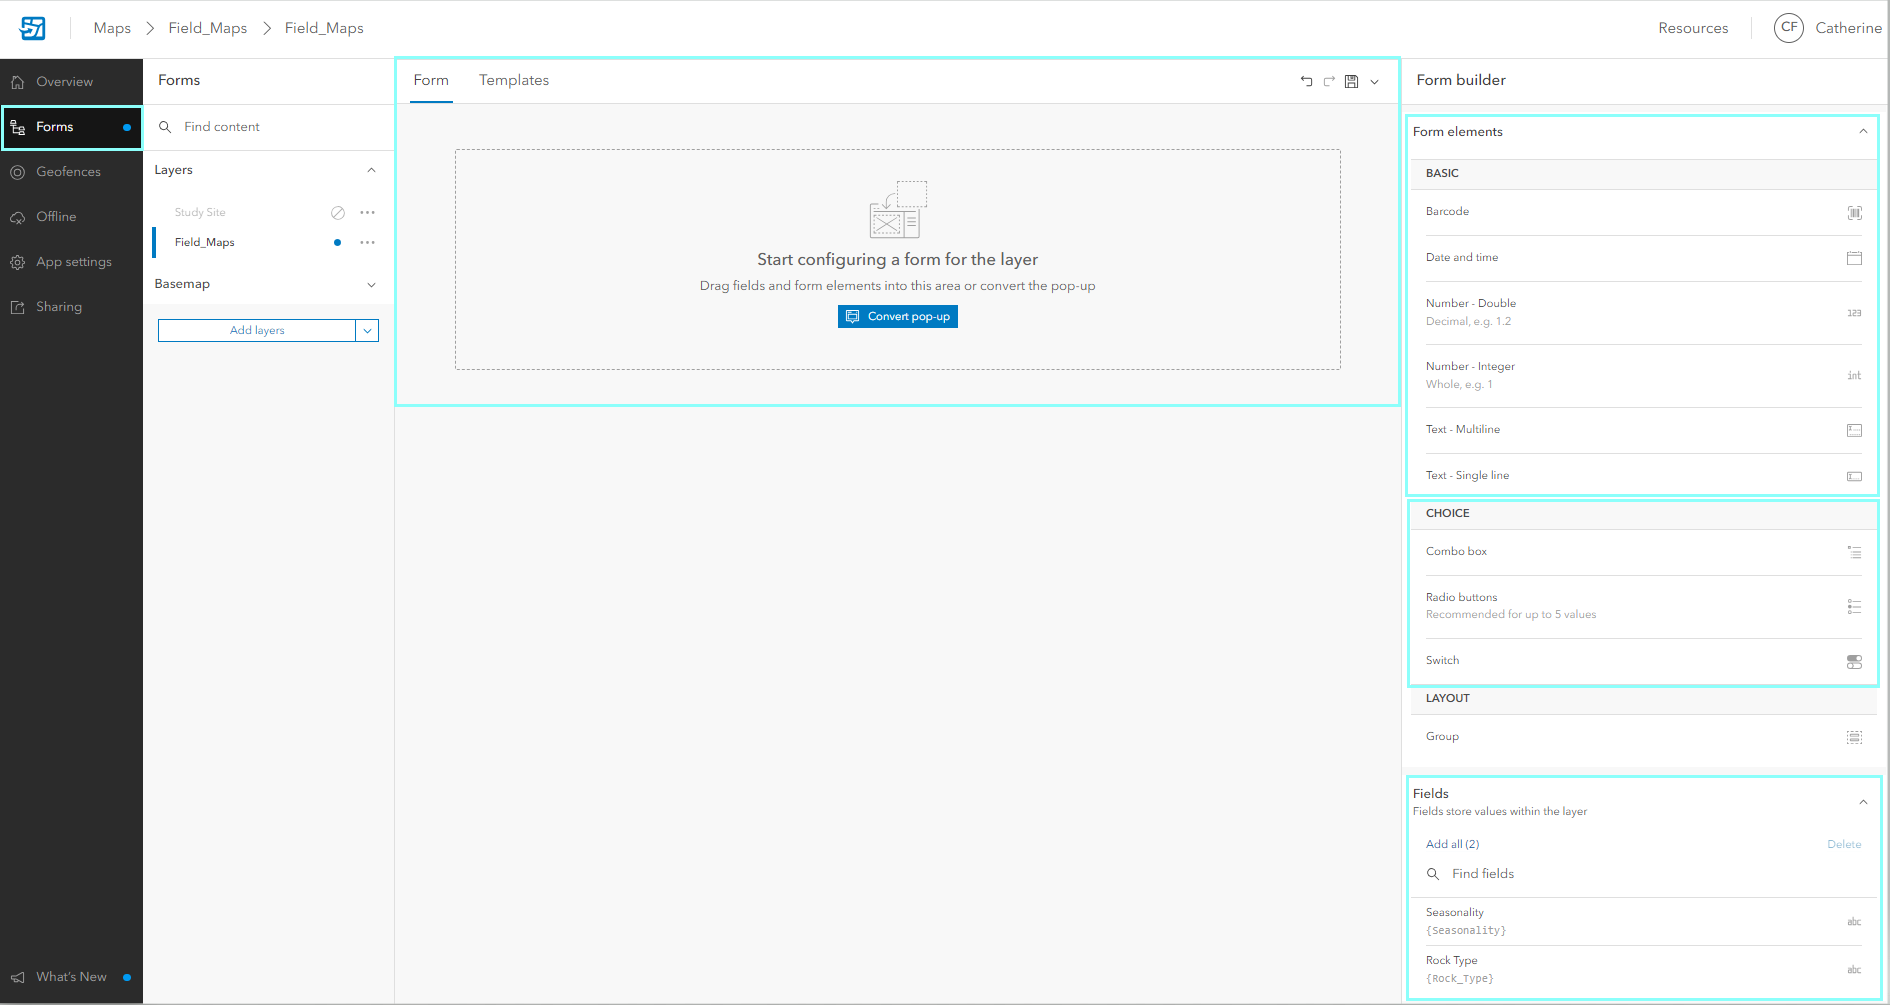
The interface for creating a form with the ArcGIS Field Maps Designer
When you drop any elements into the form configuring area, you can customise them further. For example, with the date and time field, I entered a display name, field name, and description as well as constraints on inputs such as a default time. All of these can be adapted to produce the most useful and efficient form for your mobile workers to input data into. For even more control over data collection, you can set dynamic behaviour by making fields required, editable, and visible. In this case, I used dynamic behaviour to make the date and time field required. I’ve also added a drop-down list to specify the rock type just like how we set up the list. There are a variety of question types you can add to your forms, so definitely play around with the different options.
Now you have created a dynamic form, remember to save it!
What next? – Smart forms
After creating a standard form tailored to the needs of the project, you may want to control further how your form is filled out. Now that I have created a basic form for collecting primary geological observations, I would like to personalise the form, to only ask for inputs based on the primary question of rock type. This can be achieved by writing simple Arcade expressions. Arcade is a lightweight expression language which can be used in Field Maps to elevate your smart forms with calculated fields and conditions. To learn more about Arcade and its use across ArcGIS, see this blog.
So, we already have a question which will narrow down which Igneous rock formation is observed. But this question should only be visible if ‘Igneous’ is specified as the rock type being observed in the field, simplifying the form experience. This is an example of a conditionally visible question. This is just a simple example, to learn more read this blog.
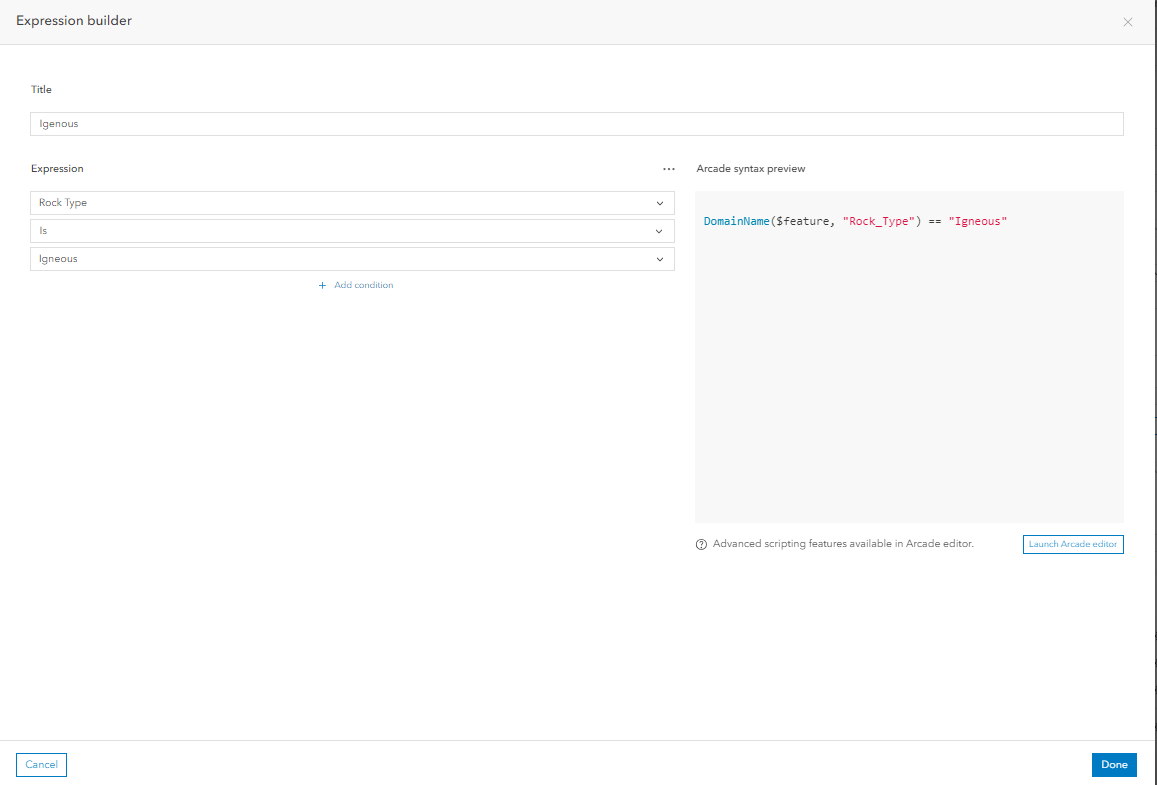
An example expression setting the conditional visibility of the question.

In the field
Now that you have created a form in Field Maps, we can think about other capabilities to increase the efficiency of working in the field.
Geofences
How can we ensure that mobile workers do not stray from the sample site? A geofence implements a virtual boundary, or ‘fence’, which when the mobile worker crosses, will send an alert to the mobile workers device. For example, geofences can be implemented to alert mobile workers when they are straying into a restricted area or hazardous site. Another type of geofence is if you only want to view the location of mobile workers when they enter a specific work zone. It’s important to note, mobile workers must always authorise location sharing on their device. Learn more about geofences here.
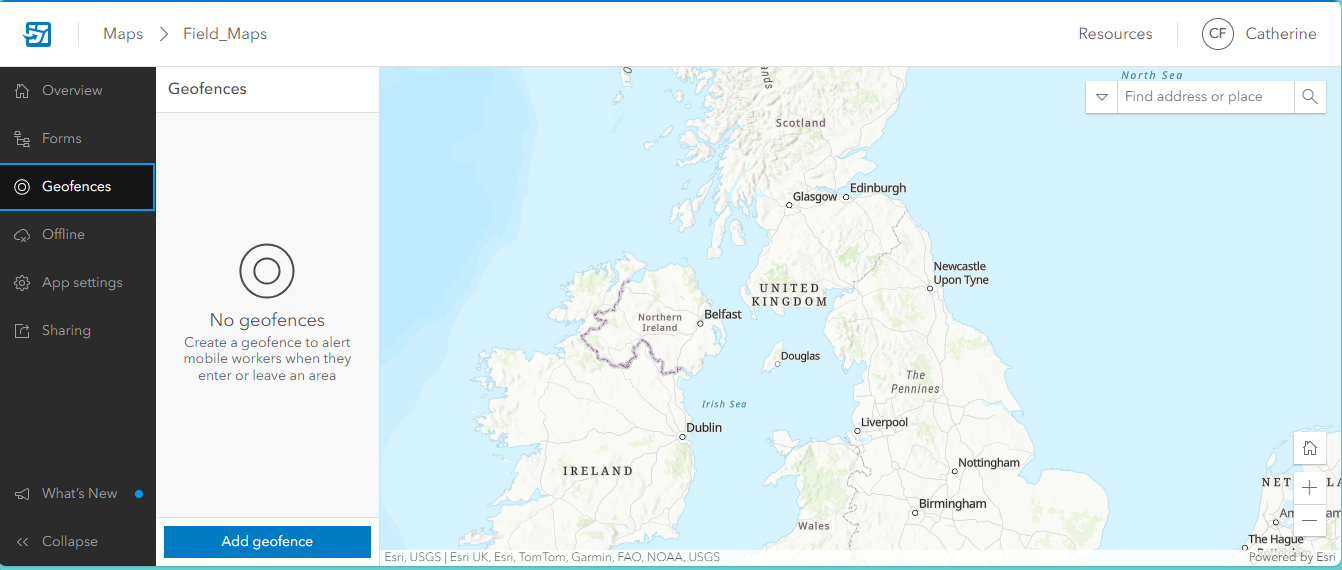
The geofence interface within the Field Maps Designer
Offline
What about sites with bad cell reception, can we ensure the completed forms are pulled through? As geological sites are often in rural areas, it would be important to ensure that the data can be collected in offline environments. This can be achieved by heading into the Offline tab in Field Maps Designer. Here you can configure offline settings and create map areas to work offline. Creating a map area involves defining an area for your study site which is then packaged up and downloaded to the mobile worker’s device. This allows them to access the map offline and then sync the data collected when connection is resumed. To find out more see this documentation.
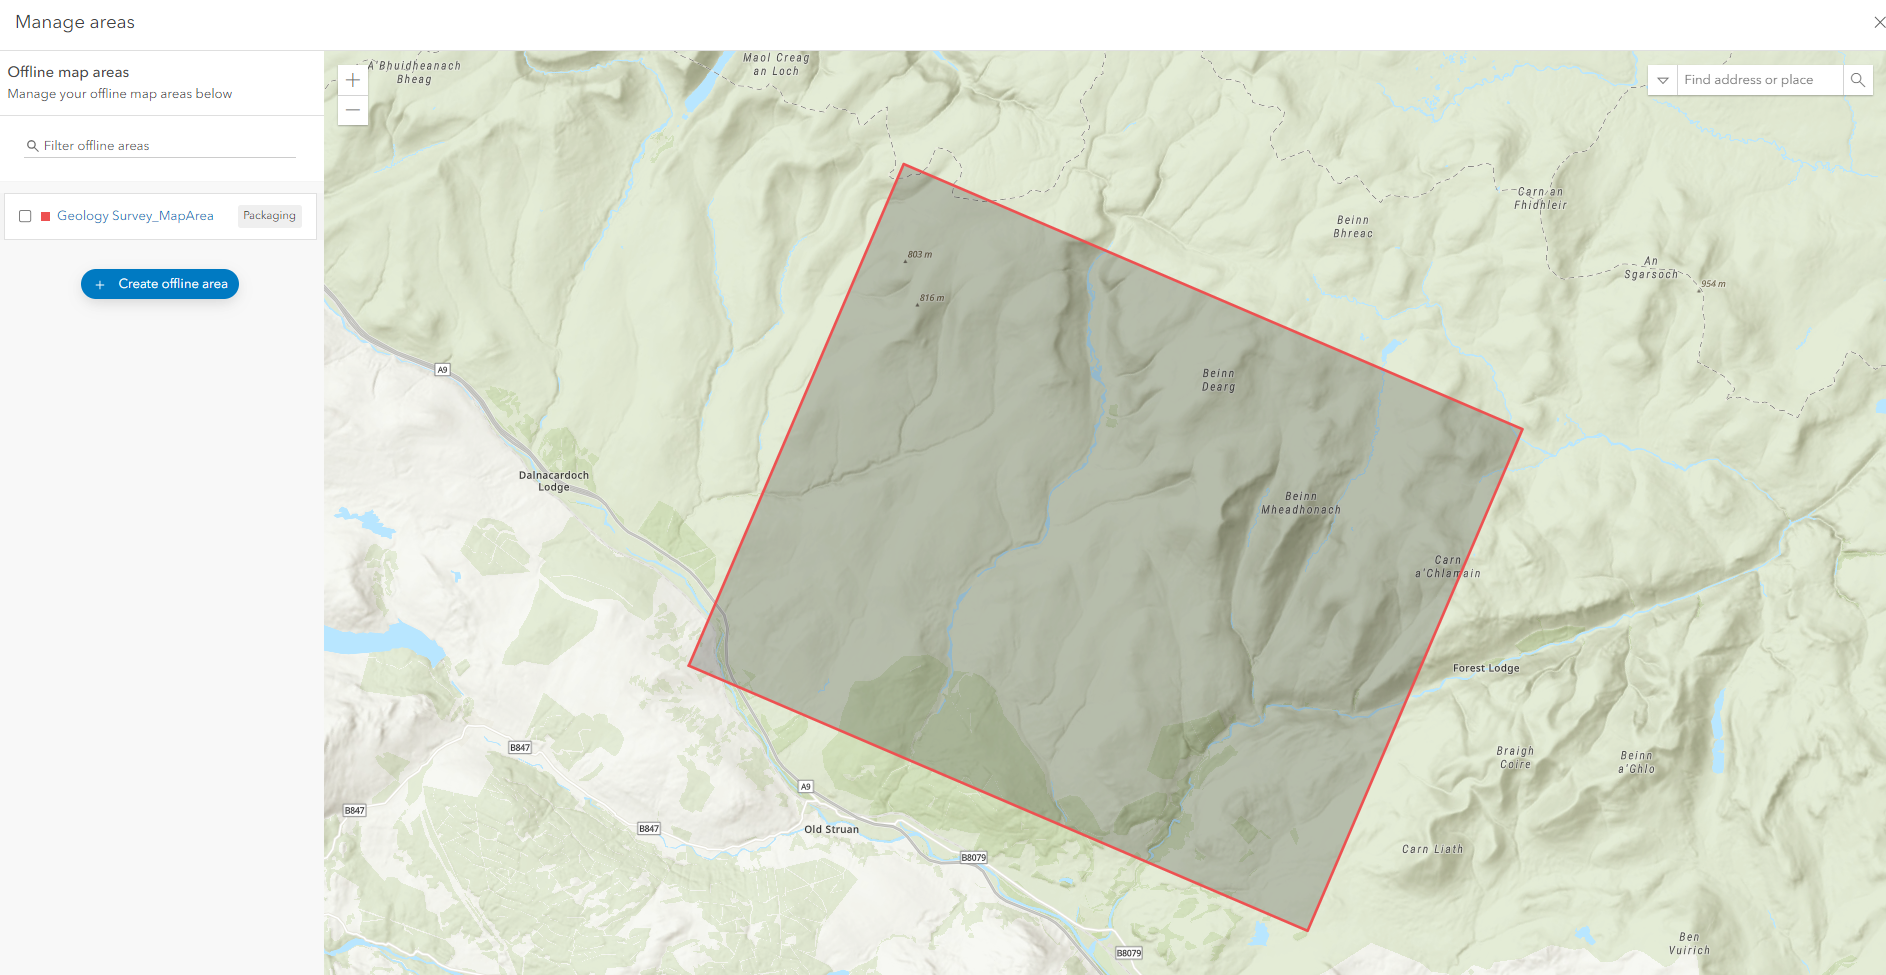
Configuring an offline area for your map in Field Maps Designer.
Using the app in the field
Now that we’ve created a form, how can it be used in the field. The mobile worker must have the Field Maps mobile app which is available on Android, IOS, watchOS, and Windows. For a list of requirements to get started, see this documentation.
You now have a form ready to collect data! These responses pull through to your Feature layer and can be visible. As it’s part of the ArcGIS System, you can view and analyse your data in many ways too such as ArcGIS Dashboards, Map Viewer and more!
Main takeaways
Hopefully this has been a useful introduction to creating a dynamic form using Field Maps designer. A couple of key takeaways I found were:
- Meaningful names – if you ensure you have meaningful names throughout your process, your project can grow in complexity a lot smoother.
- Remember to save – When configuring your form, it is very important to save regularly as it is accessed through your browser!
- Ensure permissions – to make sure your Field Maps are launched smoothly, take a look at your permissions.
- Explore expressions – there are lots and lots of resources to help with expressions, and with a bit of trial and error these can help make an effective smart form.
Resources
- Work efficiently in the field with ArcGIS Field Maps (Webinar)
- Follow your tracks; Location Sharing in ArcGIS (Blog)
- Get to know ArcGIS Field Maps (Blog)
- Making mobile data capture easy and accurate (Annual Conference 2023)